How to Fix a Cupped Wrist in Golf (Complete Guide with Proven Drills & Practical Tips
Struggling with slices or weak contact? A cupped wrist might be the hidden culprit.
Fixing the cupped wrist at the top of the backswing can lead to more power, consistent contact, and straighter shots.
After analyzing over 1,000,000 golf swings, we know that a flat or slightly bowed wrist at the top is a better position.
The problem is without the proper measurements most golfers don’t even know how bad their cupped wrist problem even is. Let’s examine a cupped wrist, how it can impact your golf game, and what you can do to fix it.
Contents
Cupped Left Wrist in Golf (Key Takeaways)
If you don’t have time to go through our entire guide on wrist cupping at the top of the backswing, here are the key takeaways to consider:
- The best way to fix a cupped wrist is to practice getting into the correct position at the top of the backswing; this can be done using HackMotion drills and repeating the process until you create muscle memory.
- Make sure your grip is neutral and not too strong; a strong grip can add extension.
- The less extension or cupping you have at the top of the backswing, the easier it is to fire through impact with speed and body rotation. Cupping costs you distance.
- HackMotion immediately shows you if you’re adding extension or too far extended in the downswing so you can correct it before it becomes a habit.
If you prefer to watch instead of read about how to fix a cupped left wrist, here’s a video recap of everything you need to know.
What is a Cupped Wrist at the Top of the Backswing?
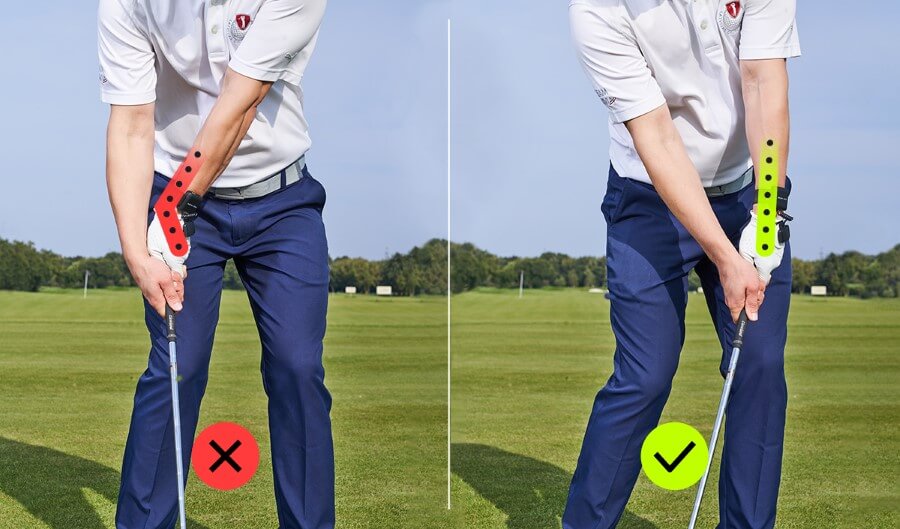
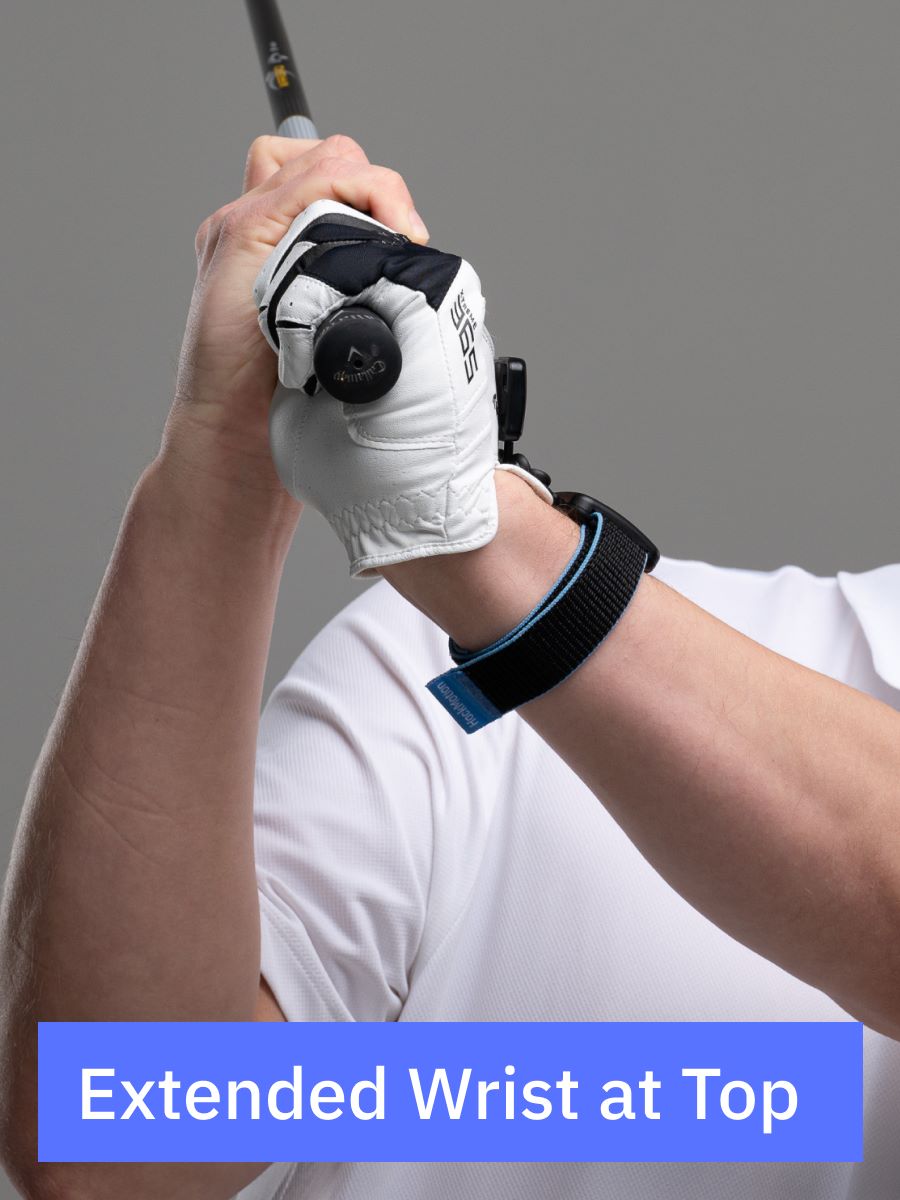
A cupped wrist is a position where the back of the hand (left hand for a right-handed golfer) arches upward toward the forearm, creating a concave shape.
This wrist position at the top of the backswing can set off a chain reaction that negatively impacts your entire swing—from the initial downswing path to impact.
If you’ve ever wondered why you’re battling consistent slices or pushes, the cupped wrist could be the root cause.
By opening the clubface at the top, you’re forcing yourself to make compensations just to get the face square again.
This often results in:
- Open Clubface – A cupped wrist prevents you from closing the clubface properly, causing shots to leak right or slice and lose distance.
- Inconsistent Ball Striking – The compensation needed to square the face leads to poor contact and unpredictable ball flight.
- Loss of Power – With a cupped wrist, you can’t efficiently transfer energy through the ball.
- Poor Swing Path – A cupped wrist at the top frequently sets you up for a swing path that’s outside-in, increasing the likelihood of slicing.
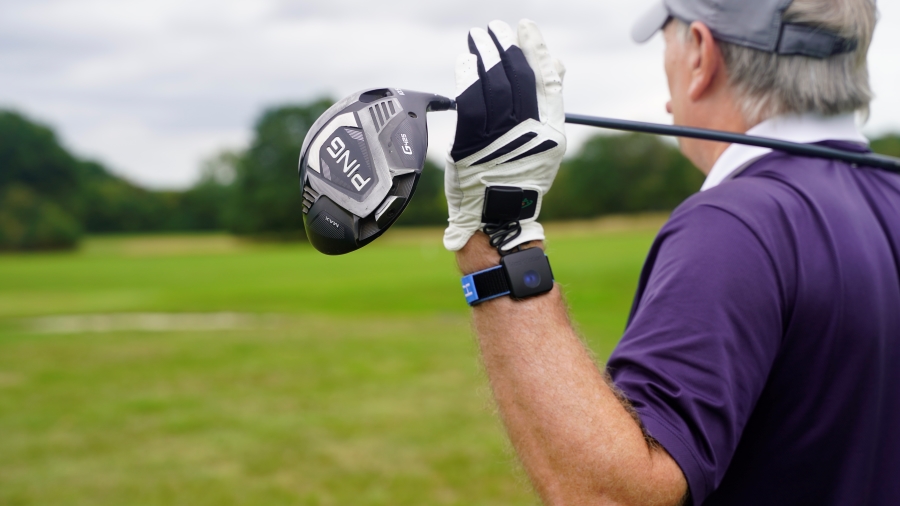
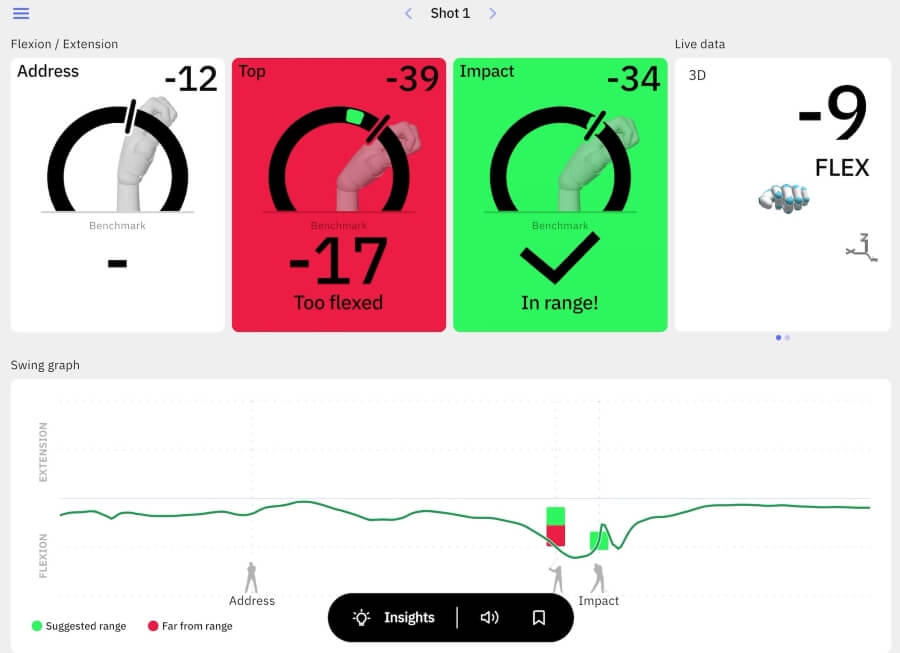
One way to tell if you have a cupped wrist is to HackMotion diagnostics to get real-time feedback and data on the position of your wrist.
What Does a Cupped Wrist Look Like?
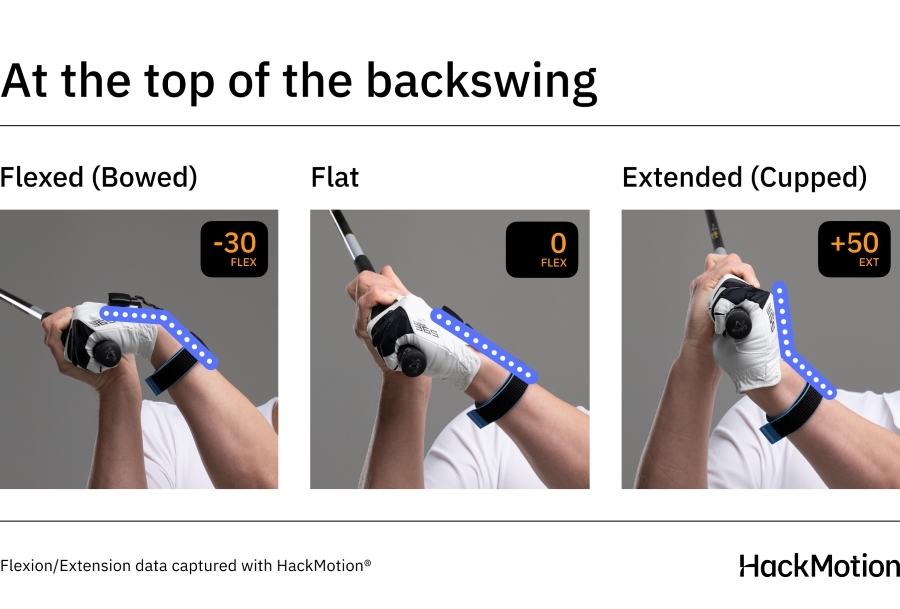
One of the easiest ways to see what a cupped wrist looks like is to check the position at the top of the backswing and compare it to a bowed or flat wrist.
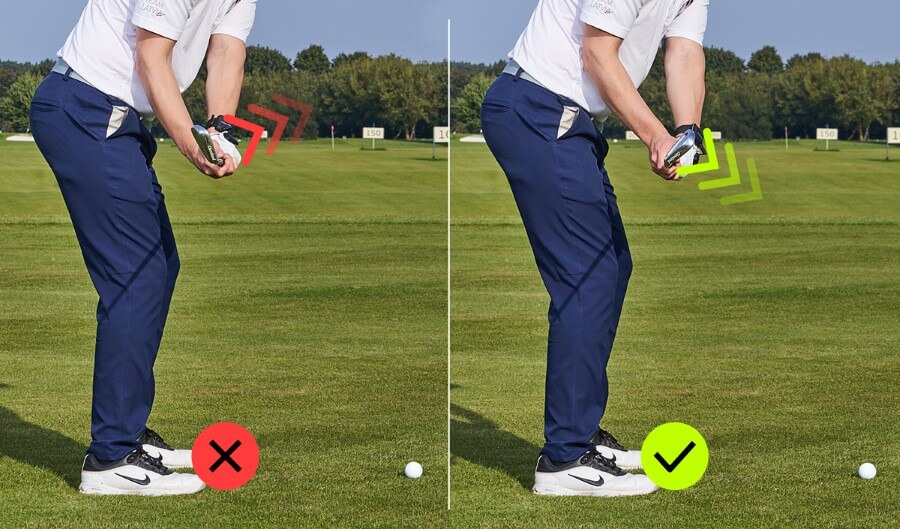
- Cupped/Extended: wrist forms a concave arch.
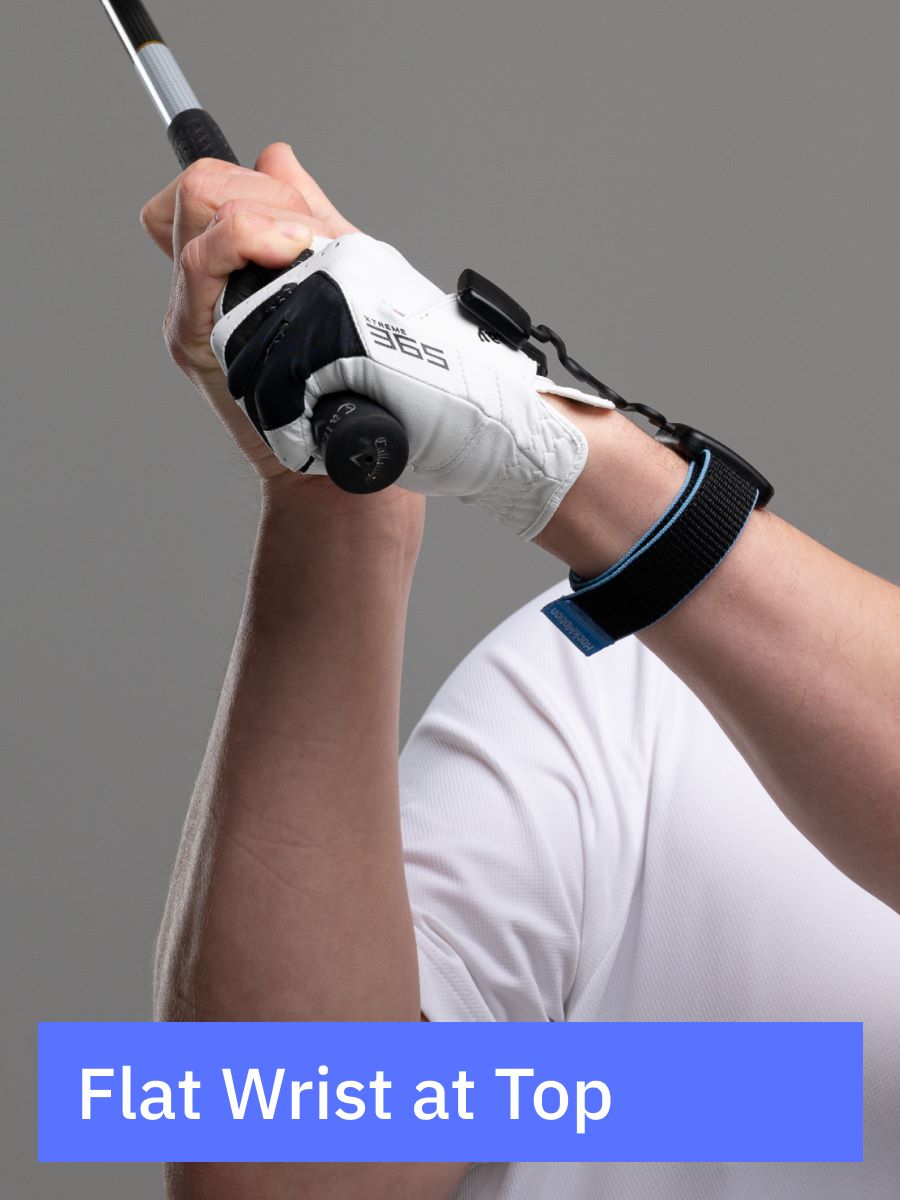
- Flat: no arch, back of hand in line with forearm.
- Bowed/Flexed: wrist angles slightly downward
Wrists in the Golf Swing Explained
Most weekend golfers only need to focus on extension vs. flexion in their lead wrist position if they struggle with cupping.
If you need a complete explanation of how the wrists work in the golf swing, check out our guide here.
Extension and flexion is the wrists’ bowing (flexion) and cupping (extension) control the clubface’s angle. Flexion closes the face, while extension opens it.
How to Stop Cupping Your Wrist in Golf (Drills and Tips)
If you or the HackMotion swing diagnostics test has identified that your wrist is, in fact, in a cupped position at the top of your backswing, here are a few of the best drills to help you get it straightened out.
Use these drills alongside HackMotion to track your wrist angles. Real-time data ensures you’re not practicing a bad habit.
Grip Change
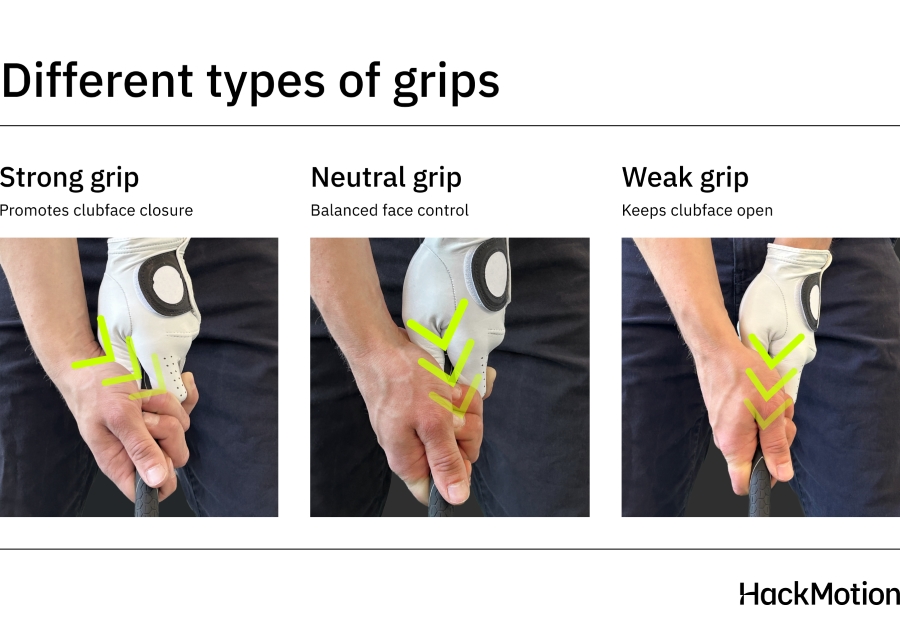
A golfer with a strong grip (too strong) often has a cupped wrist at the top of the backswing.
If you are still determining how your grip should look, here is an excellent example of a neutral grip. You’ll notice from the picture that the strong grip increases extension right from the start of the swing, sometimes creating too much at the top.
For the right-handed golfer, turn the lead hand slightly to the left to weaken the grip.
Static Top Drill
It helps to start with a simple drill like the Static Top Drill when fixing the cupped lead wrist position at the top.
Although you can do this without the HackMotion you’ll have no feedback to know if you are practicing correctly.
Static Top Drill in HackMotion
Swing to the top of the swing and stop. If you are in the green zone, your wrist is not cupped. If you are in the red zone, correct your position until it’s green.
Go back to the address and try again. You’ll go through this about ten times until you naturally feel the correct position at the top of the backswing.
Static Top Drill – Step by Step
- Setup: Address the ball as normal.
- Swing to the Top: Pause when you reach the top of your backswing.
- Check Wrist Position: Green Zone (Flat/Flexed Wrist) = Good! Red Zone (Cupped Wrist) = Adjust until the sensor shows green.
- Reset & Repeat: Go back to address and do it again. Perform 10 reps until you naturally feel the correct position.
Motorcycle Drill to Fix Cupped Lead Wrist
The motorcycle drill is an interactive HackMotion drill. Using HackMotion data, you can see if you have excess extension in the lead wrist and learn what it feels like to “rev” that lead wrist to reduce extension before transition.
The best players in the game get their wrists to a flat or flexed position before impact.
The sooner you can eliminate extension in the lead wrist starting right from the top of the swing, the easier it is to increase speed and consistency through impact.
Motorcycle Drill – Master Wrist Flexion in the Downswing
Focus on continuously adding flexion until the club reaches parallel, then smoothly complete your swing.
Motorcycle Drill – Step by Step
- Setup & Sensor: Put on your HackMotion sensor and get to the top of your backswing.
- “Rev” the Lead Wrist: Feel like you’re twisting the throttle on a motorcycle as you start your downswing. This reduces wrist extension (the cupped position).
- Track Progress: Watch HackMotion data to ensure you’re moving toward a flat or slightly flexed lead wrist.
- Repeat: Ingrain the feel of this “motorcycle rev” that happens at the top of the backswing.
Hit Hard Stop Quick Drill
Trying to stop the golf club just after impact helps you gain awareness of the clubhead through impact.
Once you’ve completed the static top drill, try practicing with this Hit Hard Stop Quick. You should notice your lead wrist stays more flexed, and your hands stay in front of the clubhead.
Hit Hard Stop Quick – Step by Step
- Take a backswing: Take your normal backswing and stop at the top
- Swing down with speed: Make a normal downswing but try to stop the club immediately after impact.
- Check wrist: Notice if your lead wrist remains flat or flexed, with your hands slightly ahead of the clubhead
- Repeat & Refine: The abrupt stop heightens your awareness of the clubhead position, helping you maintain a better wrist angle through impact. Do the drill five to ten times and then start hitting regular shots to see if you can maintain that wrist angle.
Fixing a Cupped Wrist – Angles to Understand
As you work with your HackMotion to improve wrist angles, you’ll learn that there is no perfect number to reach to become a better player.
However, in the table below, you’ll notice that the lowest handicap players have the largest change in their wrist extension at address and the wrist extension at impact.
For higher handicappers, you can see that extension (or cupping) increases from the address to the top, making it much harder to reduce this extension by impact.
If you’re in that 25-plus handicap group, practicing real-time drills with the help of HackMotion can quickly and significantly change your ball flight, distance, and consistency.
| Handicap | Extension at Address | Extension at Top | Extension at Impact | Change Address to Top | Change Address to Impact |
|---|---|---|---|---|---|
| Less than 10 | 19.3 | 14.5 | 3.6 | -4.8 | -15.6 |
| Between 10 and 25 | 19.6 | 17.0 | 9.0 | -2.5 | -10.5 |
| More than 25 | 18.8 | 24.3 | 10.7 | 5.5 | -8.1 |
Final Thoughts
You’ll be amazed at how quickly your ball flight improves once that wrist stops cupping.
It’s considerably easier to diagnose and then correct the cupped wrist problem if you are using the HackMotion.
Falling back into the bad habit of cupping the lead wrist can happen if you are not practicing the right way.
Ready to fix your cupped wrist once and for all? Click here to get HackMotion and start practicing smarter!


