Personalized Interactive Driving Range Practice Plan

pro vs amateur golfer on driving range

Create your personalized driving range practice session plan with just a few clicks. Get actionable tips to maximize your driving range practice and recommended drills tailored to your goals.

pro vs amateur golfer on driving range
Your Personal Golf Coach, Anytime, Anywhere
Your 24/7 Personal Golf Coach

Driving range practice is effective. If you want to get better at golf, you have to spend some time at the range.

However, without the right plan and the proper drills, you really aren’t practicing. You are simply exercising.

We have customized driving range plans and drills specific to your needs.

Use the interactive elements below to select your available time, equipment, and the swing fault you want to fix. You’ll receive a personalized driving range practice plan tailored to your needs in just seconds!

What Should I Practice at the Driving Range?

When you head to your driving range practice session, chances are you are thinking about working on your driver, fairway woods, hybrids, or iron.

However, to be successful, you need to break down what your goals are just a little more detailed than this.

Some things to practice at the driving range include:

  • Alignment and aim: always aim at something, use alignment sticks and make sure you are hitting your shots where you are aiming.
  • Setup: don’t skip things like the setup and grip, every great player is very focused on ensuring accuracy in this area of their game.
  • Consistency: how many of the same shot can you hit in a row? Take some time on the driving range to see how consistent you really are.
  • Variety: shots don’t count on the range; this is your chance to hit the ball high and low, to the left or right, and to practice with the clubs you never hit.
  • Distance Control: lock in exactly how far you hit all of your golf clubs and then practice controlling those in between yardages like 70, 60, and 50 yards.

How Do You Structure a Range Session?

The first thing to consider when structuring a driving range session is the amount of time you have.

We broke this down into three options; 1 hour, 30 minutes and 10 minutes. The 10 minutes is more of a warm up before heading out to the course.

However, it’s still important to structure your time at the driving range to benefit you.

Select the options below, and based on your answers, a structured plan will be generated for you.

What area of the game are you going to work on?

How much time do you have?

What type of gear do you have to work with?

Long Game 1 Hour Just Golf Clubs

For this long game routine – make sure you have 75 to 100 golf balls to use.

Stretching and Swinging (5 minutes)

  • Begin with dynamic stretching focusing on the golf muscles: legs, back, shoulders, and arms.
  • Swing a club without hitting balls to loosen up and find rhythm.
  • Hold the clubhead and swing to create some resistance and loosen up at the same time.

Warm-Up with Wedges (10 minutes)

  • Gradually increase shot distance with wedges to loosen up, focusing on consistent contact.
  • Alternate between all wedges, pitching wedge, gap wedge, sand wedge, and lob wedge.

Straight Shot Practice (10 minutes)

  • Practice hitting straight shots with a mid-iron, aiming at a specific target.
  • Use mid irons for these shots.

Fade and Draw Shots (10 minutes)

  • Alternate hitting fades and draws to control and understand ball flight.
  • Change the amount of flexion and extension in the wrist to help control the clubface.

Distance Control with 7 Iron (10 minutes)

  • Hit shots at 50, 100, and 150 yards, cycling back to 50, to develop feel and distance control.

Imaginary Course Play – First 3 Holes (10 minutes)

  • Hit a drive, approach shot, chip etc. (One shot at a time and make them count.)

Work on Weaknesses (10 minutes)

  • Spend time with clubs you find challenging, focusing on improvement.
  • Use some of your longer clubs like fairway woods and hybrids and control accuracy and direction.

Finish with Confidence – Favorite Club/Driver (5 minutes)

  • End the session with your favorite club or the driver, hitting good shots to boost confidence before concluding the practice.

Long Game 1 Hour Alignment Stick

For this long game routine – make sure you have 75 to 100 golf balls to use.

Stretching and Swinging (5 minutes)

  • Begin with dynamic stretching focusing on the golf muscles: legs, back, shoulders, and arms.
  • Swing a club without hitting balls to loosen up and find rhythm.
  • Hold the clubhead and swing to create some resistance and loosen up at the same time.

Warm-Up with Wedges (10 minutes)

  • Gradually increase shot distance with wedges to loosen up, focusing on consistent contact.
  • Alternate between all wedges, pitching wedge, gap wedge, sand wedge, and lob wedge.
  • Lay an alignment stick on the ground to ensure proper foot and ball alignment with the target.

Straight Shot Practice (10 minutes)

  • Practice hitting straight shots with a mid-iron, aiming at a specific target.
  • Try mid irons for these shots, as they will come up often on the course.
  • Use an alignment stick to check the alignment of feet, hips, and shoulders to the target, enhancing accuracy with mid irons.

Fade and Draw Shots (10 minutes)

  • Alternate hitting fades and draws to control and understand ball flight.
  • Change the amount of flexion and extension in the wrist to help control the clubface.

Distance Control with 7 Iron (10 minutes)

  • Hit shots at 50, 100, and 150 yards, cycling back to 50, to develop feel and distance control.

Imaginary Course Play – First 3 Holes (10 minutes)

  • Simulate playing the first three holes of your home course, focusing on shot planning and execution.
  • Hit a drive, approach shot, chip etc. (One shot at a time and make them count.)

Work on Weaknesses (10 minutes)

  • Spend time with clubs you find challenging, focusing on improvement.
  • Use some of your longer clubs like fairway woods and hybrids and control accuracy and direction.
  • Position alignment sticks to help correct swing path for the troublesome clubs.

Finish with Confidence – Favorite Club/Driver (5 minutes)

  • End the session with your favorite club or the driver, hitting good shots to boost confidence before concluding the practice.

Long Game 1 Hour HackMotion

For this long game routine – make sure you have 75 to 100 golf balls to use.

Stretching and Swinging (5 minutes)

  • Begin with dynamic stretching focusing on the golf muscles: legs, back, shoulders, and arms.
  • Swing a club without hitting balls to loosen up and find rhythm.
  • Hold the clubhead and swing to create some resistance and loosen up at the same time.

Warm-Up with Wedges (10 minutes)

  • Gradually increase shot distance with wedges to loosen up, focusing on consistent contact.
  • Alternate between all wedges, pitching wedge, gap wedge, sand wedge, and lob wedge.

Straight Shot Practice (10 minutes)

  • Practice hitting straight shots with a mid-iron, aiming at a specific target.
  • Use mid irons for these shots.

Fade and Draw Shots (10 minutes)

  • Alternate hitting fades and draws to control and understand ball flight.
  • Utilize HackMotion to monitor and control wrist flexion and extension while practicing fades and draws, helping to understand how wrist angles affect ball flight and shot shape.

Distance Control with 7 Iron (10 minutes)

  • Hit shots at 50, 100, and 150 yards, cycling back to 50, to develop feel and distance control.

Imaginary Course Play – First 3 Holes (10 minutes)

  • Simulate playing the first three holes of your home course, focusing on shot planning and execution.
  • Hit a drive, approach shot, chip, etc. (One shot at a time and make them count.)

Work on Weaknesses (10 minutes)

  • Spend time with clubs you find challenging, focusing on improvement.
  • HackMotion analyzes wrist movement with the more challenging clubs, identifying and correcting improper wrist positions to improve control and accuracy.

Finish with Confidence – Favorite Club/Driver (5 minutes)

  • End the session with your favorite club or the driver, hitting good shots to boost confidence before concluding the practice.

Long Game 30 Minutes Just Golf Clubs

For this long game routine – make sure you have 50 to 75 golf balls to use.

Stretching and Swinging (5 minutes)

  • Begin with dynamic stretching focusing on golf muscles.
  • Swing the club while holding the club head to find rhythm and create resistance.

Warm-Up with Wedges (5 minutes)

  • Start with short shots and gradually increase distance, focusing on consistent contact.
  • Increase yardages in 10 yard increments 5 shots at 40 yards, 5 at 50 yards etc.

Combined Shot Practice (10 minutes)

  • Practice hitting straight shots, then alternate between fades and draws with a mid-iron. Don’t hit more than three shots in a row to the same target.

Distance Control and Imaginary Play (5 minutes)

  • Hit a few shots at varied distances with a 7-iron. (150, 100, 50 without changing the club)
  • Briefly simulate playing the first hole of your course, focusing on strategy and picking specific targets.

Finish with Confidence (5 minutes)

  • End with a few satisfying shots using your favorite club or driver.
  • Focus on staying in balance.

Long Game 30 Minutes Alignment Stick

For this long game routine – make sure you have 50 to 75 golf balls to use.

Stretching and Swinging (5 minutes)

  • Begin with dynamic stretching focusing on golf muscles.
  • Swing the club while holding the club head to find rhythm and create resistance.

Warm-Up with Wedges (5 minutes)

  • Start with short shots and gradually increase distance, focusing on consistent contact.
  • Increase yardages in 10-yard increments 5 shots at 40 yards, 5 at 50 yards etc.
  • Place an alignment stick on the ground to ensure proper aim and body alignment as you increase the shot distance.

Combined Shot Practice (10 minutes)

  • Practice hitting straight shots, then alternate between fades and draws with a mid-iron. Don’t hit more than three shots in a row to the same target.
  • Use an alignment stick to help maintain the target line when practicing straight, fade, and draw shots with a mid-iron.

Distance Control and Imaginary Play (5 minutes)

  • Hit a few shots at varied distances with a 7-iron. (150, 100, 50 without changing the club)
  • Briefly simulate playing the first hole of your course, focusing on strategy and picking specific targets.

Finish with Confidence (5 minutes)

  • End with a few satisfying shots using your favorite club or driver.
  • Focus on staying in balance.

Long Game 30 Minutes HackMotion

For this long game routine – make sure you have 50 to 75 golf balls to use.

Stretching and Swinging (5 minutes)

  • Begin with dynamic stretching focusing on golf muscles.
  • Swing the club while holding the club head to find rhythm and create resistance.

Warm-Up with Wedges (5 minutes)

  • Start with short shots and gradually increase distance, focusing on consistent contact.
  • Increase yardages in 10 yard increments, 5 shots at 40 yards, 5 at 50 yards, etc.

Combined Shot Practice (10 minutes)

  • Practice hitting straight shots, then alternate between fades and draws with a mid-iron.
  • Incorporate HackMotion to monitor and adjust wrist flexion and extension while switching between straight, fade, and draw shots. Utilize HackMotion’s audio feedback to correct wrist positions in real-time without looking at a screen.

Distance Control and Imaginary Play (5 minutes)

  • Hit a few shots at varied distances with a 7-iron. (150, 100, 50 without changing the club)
  • Briefly simulate playing the first hole of your course, focusing on strategy and picking specific targets.

Finish with Confidence (5 minutes)

  • End with a few satisfying shots using your favorite club or driver.
  • Focus on staying in balance.

Long Game 10 Minutes Just Golf Clubs

You’ll need about 25 golf balls for this routine.

  • Driver Control Shots (3 minutes): Begin with the driver, aiming to hit gentle 150 to 200 yard shots to warm up and dial in swing mechanics.
  • Approach Shots – Wedges and Short-Iron (4 minutes): Start with the wedge and transition to a mid-iron (like a 6-iron) for approach shots, focusing on consistent contact, accuracy, and ensuring the divot occurs after the ball.
  • Mental Play (3 minutes): Conclude by mentally playing a hole, starting with a driver shot, followed by an approach and a short game shot, to simulate course conditions and strategy.

Long Game 10 Minutes Alignment Stick

You’ll need about 25 golf balls for this routine.

  • Driver Control Shots (3 minutes): Begin with the driver, aiming to hit gentle 150 to 200 yard shots to warm up and dial in swing mechanics.
  • Approach Shots – Wedges and Short-Iron (4 minutes): Start with the wedge and transition to a mid-iron (like a 6-iron) for approach shots, focusing on consistent contact, accuracy, and ensuring the divot occurs after the ball. Use an alignment stick on the ground to ensure consistency in setup and aim.
  • Mental Play (3 minutes): Conclude by mentally playing a hole, starting with a driver shot, followed by an approach and a short game shot, to simulate course conditions and strategy.

Long Game 10 Minutes HackMotion

You’ll need about 25 golf balls for this routine.

  • Driver Control Shots (3 minutes): Begin with the driver, aiming to hit gentle 150 to 200 yard shots to warm up and dial in swing mechanics.
  • Approach Shots – Wedges and Short-Iron (4 minutes): Start with the wedge and transition to a mid-iron (like a 6-iron) for approach shots, focusing on consistent contact, accuracy, and ensuring the divot occurs after the ball. Wear the HackMotion and ensure audio feedback is enabled for better results and improved impact position.
  • Mental Play (3 minutes): Conclude by mentally playing a hole, starting with a driver shot, followed by an approach and a short game shot, to simulate course conditions and strategy.

Short Game 1 Hour Just Golf Clubs

Wedge Warm-Up (10 minutes)

  • Start with 50-yard pitches to get a feel for the wedge and focus on consistent contact.
  • Work on hitting shots with different wedges (PW, GW, SW, LW) that all go about 50 yards.

Distance Control Drills (15 minutes)

  • Practice hitting shots at 30, 60, 90, and 125 yards to work on distance control.
  • Use a clock face drill: imagine the hole at the center of a clock, and hit shots to 9 o’clock (short), 12 o’clock (medium), and 3 o’clock (long) positions.
  • Record these distances with each club so you can use them again when you get to the course.

High and Low Shots (10 minutes)

  • Focus on altering shot height, hitting 5 high shots and then 5 low shots with the same club.
  • Work on ball position and club face angle to control the trajectory.

Bunker Play (10 minutes)

  • Spend time in the sand trap practicing green-side bunker shots.
  • Try using the gap and lob wedge, not just the sand wedge.

Putting Green Chipping (10 minutes)

  • Move to the putting green and practice chipping from just off the green.
  • Focus on landing spots and getting the ball to roll out to the hole.

High Lofted Shots From The Rough (5 minutes)

  • Finish the practice session greenside, using a higher lofted club, flying the ball closer to the pin, and then having it stop when it lands.

Short Game 1 Hour Alignment Stick

Wedge Warm-Up (10 minutes)

  • Start with 50-yard pitches to get a feel for the wedge and focus on consistent contact.
  • Work on hitting shots with different wedges (PW, GW, SW, LW) that all go about 50 yards.

Distance Control Drills (15 minutes)

  • Practice hitting shots at 30, 60, 90, and 125 yards to work on distance control.
  • Use a clock face drill: imagine the hole at the center of a clock, and hit shots to 9 o’clock (short), 12 o’clock (medium), and 3 o’clock (long) positions.
  • Record these distances with each club so you can use them again when you get to the course.
  • Place an alignment stick on the ground to act as a visual guide for the target line, the alignment stick will help you maintain a consistent swing path and body alignment relative to the target for each shot distance.

High and Low Shots (10 minutes)

  • Focus on altering shot height, hitting 5 high shots and then 5 low shots with the same club.
  • Work on ball position and club face angle to control the trajectory.

Bunker Play (10 minutes)

  • Spend time in the sand trap practicing green-side bunker shots.
  • Try using the gap and lob wedge, not just the sand wedge.

Putting Green Chipping (10 minutes)

  • Move to the putting green and practice chipping from just off the green.
  • Focus on landing spots and getting the ball to roll out to the hole.
  • Place alignment sticks on either side of your landing spot to work as a runway into the hole.

High Lofted Shots From The Rough (5 minutes)

  • Finish the practice session greenside, using a higher lofted club, flying the ball closer to the pin, and then having it stop when it lands.

Short Game 1 Hour HackMotion

Wedge Warm-Up (10 minutes)

  • Start with 50-yard pitches to get a feel for the wedge and focus on consistent contact.
  • Work on hitting shots with different wedges (PW, GW, SW, LW) that all go about 50 yards.

Distance Control Drills (15 minutes)

  • Practice hitting shots at 30, 60, 90, and 125 yards to work on distance control.
  • Use a clock face drill: imagine the hole at the center of a clock, and hit shots to 9 o’clock (short), 12 o’clock (medium), and 3 o’clock (long) positions.
  • Record these distances with each club so you can use them again when you get to the course.

High and Low Shots (10 minutes)

  • Focus on altering shot height, hitting 5 high shots and then 5 low shots with the same club.
  • Use HackMotion to monitor and analyze wrist angles and movements when practicing different shot trajectories. This technology can provide instant feedback on wrist action, helping to perfect the technique required for hitting both higher and lower shots.

Bunker Play (10 minutes)

  • Spend time in the sand trap practicing green-side bunker shots.
  • Try using the gap and lob wedge, not just the sand wedge.

Putting Green Chipping (10 minutes)

  • Move to the putting green and practice chipping from just off the green.
  • Focus on landing spots and getting the ball to roll out to the hole.

High Lofted Shots From The Rough (5 minutes)

  • Finish the practice session greenside, using a higher lofted club, flying the ball closer to the pin, and then having it stop when it lands.

Short Game 30 Minutes Just Golf Clubs

Wedge Warm-Up (7 minutes)

  • Begin with 50-yard pitches to get warmed up, focusing on contact and control. Utilize different wedges to develop comfort with all short game clubs.

Distance Control Drills (8 minutes)

  • Practice hitting shots at key distances (30, 60, 90 yards) to refine distance control.
  • Work on recording these distances so you know how big of a swing you need to create each distance with all of your short game clubs.

Bunker Play and High Lofted Shots (7 minutes)

  • Spend about 4 minutes in the bunker working on green-side shots, then transition to the rough for 3 minutes to practice high-lofted shots, focusing on stopping the ball near the pin.

Putting Green Chipping (5 minutes)

  • Start chipping from just off the green, targeting specific landing spots to get the ball close to or into the hole, simulating real-game scenarios.

Short Game Challenge (3 minutes)

  • Take five golf balls and chip or pitch them to within a few feet of the hole, get out your putter and try to make at least ⅖ up and downs; gradually make this harder as your skills improve.

Short Game 30 Minutes Alignment Stick

Wedge Warm-Up (7 minutes)

  • Begin with 50-yard pitches to get warmed up, focusing on contact and control. Utilize different wedges to develop comfort with all short game clubs.

Distance Control Drills (8 minutes)

  • Practice hitting shots at key distances (30, 60, 90 yards) to refine distance control
  • Work on recording these distances so you know how big of a swing you need to create each distance with all of your short game clubs
  • Use an alignment stick on the ground when practicing these shots to ensure they are not just the correct distance but also the correct accuracy.

Bunker Play and High Lofted Shots (7 minutes)

  • Spend about 4 minutes in the bunker working on green-side shots, then transition to the rough for 3 minutes to practice high-lofted shots, focusing on stopping the ball near the pin.

Putting Green Chipping (5 minutes)

  • Start chipping from just off the green, targeting specific landing spots to get the ball close to or into the hole, simulating real-game scenarios.

Short Game Challenge (3 minutes)

  • Take five golf balls and chip or pitch them to within a few feet of the hole, get out your putter and try to make at least ⅖ up and downs; gradually make this harder as your skills improve.

Short Game 30 Minutes HackMotion

Wedge Warm-Up (7 minutes)

  • Begin with 50-yard pitches to get warmed up, focusing on contact and control. Utilize different wedges to develop comfort with all short game clubs.
  • Wear the HackMotion while warming up to make sure that your wrist angles are helping you compress the golf ball. When you want to add some loft, it’s ok to add a little more extension in the lead wrist for those short shots.

Distance Control Drills (8 minutes)

  • Practice hitting shots at key distances (30, 60, 90 yards) to refine distance control
  • Work on recording these distances so you know how big of a swing you need to create each distance with all of your short game clubs
  • Use an alignment stick on the ground when practicing these shots to ensure they are not just the correct distance but also the correct accuracy.

Bunker Play and High Lofted Shots (7 minutes)

  • Spend about 4 minutes in the bunker working on green-side shots, then transition to the rough for 3 minutes to practice high-lofted shots, focusing on stopping the ball near the pin.

Putting Green Chipping (5 minutes)

  • Start chipping from just off the green, targeting specific landing spots to get the ball close to or into the hole, simulating real-game scenarios.

Short Game Challenge (3 minutes)

  • Take five golf balls and chip or pitch them to within a few feet of the hole, get out your putter and try to make at least ⅖ up and downs; gradually make this harder as your skills improve.

Short Game 10 Minutes Just Golf Clubs

Chipping Warm-Up (3 minutes)

  • Begin with a series of chip shots from just off the green to get a feel for the green speeds.
  • Take putting like swings to focus on consistent contact.
  • Pick a spot and hit the spot.

Pitching Practice (4 minutes)

  • Move back to practice pitching from various distances, starting at 20 yards and extending up to 50 yards.
  • Concentrate on smooth tempo and consistent contact, again pick a landing spot.

Variable Shot Challenge (3 minutes)

  • Alternate between chipping and pitching, aiming to hit two chips followed by two pitches, varying the targets with each shot.
  • This exercise helps in adapting to different shot types quickly, enhancing touch and feel around the greens.

Short Game 10 Minutes Alignment Stick

Chipping Warm-Up (3 minutes)

  • Begin with a series of chip shots from just off the green to get a feel for the green speeds.
  • Use alignment sticks on the ground to allow for better accuracy.
  • Pick a spot and hit the spot.

Pitching Practice (4 minutes)

  • Move back to practice pitching from various distances, starting at 20 yards and extending up to 50 yards.
  • Concentrate on smooth tempo and consistent contact, again pick a landing spot.

Variable Shot Challenge (3 minutes)

  • Alternate between chipping and pitching, aiming to hit two chips followed by two pitches, varying the targets with each shot.
  • This exercise helps in adapting to different shot types quickly, enhancing touch and feel around the greens.

Short Game 10 Minutes HackMotion

Chipping Warm-Up (3 minutes)

  • Begin with a series of chip shots from just off the green to get a feel for the green speeds
  • Take putting like swings to focus on consistent contact, wear the HackMotion, and focus on flexion at impact.
  • Pick a spot and hit the spot.

Pitching Practice (4 minutes)

  • Move back to practice pitching from various distances, starting at 20 yards and extending up to 50 yards.
  • Wear the HackMotion and allow for a little more extension at impact to increase ball flight.
  • Concentrate on smooth tempo and consistent contact, again pick a landing spot.

Variable Shot Challenge (3 minutes)

  • Alternate between chipping and pitching, aiming to hit two chips followed by two pitches, varying the targets with each shot.
  • This exercise helps in adapting to different shot types quickly, enhancing touch and feel around the greens.

Putting 1 Hour Just Golf Clubs

Warm-Up and Feel (10 minutes)

  • Start with short putts (3-4 feet) to focus on solid contact and a square clubface.
  • Gradually increase distance to 6-8 feet, concentrating on consistent stroke and tempo.

Alignment and Start Line Drill (10 minutes)

  • Set up a putting line for a straight putt.
  • Practice hitting putts on the intended line, ensuring the ball starts and stays on that line over 10-15 feet, you don’t need a hole just the line.

Lag Putting for Distance Control (15 minutes)

  • Set targets at varying distances (20, 30, 40 feet) and practice getting the ball within a 3-foot radius of each target.
  • Focus on the feel (and the total length) of the stroke to control the distance, adjusting the power as needed for each putt.

Circle Putting Drill (10 minutes)

  • Place balls around a hole at equal distances (e.g., 4 feet) in a circle.
  • Aim to make all putts in succession, moving around the circle. This improves consistency and pressure putting regardless of the angle.

Gate Drill for Start Line Accuracy (5 minutes)

  • Set up a “gate” with two tees just wider than the ball, about a foot in front of the ball on your start line.
  • Practice putting through the gate, ensuring the ball starts on your intended line, helping with accuracy and precision.

Two Putt Challenge (10 minutes)

  • Practice long putts going back and forth across the green trying to only make two putts.
  • Focus on the feel and adjustment of stroke length to control speed and distance.

Putting 1 Hour Alignment Stick

Warm-Up and Feel (10 minutes)

  • Start with short putts (3-4 feet) to focus on solid contact and a square clubface.
  • Gradually increase distance to 6-8 feet, concentrating on consistent stroke and tempo.

Alignment and Start Line Drill (10 minutes)

  • Set up a putting line using your alignment sticks for a straight putt.
  • Practice hitting putts on the intended line, ensuring the ball starts and stays on that line over 10-15 feet, you don’t need a hole just the line.

Lag Putting for Distance Control (15 minutes)

  • Set targets at varying distances (20, 30, 40 feet).
  • Place an alignment stick about three feet behind the hole.
  • Focus on getting the ball between the hole and the alignment stick.

Circle Putting Drill (10 minutes)

  • Place balls around a hole at equal distances (e.g., 4 feet) in a circle.
  • Aim to make all putts in succession, moving around the circle. This improves consistency and pressure putting regardless of the angle.

Gate Drill for Start Line Accuracy (5 minutes)

  • Set up a “gate” with two alignment sticks just wider than the ball, about a foot in front of the ball on your start line.
  • Practice putting through the gate, ensuring the ball starts on your intended line, helping with accuracy and precision.

Two Putt Challenge (10 minutes)

  • Practice long putts going back and forth across the green trying to only make two putts.
  • Focus on the feel and adjustment of stroke length to control speed and distance.

Putting 1 Hour HackMotion

Warm-Up and Feel (10 minutes)

  • Start with short putts (3-4 feet) to focus on solid contact and a square clubface.
  • Wear the HackMotion and check for consistency in your stroke.
  • Gradually increase the distance to 6-8 feet, concentrating on consistent stroke and tempo.

Alignment and Start Line Drill (10 minutes)

  • Set up a putting line for a straight putt.
  • Practice hitting putts on the intended line, ensuring the ball starts and stays on that line over 10-15 feet, you don’t need a hole just the line.

Lag Putting for Distance Control (15 minutes)

  • Set targets at varying distances (20, 30, 40 feet) and practice getting the ball within a 3-foot radius of each target.
  • Wear the HackMotion and make sure you are keeping consistent wrist angles throughout your stroke.
  • Focus on the feel (and the total length) of the stroke to control the distance, adjusting the power as needed for each putt.

Circle Putting Drill (10 minutes)

  • Place balls around a hole at equal distances (e.g., 4 feet) in a circle.
  • Aim to make all putts in succession, moving around the circle. This improves consistency and pressure putting regardless of the angle.

Gate Drill for Start Line Accuracy (5 minutes)

  • Set up a “gate” with two tees just wider than the ball, about a foot in front of the ball on your start line.
  • Practice putting through the gate, ensuring the ball starts on your intended line, helping with accuracy and precision.

Two Putt Challenge (10 minutes)

  • Practice long putts going back and forth across the green trying to only make two putts.
  • Focus on the feel and adjustment of stroke length to control speed and distance.

Putting 30 Minutes Just Golf Clubs

Warm-Up and Feel (5 minutes)

  • Start with short putts (3-4 feet) to establish solid contact and a square clubface.
  • Move to putts of 6-8 feet to work on stroke consistency and tempo.

Alignment and Start Line Drill (7 minutes)

  • Visualize a line on the putting green.
  • Practice hitting putts along the line for 10-15 feet to ensure the ball starts and stays on the intended path.

Lag Putting for Distance Control (10 minutes)

  • Practice long putts at varying distances (20, 30, 40 feet), aiming to get the ball within a 3-foot radius of each target, focusing on stroke length.

Circle Putting Drill (4 minutes)

  • Place balls around a hole at 4 feet in a circle and try to make all putts in succession, working on consistency from various angles.

Two Putt Challenge (4 minutes)

  • Practice long putts across the green, aiming to two-putt each time, focusing on speed control and distance adjustment.

Putting 30 Minutes Alignment Sticks

Warm-Up and Feel (5 minutes)

  • Start with short putts (3-4 feet) to establish solid contact and a square clubface.
  • Move to putts of 6-8 feet to work on stroke consistency and tempo.

Alignment and Start Line Drill (7 minutes)

  • Use alignment sticks to set a gate to putt through.
  • Practice hitting putts along the line for 10-15 feet to ensure the ball starts and stays on the intended path.

Lag Putting for Distance Control (10 minutes)

  • Practice long putts at varying distances (20, 30, 40 feet).
  • Put an alignment stick three feet after the hole, focus on getting the golf ball to end up between the hole and the alignment stick.

Circle Putting Drill (4 minutes)

  • Place balls around a hole at 4 feet in a circle and try to make all putts in succession, working on consistency from various angles.

Two Putt Challenge (4 minutes)

  • Practice long putts across the green, aiming to two-putt each time, focusing on speed control and distance adjustment.

Putting 30 Minutes HackMotion

Warm-Up and Feel (5 minutes)

  • Start with short putts (3-4 feet) to establish solid contact and a square clubface.
  • Move to putts of 6-8 feet to work on stroke consistency and tempo.
  • Wear HackMotion to make sure your wrist angles stay consistent throughout the stroke.

Alignment and Start Line Drill (7 minutes)

  • Visualize a line on the putting green
  • Practice hitting putts along the line for 10-15 feet to ensure the ball starts and stays on the intended path.

Lag Putting for Distance Control (10 minutes)

  • Practice long putts at varying distances (20, 30, 40 feet), aiming to get the ball within a 3-foot radius of each target, focusing on stroke length.

Circle Putting Drill (4 minutes)

  • Place balls around a hole at 4 feet in a circle and try to make all putts in succession, working on consistency from various angles.
  • Put the HackMotion back on and check to see if your wrist angles remain consistent as you change your angle, this is a powerful mental thought when you head back out to the course.

Two Putt Challenge (4 minutes)

  • Practice long putts across the green, aiming to two-putt each time, focusing on speed control and distance adjustment.

Putting 10 Minutes Just Golf Clubs

Speed and Distance Control (5 Minutes)

  • Start at one end of the putting green and hit long putts towards the opposite end, aiming to stop the ball as close to the edge of the green as possible without going off. Repeat this from varying distances to get a feel for speed control across the green.
  • Don’t focus on a hole here, just worry about speed and feel.

Alignment and Accuracy (5 Minutes)

  • Set up a gate with two tees just wider than the ball about 3 feet in front of the ball on a chosen line.
  • Make this about a ten foot putt.
  • Practice putting through the gate to a specific target or hole, working on keeping the putt on line from the start and making sure the ball gets to the hole.

Putting 10 Minutes Alignment Sticks

Speed and Distance Control (5 Minutes)

  • Start at one end of the putting green and hit long putts towards the opposite end, aiming to stop the ball as close to the edge of the green as possible without going off.
  • Repeat this from varying distances to get a feel for speed control across the green.
  • Don’t focus on a hole here, just worry about speed and feel.

Alignment and Accuracy (5 Minutes)

  • Set up a gate with two alignment sticks just wider than the ball about 3 feet in front of the ball on a chosen line.
  • Make this about a ten foot putt.
  • Practice putting through the gate to a specific target or hole, working on keeping the putt on line from the start and making sure the ball gets to the hole.

Putting 10 Minutes HackMotion

Speed and Distance Control (5 Minutes)

  • Start at one end of the putting green and hit long putts towards the opposite end, aiming to stop the ball as close to the edge of the green as possible without going off. Repeat this from varying distances to get a comprehensive feel for speed control across the green.
  • Don’t focus on a hole here, just worry about speed and feel.

Alignment and Accuracy (5 Minutes)

  • Set up a gate with two tees just wider than the ball about 3 feet in front of the ball on a chosen line.
  • Make this about a ten foot putt.
  • Practice putting through the gate while keeping your wrist action consistent. Your HackMotion can be set to alert you when there is too much variation in the wrist angles.
Select the options below to specify the areas you wish to improve in your golf game, and a list of drill ideas will be generated for you.

Where does your golf game need the most work?

Fix My Slice

Drill 1: 9-to-3 Clubface Control Drill

This drill trains you to intentionally close the clubface at impact, helping to eliminate the open-face slice pattern. It also encourages better body rotation through the ball for solid contact and a slight draw.

9-to-3 Clubface Control Drill – Step by Step

  1. Take your normal setup with an iron and tee the ball slightly for margin.
  2. Swing the club back to the 9 o’clock position (shaft parallel to the ground).
  3. Pause and intentionally twist the club slightly using your wrists and forearms; this is called the ‘motorcycle move‘ to close the clubface.
  4. From this position, rotate through the ball while keeping the clubface closed through impact.
  5. The goal is to hit a controlled 3 o’clock follow-through and produce a small draw.
  6. Focus on using body rotation for power, not just the arms.
  7. Monitor ball flight, if it’s still slicing, double-check your grip and wrist movement.
  8. As you gain confidence, progress to longer swings while keeping the same closing motion.

Drill 2: Flat Wrist + Path Gate Driver Drill

This drill helps eliminate your slice by training a square clubface at the top of the backswing and combining it with an improved in-to-out swing path. It’s especially effective for driver control, where low loft magnifies any face-to-path issues.

Flat Wrist + Path Gate Driver Drill – Step by Step

  1. Set up with your driver and take your normal grip.
  2. Focus on your lead wrist angle—at address, a small amount of extension (cupping) is fine.
  3. As you make your backswing, stop at the top and flatten your lead wrist (0–5° extension).
  4. Use a HackMotion sensor with biofeedback mode set to “Top of Backswing”, you’ll hear a tone when the wrist is in range.
  5. Without swinging yet, rehearse this top position until you consistently hear the tone or feel the flat wrist. You can also use the HackMotion Top Drill.
  6. Place your driver headcover just outside the target line (ahead and slightly outside the ball). This acts as a visual path barrier.
  7. From the top of the swing, swing down while keeping your wrist angle intact and miss the headcover to promote an in-to-out path.
  8. Repeat the top-stop-down motion slowly before building to full swings.

Drill 3: Stop-Quick Flexion Drill

This drill teaches you how to deliver a square (or even slightly closed) clubface at impact by exaggerating lead wrist flexion. It’s ideal for slicers who lose control of the face through the hitting zone.

Stop-Quick Flexion Drill – Step by Step

  1. Take your normal setup with a short to mid iron (start with a 7-iron).
  2. Push the handle slightly forward and up at address—this encourages lead wrist flexion and pre-sets a square face.
  3. Make a small backswing and focus on maintaining the wrist angle you just created.
  4. Swing down and stop almost immediately after impact, holding your follow-through short (like a long chip shot or punch shot).
  5. The goal is to retain as much lead wrist flexion as possible through and just after impact.
  6. Check your HackMotion data; too much flexion is okay during this drill, as it helps retrain your face control.

Fix My Hook

Drill 1: Wrist Angle Control (HackMotion or Tee Peg Hack)

Excessive lead wrist flexion (bowing) in the downswing is a major hook culprit. This drill helps you monitor and maintain neutral wrist angles.

Option A – Using HackMotion:

  1. Set flexion parameters (e.g., 38° to 18°) to avoid excessive bowing.
  2. Enable audio/vibration biofeedback.
  3. Take swings while staying inside the set range—listen for alerts if you go beyond.

Option B – Using a Tee Peg:

  • Place a tee between the fingers of your trail hand (like holding a pencil).
  • Use it as a face angle reference during the swing.
  • Keep the tee pointing more out in front of you (not toward the sky or ground) at the top and on the way down.

Drill 2: Headcover Drill to Fix Club Path

Even with a square face, an in-to-out path causes hooks. This drill trains a more neutral or out-to-in path.

Headcover Drill – Step by Step

  1. Place a headcover just outside and behind the ball (about 1 foot away).
  2. Swing and miss the headcover. If you hit it, you’re swinging too far from the inside.
  3. Add a target stick out front on a 45° angle for a visual to swing left through impact.
  4. Practice hitting intentional slices—this exaggerates the new path and face relationship.
  5. Then blend back toward a straight ball by moderating the feel.

Drill 3: Neutral Takeaway to Fix Hooking

This drill corrects hooks by reducing excessive lead wrist flexion in the takeaway, which causes the clubface to shut early. It trains a more neutral clubface position, resulting in straighter, higher ball flights.

Headcover Drill – Step by Step

  1. Set up a swing station with a training stick angled along your shaft plane.
  2. Attach a magnetic rod to the clubface (or imagine one). This helps you visually monitor face angle during the takeaway.
  3. Start your backswing over the stick. Keep the club just outside your hands and avoid swinging it around your body.
  4. At club parallel (P2), pause and check the face: Magnetic rod should point slightly down or level, not toward the ground. Clubface should look more vertical than horizontal. Lead wrist should have slight extension, not flexion or bowing.
  5. Rehearse this takeaway multiple times. Prioritize face orientation and wrist feel over speed.
  6. Hit shots while maintaining this feeling. Focus on holding that wrist extension longer into the downswing to keep the face square or slightly open.
  7. Adjust the amount of extension based on your typical hook severity. Bigger hooks means you need to feel more extension.

Fix Thin Shots

Drill 1: Smart Ball Arm Connection Drill for Thin Shot Elimination

This drill trains better arm structure and wrist mechanics to eliminate thin shots. By keeping the elbows connected and preventing early extension of the wrists, you maintain a consistent swing radius and improve strike quality.

Smart Ball Arm Connection Drill – Step by Step

  1. Grab a Smart Ball (or use an inflatable kids’ ball or even a rolled-up towel). Place it between your forearms just above the elbows.
  2. Take your setup and begin with small swings. Focus on keeping the ball in place by squeezing your arms together throughout the swing.
  3. Avoid pulling the elbows apart. That motion leads to wrist cupping (extension) and inconsistent contact.
  4. Make practice swings without hitting balls at first. Feel the pressure of the arms staying close together through impact and into the follow-through, then progress to full swing shots with a ball.

Drill 2: Casting Drill for Wrist Angle Control

This drill teaches you how to maintain lead wrist flexion (and avoid early extension) during the downswing, eliminating both thin and fat shots. It’s designed to help you keep the handle forward through impact for better compression and strike consistency. It’s built into the HackMotion app for easy practice.

Casting Drill – Step by Step

  1. Start in your normal setup position. You can do this drill with or without a ball.
  2. Go to the top of the backswing. Pause briefly at the top.
  3. Feel the lead wrist flexion and trail wrist extension. Your lead wrist should feel flat or slightly bowed, not cupped.
  4. Slowly start the downswing. Focus on keeping your hands ahead of the clubhead (this maintains your wrist angles).
  5. Avoid casting. Don’t let the shaft “overtake” your lead wrist early; this causes early extension and results in either fat or thin shots.
  6. Return to impact in slow motion. Hands should be forward, shaft leaning toward the target, and lead wrist still in flexion.
  7. Progress to full-speed reps. Once you’ve built the feel, practice smooth transitions from top to impact. Then hit punch-style shots, focusing on handle forward.

Fix Fat Shots

Drill 1: Shaft Alignment Stick Drill

This drill helps eliminate fat shots by training you to maintain shaft lean and control wrist extension through impact.

Shaft Alignment Stick Drill – Step by Step

  1. Attach an alignment stick to your club: Place it along the lead side of the shaft and grip it together with the club.
  2. Set up with the stick touching your lead side: This gives you instant feedback if you flip the club.
  3. Make small practice swings: Keep the alignment stick away from your lead side by pushing the handle forward through impact.
  4. Feel lead wrist flexion: To keep the stick off your body, you’ll need to bow (flex) the lead wrist at impact.
  5. Hold the finish short: Stop after impact with minimal follow-through to emphasize no early release.
  6. Use without a ball first: Focus on learning the feel of proper wrist angles and shaft lean.

Drill 2: Towel Behind the Ball Drill

This drill trains you to control low point by forcing you to avoid hitting the ground behind the ball.

Towel Behind the Ball Drill – Step by Step

  1. Fold a towel into a small rectangle: Lay it flat on the ground.
  2. Place it one grip length behind the ball: This gives you a margin of error while learning the motion.
  3. Set up as normal: Use a short iron to start.
  4. Take your swing and avoid the towel: If you strike the towel, you’re bottoming out too early.
  5. Watch your wrist movement: Avoid casting or flipping the club in the downswing.
  6. Check your divot pattern: You should see ball-first contact with the divot starting just in front of the ball.
  7. Make it harder over time: Move the towel closer to the ball to increase the challenge as you improve.

Drill 3: Casting Drill to Fix Fat and Thin Shots

This drill helps train proper wrist angles in the downswing, especially lead wrist flexion. Losing these angles too early causes both fat and thin shots depending on how your body reacts.

Maintaining flexion through impact improves compression, low point control, and distance. It’s located in the HackMotion app so you can practice in real time.

Casting Drill – Step by Step

  1. Start in your setup position: Let the app recognize your address position with neutral wrist angles.
  2. Move to the top of the swing: Pause at the top. The app will confirm correct position with a vibration.
  3. Begin the downswing slowly: Focus on keeping the lead wrist flexed (bowed) as you move toward impact.
  4. Watch for early extension: Don’t allow the lead wrist to cup or extend before hitting the ball.
  5. Feel the handle forward: Keep the hands ahead of the clubhead into impact for solid, ball-first contact.
  6. Use HackMotion feedback: Get instant cues if you lose wrist angles too early (extension = casting).
  7. Practice slow reps first then progress to full swings.

Fix Push or Pull

Drill 1: Flex the Lead Wrist to Stop Pushing the Ball

If you’re struggling with push shots—those straight balls that miss right (for a right-handed golfer)—you’re likely dealing with a combination of an open clubface and an inside-out swing path. This drill helps you square the face by fixing your wrist angles at impact.

Flex the Lead Wrist – Step by Step

  1. Check your ball position: Make sure it’s not too far back in your stance. Move it slightly forward to help shift the path more left.
  2. Set up normally: Expect a small amount of wrist extension (slight cupping) in your lead wrist.
  3. Rehearse impact position: Push the handle forward while flexing the lead wrist (bowing it slightly) to square the face.
  4. Use HackMotion feedback (if available): Listen for the beep when your lead wrist is in a flat or slightly flexed position at impact.
  5. Go from setup to impact repeatedly: Practice the motion without hitting balls.

Drill 2: Fixing Pull Shots by Adjusting Arm Drop and Club Path

Pulls happen when the club swings from out-to-in with a face that’s square to that path. This drill helps you correct that pattern by adjusting your transition and getting the club coming more from the inside.

Adjusting Arm Drop and Club Path – Step by Step

  1. Check your alignment: Make sure you’re not aimed left of your target or unknowingly compensating with your swing.
  2. Pick a small spot in front of the ball: Use a leaf, broken tee, or blade of grass as your intermediate target to align your clubface first.
  3. Build your stance around the clubface: After aiming the face at your spot, set your feet parallel to that line.
  4. Turn your head, not your whole body: When checking the target, avoid rotating your body and changing your alignment.

Master Wrist Mechanics

Drill 1: Hit Hard, Stop Quick Drill

This drill teaches you to delay the release and control the clubhead through impact for better contact and consistency.

Hit Hard, Stop Quick Drill – Step by Step

  1. Make a swing where you hit the ball and immediately stop the club just after impact.
  2. Avoid letting the club flip past your hands or wrist angles collapse.
  3. The goal is to finish with your hands ahead of the clubhead.
  4. Do several practice swings without a ball, then add short shots to test your feel.
  5. Focus on crisp contact and stopping the club quickly, like a punch shot.

Drill 2: Motorcycle Drill

The Motorcycle Drill is a powerful feel-based drill that teaches you how to square the clubface and eliminate the need for compensations in the downswing.

Motorcycle Drill – Step by Step

  1. Take your backswing and pause at the top.
  2. From the top, twist your lead wrist like you’re revving a motorcycle.
  3. Feel the clubface rotate so it’s pointing more toward the ground (not the sky).
  4. Focus on this twisting move as you begin your downswing, especially before the club reaches waist-high.
  5. Repeat this motion slowly, moving from the top of the swing down to the waist-high position, and exaggerate the twist.
  6. Ensure the clubface is angled slightly downward when the shaft is parallel to the ground.
  7. Once the feel is clear, hit a few balls using a controlled swing, keeping the same wrist twist during the transition.
  8. Use your ball flight and Hack Motion as feedback

Drill 3: Proper Wrist Hinge Drill

This drill helps you train the correct wrist hinge early in the backswing so you don’t have to fix it later. It improves contact, distance, and clubface control.

Proper Wrist Hinge Drill – Step by Step

  1. Set up normally to the ball.
  2. Before starting your swing, hinge the club so the shaft is parallel to the ground and points down your target line.
  3. Check your position; ensure the lead wrist feels flat (not cupped), the trail wrist feels slightly bent back, and your hands are still over the ball.
  4. From this preset position, turn your shoulders to complete the backswing.
  5. Keep your wrist angles the same as you go to the top.
  6. Return to the preset position and repeat slowly to build the feel.
  7. Once comfortable, make smooth practice swings starting from this preset wrist hinge.

Add More Distance

Drill 1: Preset Wrist Position at P2

This drill trains proper wrist angles early in the backswing to improve clubface control, contact, and consistency.

It uses a simple alignment stick setup and builds awareness of lead wrist flexion and trail wrist extension using HackMotion checkpoints.

Preset Wrist Position at P2 – Step by Step

  1. Set up normally to the ball. Place an alignment stick on the ground parallel to your target line (along your feet).
  2. Preset the club to P2. Without moving your arms away from your body, hinge your wrists so the shaft is parallel to the ground and points down the alignment stick.
  3. Check your wrist angles. Trail wrist: bent back into extension. Lead wrist: slightly flexed (flattened or bowed). The butt end of the grip should stay over the ball. The clubface should point slightly downward, not straight up.
  4. Turn to the top from this preset position. Maintain the wrist angles as you rotate your shoulders to complete the backswing.
  5. Return to P2 and repeat. Go back to the preset wrist position after each rep to build feel.

Drill 2: “Whoosh” Drill for Wrist Speed and Tension Release

This drill helps you generate more distance by reducing arm and grip tension and allowing your wrists to release naturally through the hitting zone.

It builds effortless speed without needing to swing harder.

Whoosh Drill – Step by Step

  1. Grab an alignment rod. You’ll use this instead of a club.
  2. Take your setup and make soft, relaxed swings. Your wrists should be free enough to move up and down and left and right without resistance.
  3. Listen for the “whoosh.” Your goal is to generate a loud whoosh sound through the strike zone (roughly where the ball would be).
  4. Avoid tension. If you’re gripping too tightly or stiff in the arms/shoulders, the whoosh will be quieter or disappear altogether.
  5. Compare both feels. Try one swing with tension, then one with loose wrists. You’ll notice it’s easier to generate speed and sound when relaxed.

Drill 3: Setup Tweaks for More Turn and Longer Hand Path

This isn’t the most complex drill but it’s highly effective. Small setup changes help senior golfers make a bigger shoulder turn and a longer hand path, which can lead to more distance without adding speed.

Setup Tweaks for More Turn and Longer Hand Path – Step by Step

  1. Turn both feet outward slightly. This opens the hips and increases your available range of motion.
  2. Drop your trail foot back slightly. This closes your stance and “pre-sets” a deeper backswing turn.
  3. Allow your knees to flex. Don’t keep your trail knee locked in place—let it straighten naturally in the backswing.
  4. Focus on turning your hips and shoulders fully. These adjustments make it easier to complete a full backswing and stretch out your hand path.

Increase Consistency

Drill 1: Hit Hard, Stop Quick

This dynamic drill improves contact consistency, wrist stability, and body control. It helps eliminate sloppy follow-throughs and forces proper energy transfer and ball-first contact by training you to stop the swing right after impact.

Hit Hard, Stop Quick Drill – Step by Step

  1. Set up normally to the ball.
  2. Make a full backswing. Turn fully and stay balanced.
  3. Swing through the ball with speed. Hit the ball hard, but with control.
  4. Try to stop the club as soon as possible after impact. Use a visual cue like the edge of a hitting mat to gauge where you want the club to decelerate.
  5. Keep your arms straight and stable as you stop. Don’t let them collapse or wrap around your body.

Drill 2: Feet Together for Forearm Release

This drill teaches you how to properly release the club with forearm rotation. It helps slicers square the face, boost clubhead speed, and feel the correct arm motion through impact, without relying on body rotation.

Feet Together for Forearm Release – Step by Step

  1. Set up normally to the ball. Then bring your feet together until they’re touching or almost touching.
  2. Make small practice swings. Focus on balance and maintaining rhythm.
  3. Let the forearms rotate naturally through impact. You should feel the clubhead swing past your body with the arms doing more of the work.
  4. Hit soft shots from this setup. Start with wedges or short irons and gradually work into fuller swings.
  5. Watch your ball flight. If you’re used to slicing, this drill should help promote a draw or reduce the right-side miss.

Tips to Maximize Your Driving Range Practice

Now that you have a better idea of how and what to practice, here are some tips to maximize your driving range practice.

These tips will ensure that you get the most out of your time on the range. 

  • Use golf technology and training aids: Implement tools like HackMotion to accelerate learning and provide feedback. Wearing the HackMotion while you practice is like having a coach with you at the driving range.
  • Take your time and slow down between shots: you don’t need 200 balls to get through a golf practice session; make the shots more deliberate, not a rapid fire session.
  • Choose a variety of targets. Since you won’t have the same target twice on the course, don’t practice hitting to the same flag 100 times while on the driving range.
  • Don’t leave the short game out: Ensure that putting and chipping practice is part of your routine.
  • Always have a plan: Create clear goals and structure your session around specific skills or issues you want to address. 
  • Get your body ready to practice: Prepare for a driving range practice session by hydrating and doing some dynamic stretching.
  • Don’t stand in the same place: Move around between shots to better simulate actual play and enhance focus. If you can, put the bucket of range balls at least a few yards away from you. Walk back and forth each time to get a ball.

FAQs

The more you play golf, the more you should be practicing your game. Head to the driving range once a week on average, but if you play several days a week, go two or three times. You don’t have to go for extended sessions, but 30 minutes is enough time.

Many golfers find a ½ hour of practice to be enough. Better players often have more stamina and can practice for an hour or more and still benefit from it.

Most times, you will start to feel tired or have some soreness if you practice too long, so this should be avoided.

If you enjoy practice, you can go to the driving range every day. However, it is not necessarily recommended for all golfers because it can be tiring, and poor habits can be developed.

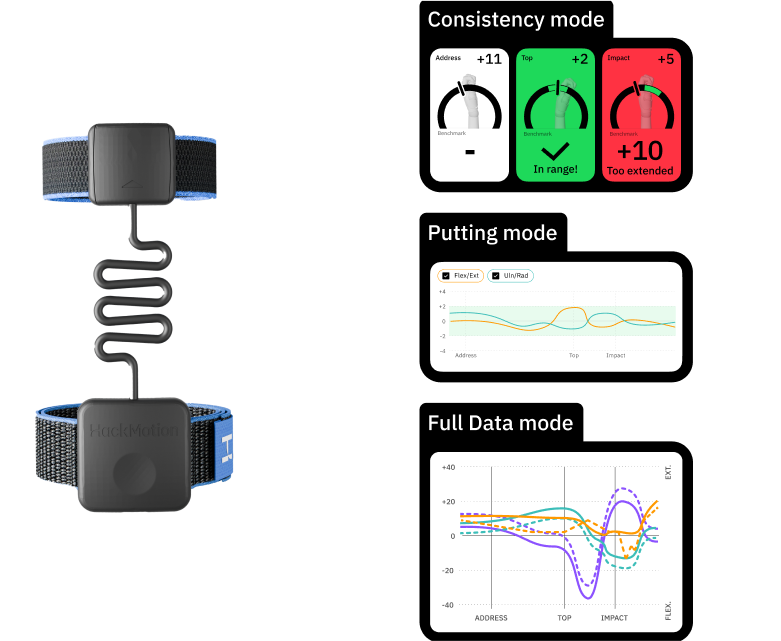
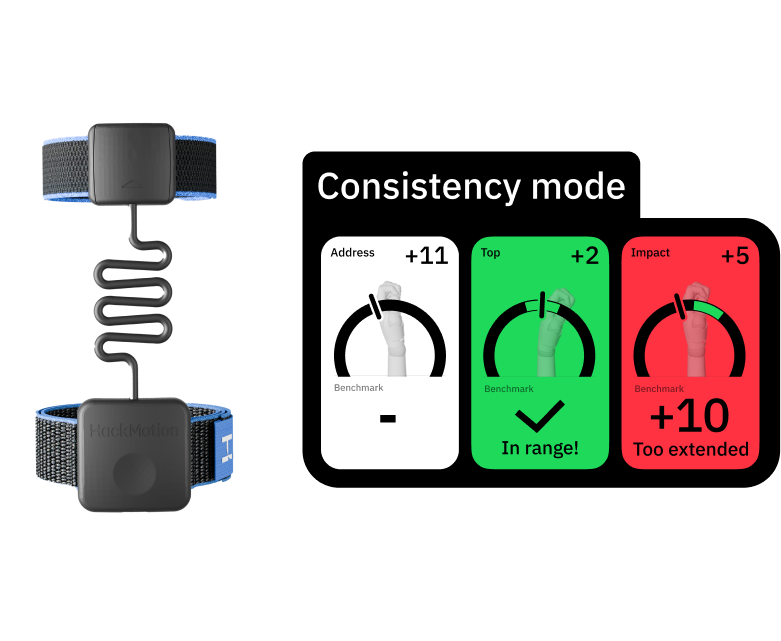
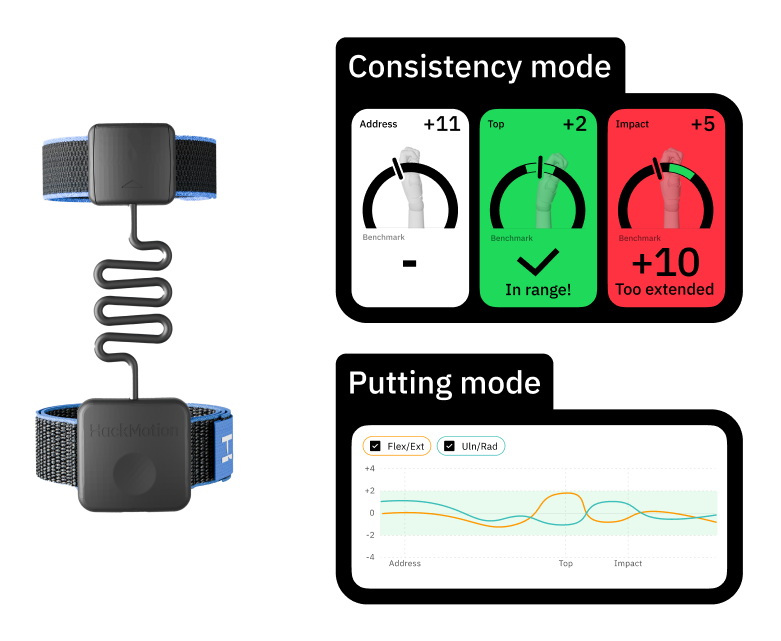
A driving range is more fun if you are playing games and creating challenges. Pick targets and challenge yourself to hit them, then work on beating your score. Incorporating technology like HackMotion into your practice session will also make the session more interesting and allow you to collect data at the same time.

When hitting golf balls at the range, never start with the driver. In addition, never hit driver after driver until you run through a bucket of golf balls.

The range should be more of a practice for the course instead of just a session where you swing the club over and over.

You may feel less pressure to hit a perfect shot at the driving range.

If you find this is the case, you should learn how to increase pressure at the range by playing games and setting up challenges for yourself.

This process puts pressure on and makes it easier to perform on the course.

Hitting about 50 golf balls should be the minimum when you have a practice session; the first ten shots and the last ten shots should be chipping and short game practice.

This leaves thirty shots in the middle to work on the things you need to.

Beginners should practice setup and hitting a golf ball straight when they are at the driving range.

In the beginning, it’s hard to hit a golf shot straight and get it up in the air.

Make sure you are balanced, your grip is correct, and you are aiming at a target.

Summary

We hope this interactive driving range practice plan has helped you narrow down exactly which areas of your golf game need your attention. Start building out your practice plan and incorporating drills that will make a difference in your scoring. The better you become a practicing the easier it will be to lower your scores on the course.

Was this content and the videos helpful to you? Help us improve!

Please fill out our quick 3-question quiz to help us continue creating content that meets your needs. Your responses won’t be public, so feel free to be honest!

Like Having a Coach on Your Wrist, Anytime You Need

Start the 2025 season strong with HackMotion—your personal coach on your wrist, helping you hit better shots and achieve faster results.

Core

Core HackMotion value.

For players who want to improve clubface control and full swing consistency by optimising wrist angles

Plus

A total powerhouse.

Work on your whole game by optimizing both the full swing and putting. Reach your peak performance.

Pro

The ultimate HackMotion.

All the wrist data, tour data and analytics for both hands in the ultimate feature package.