Wrists & Hands in the Golf Swing (Slow Motion Breakdown) – What Really Happens Step-by-Step
Most golfers have been told to “keep the wrists firm” or “hold the angle longer.” The problem is, those ideas don’t match what actually happens in a great golf swing.
When you slow the swing down, you can see that the wrists are constantly working flexing, hinging, and rotating in a precise sequence that controls both clubface and power.
Understanding that motion is the key to more consistent contact. In this guide, we’ll walk through exactly what your wrists should be doing in each part of the golf swing.
Wrists in Golf Swing (Key Takeaways)
Here are the most important things to know about slow motion wrist action, keep this guide and take it with you to the driving range to practice your wrist action in slow motion.
- The wrists don’t stay locked, they move in a controlled sequence that determines clubface position and power.
- The lead wrist moves from slightly extended at setup to flat by takeaway, into flexion in transition, then back toward extension after impact.
- The trail wrist mirrors this motion: slightly flexed at address, extended through the backswing, and returning to neutral in the release.
- Most golfers lose structure by overhinging or extending too early; slow motion reveals these faults instantly.
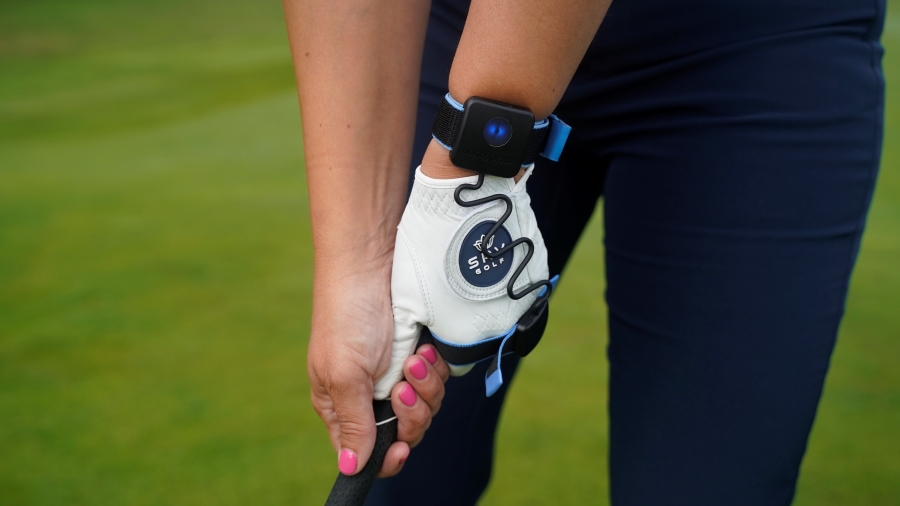
- Using HackMotion lets you measure real wrist angles and train them precisely at each stage of the swing.
Contents
Slow Motion Golf Swing: Wrists & Hands Breakdown Step-by-Step
Use the interactive slow-motion player below to see how the wrists and hands move in the golf swing.
Scroll, pause, and study each position in slow motion to understand how the wrists flex, hinge, and rotate through every stage. Then jump into the steps below for a detailed breakdown.
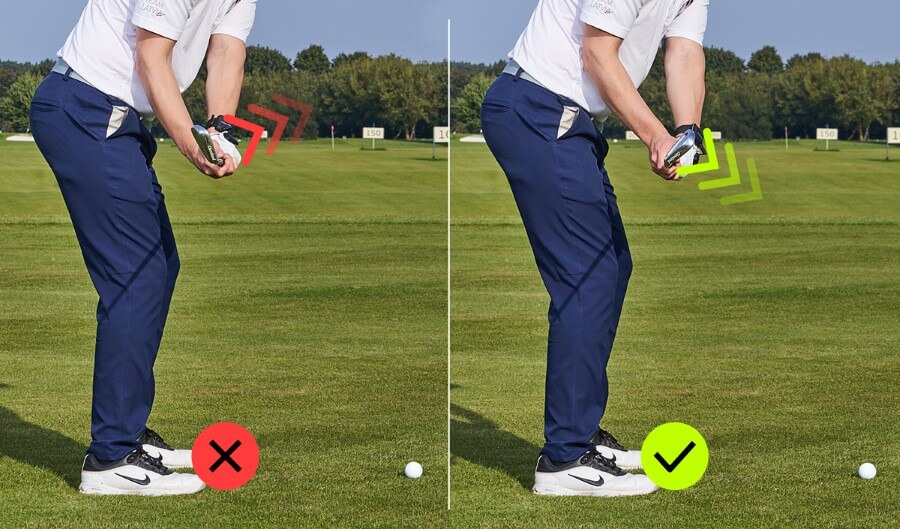
Step 1: Setup (The Start of Clubface Control)
If you start with the wrong wrist angles, everything that follows gets harder. At setup, your wrists quietly establish the geometry that allows the clubface to return square at impact.
Small changes here can make a big difference later.
What to Know:
Your goal is to start neutral but structured. A slightly cupped lead wrist and a slightly bent trail wrist help set the shaft on plane and prevent the face from shutting early. Make sure your hands stay relaxed with light tension through the grip.
Slow Motion Wrist Action – Step-by-Step:
- Lead wrist: slight extension (15–20°), trail wrist: slight flexion.
- Hands slightly ahead of or in line with the ball for natural shaft lean.
- Too flexed at address often means a strong grip or shut face.
- Too extended promotes an open face and high, weak shots.
Step 2: Takeaway (P1 – P2)
This first movement away from the ball often decides whether the rest of your swing stays on plane. Slow-motion footage shows that the wrists begin to shift immediately, even if it doesn’t feel that way in real time.
What to Know:
At this point, your wrists shouldn’t be static. The lead wrist is flattening as the trail wrist hinges slightly, helping the club trace a wide, low arc. Think stability even though your wrists will start to move your key thought should be stability.
Slow Motion Wrist Action – Step-by-Step:
- Lead wrist flattens gradually as the club reaches parallel to the ground.
- Trail wrist gains slight extension (the start of your hinge).
- Avoid rolling the clubface open or over-hinging early.
- Keep arms extended out from the body, not collapsing inward.
- Check that the clubface stays roughly parallel to your spine angle, square to the path.
Step 3: Backswing to Top (P2 – P4)
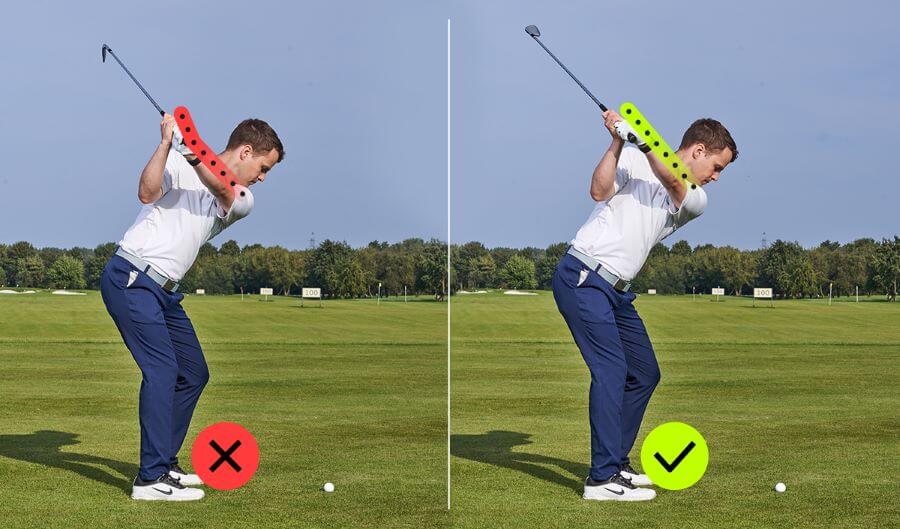
At the top of the backswing, you can tell a lot about where the golf ball is going to go. The wrists decide where the clubface points and how much control you’ll have coming down.
Many golfers overswing here, adding wrist movement that ruins consistency. Slow-motion review of elite players shows how little their wrists change once the hinge is set.
What to Know:
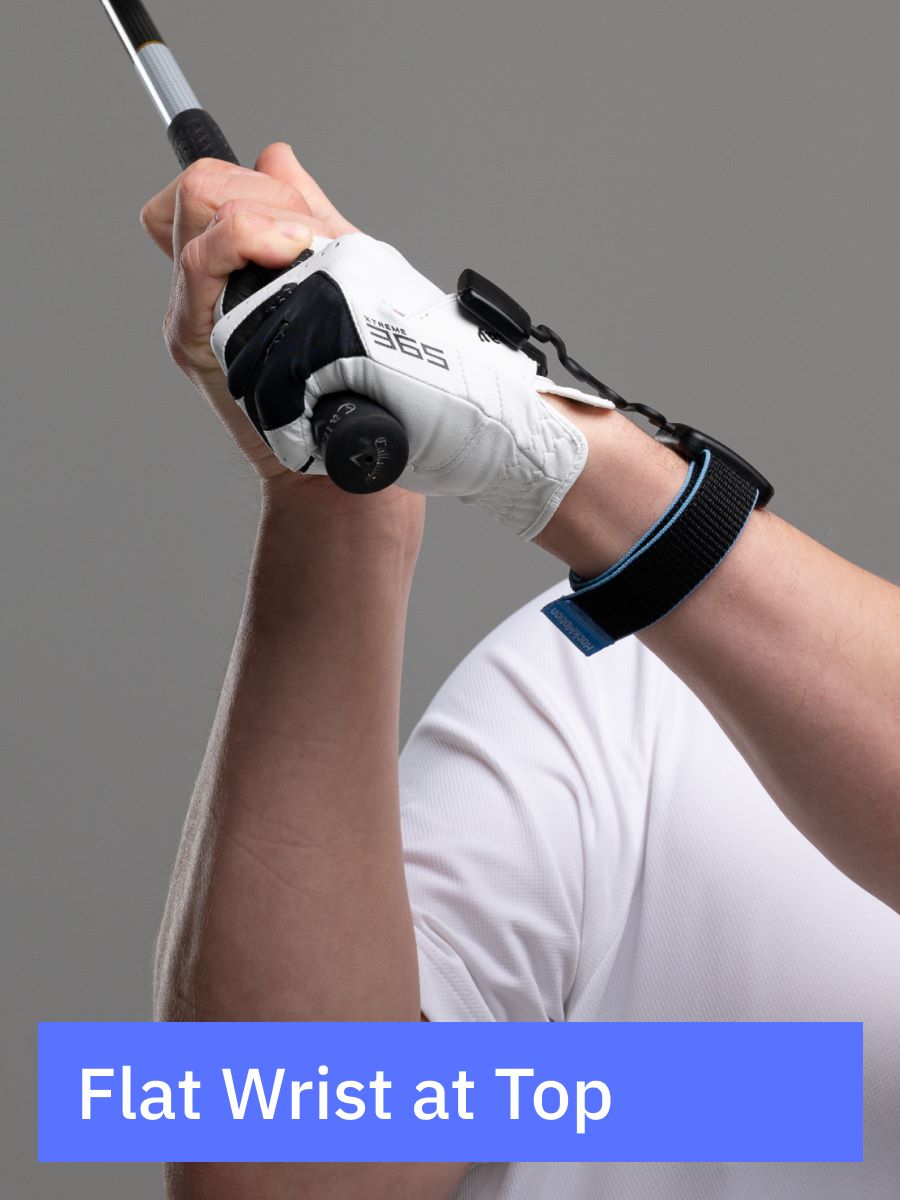
The goal isn’t to create a huge wrist hinge, it’s to hold the right amount of hinge consistently. The flatter or slightly flexed your lead wrist remains, the more repeatable your strike becomes.
Slow Motion Wrist Action – Step-by-Step:
- Lead wrist stays flat or slightly flexed; trail wrist fully extended.
- Maintain hinge through radial deviation, not excess twisting. This means the wrists hinge upward (like lifting a hammer) rather than rotating open or shut.
- Over-bowing closes the face; over-cupping opens it.
- Check your trail wrist extension with HackMotion – it should remain stable within your green zone.
Step 4: Transition (P4 – P5) – The Power Move
The transition (when you move from backswing to downswing) is where everything happens fast.
In real time, it takes fractions of a second; in slow motion, you can see the wrists begin to square the clubface long before impact. This is where pros gain distance and consistency while amateurs lose it.
What to Know:
The best players flex the lead wrist (bow it slightly) as they start down. This squares the face early and adds shaft lean. If you hold the extension in the lead wrist instead, you’ll leave the face open and likely miss right.
Slow Motion Wrist Action – Step-by-Step:
- Lead wrist moves into flexion at the start of the downswing (“motorcycle” feel).
- Trail wrist stays bent back to preserve lag.
- Hips start the motion while the wrists hold structure.
- Avoid unhinging early or “casting” the club from the top.
- Check with HackMotion: you should see increasing flexion as the downswing begins.
Step 5: Impact (P6 – Ball Contact)
Impact is where your wrist conditions translate directly into launch, spin, and compression.
Every pro you watch in slow motion shares one thing in common: the lead wrist is more flexed at impact than it was at address.
What to Know:
Your goal is a firm, flexed lead wrist with the handle slightly ahead of the ball. This delivers a square clubface and clean compression. If you release early, the lead wrist re-extends before impact, costing distance and accuracy.
Slow Motion Wrist Action – Step-by-Step:
- Lead wrist flexed more than at setup; trail wrist still extended.
- Maintain structure through impact, don’t “help” the ball up.
- Check that the hands are leading the clubhead into the ball.
- Keep the handle low through impact for solid contact.
- Use HackMotion to verify flexion and shaft lean match your in-range zone.
Step 6: Release and Follow-Through
After the ball is gone, the wrists finally release the built-up energy.
Many golfers try to force this motion, but great players let it happen naturally. Slow motion makes it obvious the wrists stay stable through impact and only extend after.
What to Know:
Allow the release to unfold. The wrists re-extend and rotate with the body, not independently. A smooth, late release equals consistent direction and flight.
Slow Motion Wrist Action – Step-by-Step:
- Wrists unhinge and re-extend only after the strike.
- Trail wrist straightens as the lead wrist returns toward neutral.
- Avoid flipping or rolling the hands through the ball.
- Feel that the club’s momentum finishes the release, not hand effort.
- Check your HackMotion graphs – extension should spike after contact.
How to Work on Slow Motion Wrist Action
Slow motion practice helps you connect what you feel with what’s really happening. But to know your exact wrist angles and how they change during the swing, you need precise feedback.
Using HackMotion, you can:
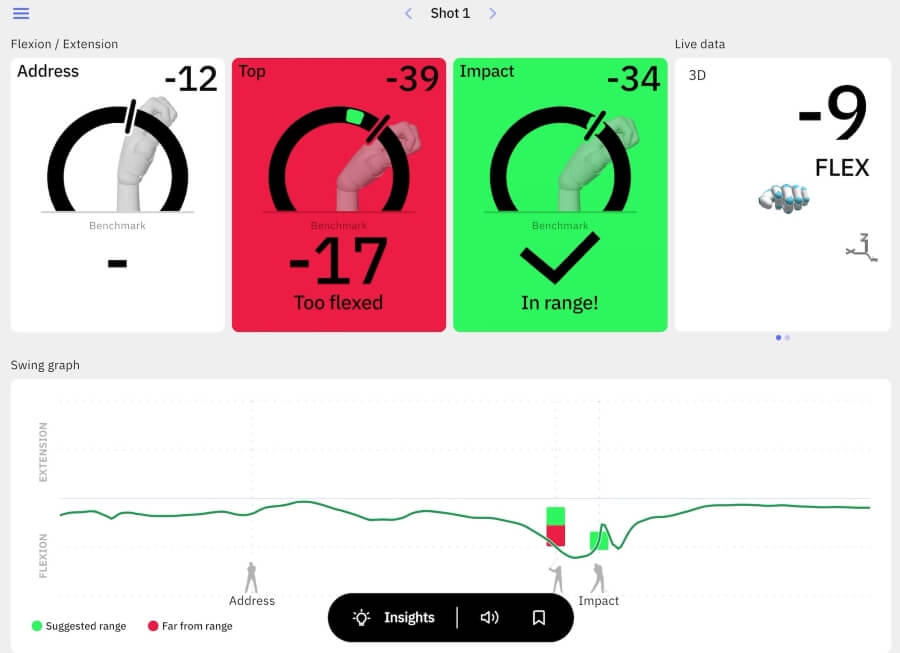
- Measure flexion, extension, and hinge angles at every point of the swing.
- See real-time graphs of your wrist motion in the app.
- Use interactive training modes to rehearse each position in slow motion.
- Get instant audio and visual feedback that matches your feel to real movement.
Combine this slow-motion awareness with HackMotion’s measurements, and you’ll train faster and more accurately than with feel alone.
Drills to Improve Wrist Action
After working on wrist and hand action in slow motion, you should have a better idea as to what you do well and where your game struggles.
Try these HackMotion interactive drills to work on different areas of your golf game.
Faldo Drill
This drill builds awareness at the top of the swing and prevents overswinging.
By presetting your wrist hinge early, you’ll create a compact, repeatable top position and eliminate excess motion.
HackMotion Faldo Drill
Reach a solid Top position with just the right amount of wrist hinge.
HackMotion Faldo Drill – Step by Step:
- Preset wrist hinge: lift the club until it’s parallel to the ground, creating about 90° of hinge.
- Turn the shoulders to reach your top position without adding wrist motion.
- Avoid overswinging and stop when your shoulders complete their turn.
- Start slowly, then increase speed while keeping hinge consistent.
- Use HackMotion to confirm wrist hinge and flexion angles stay in range.
Top Drill
This drill teaches you to reach the correct top-of-swing wrist position at full speed. It bridges the gap between slow rehearsal and real swing tempo.
Top Drill in HackMotion
Train your top position by mastering optimal wrist angles. Challenge yourself to reach the ideal wrist position during a full-speed backswing.
HackMotion Top Drill – Step by Step
- Take a normal address and make a full-speed backswing.
- Pause briefly at the top and check your wrist position in HackMotion’s green zone.
- Swing down smoothly from that checked top position.
- Repeat with gradually shorter pauses until the correct wrist position happens naturally at full speed.
Release Drill
The release drill simplifies the motion to help you master impact before adding power.
If your release from club-parallel to club-parallel is correct, the rest of the swing falls into place.
Perfect Your Release with HackMotion
Fine-tune your release for consistent contact. Start with a short swing to master control before adding power.
HackMotion Release Drill – Step by Step
- Use a shorter swing: from club-parallel in the downswing through to club-parallel after impact.
- Keep your hands slightly ahead of the ball at contact.
- Use HackMotion to confirm your wrist angle is in the correct range.
- Perform 10 smooth reps before increasing speed.
Final Thoughts
Slow-motion training reveals what the eye can’t see in real time: the wrists drive nearly everything about your swing.
By breaking each phase down and pairing it with HackMotion feedback, you’ll see exactly where your wrist angles help or hurt your ball flight.