

6 Proven Drills to Perfect Your Golf Swing Takeaway
The takeaway gets your golf club started on the right path. A mistake in the takeaway leaves you playing catch-up the entire time you are taking the club back.
Many great golfers say that one positive takeaway thought or movement is all they need to play great golf.
It’s hard to disagree.
If you know your golf takeaway needs some work, here are the best drills. Try a few of these and see which one makes the most sense for your game. Not every takeaway drill you try will be a fit for your game.
Contents
The Secret to a Better Golf Swing Starts with Your Wrists!
Your clubface angle at impact determines 80% of your shot’s direction—your wrists control that angle. Click here for the best drills to master your wrist mechanics and take control of your game.
The 6 Drills for Perfecting Your Golf Swing Takeaway
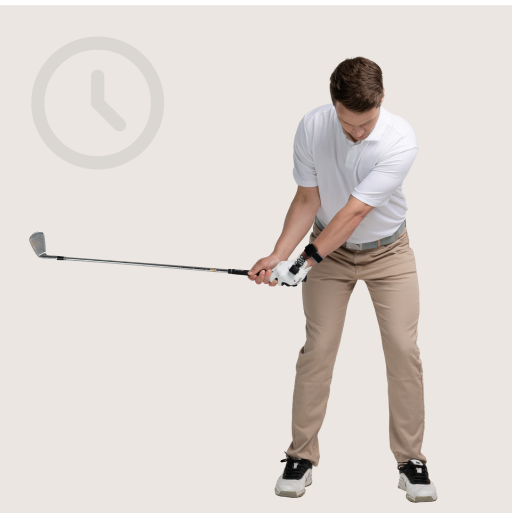
Checkpoint Drill
One of the best ways to improve your takeaway is to practice the correct positions in the swing.
The P2 position is when your club is parallel to the ground. At this point, make sure your clubface is slightly down from vertical, with your hands, shaft, and clubhead in line. If your wrists are too active early in the takeaway, it can throw off your swing path and clubface control.
- Video Timestamp: 0:37-3:17
Checkpoint Drill – Step by Step
- Setup: Address the ball, wearing your HackMotion sensor if you have one.
- Move to P2: Turn your shoulders and arms together, stopping when the shaft is parallel to the ground.
- Checkpoint: Clubface points slightly down toward the ball, hands remain “in,” and the shaft aligns with your hands/clubhead.
- Reps & Shots: Repeat 10 times without a ball. Pause at P2 to confirm your positions and HackMotion readings (avoid big extension spikes). Then hit some shots, briefly pausing at P2 during each takeaway to feel that correct alignment.
Towel Drill
The purpose of the Towel Drill is to maintain proper arm and body connection in the takeaway.
This drill will prevent you from lifting the arms and losing power or taking the club off the proper swing plane. For this drill all you need is a towel.
- Video Timestamp: 3:18-4:46
Towel Drill – Step by Step
- Setup: Roll a small towel and tuck it under both armpits at address.
- Execution: Begin your backswing to P2. If you lift your arms instead of turning the body/arms in sync, the towel will fall. Keep the towel tucked by turning shoulders and arms as a unit.
- Practice: Perform 5–10 rehearsals (only to P2) focusing on the towel staying in place.
- Hit shots: Remove the towel and hit 5–10 shots, trying to replicate that “connected” feel.
Barrier Drill (Alignment Stick)
As great as the Towel Drill is, you do leave yourself with the issue of potentially swinging too far inside or around you.
In this situation, you’ll want to try using the Barrier Drill. This prevents an overly inside or flat takeaway by using an alignment stick.
If your normal miss is to the left of the target or your swing path is known to get too shallow, add this barrier to the Towel Drill to get on the proper path.
- Video Timestamp: 5:04-7:45
Barrier Drill – Step by Step
- Setup: Stick an alignment rod in the ground behind you at roughly the same angle as your club shaft at address. If the clubhead whips too far inside, it will bump the rod.
- Execution: Swing back to P2. The club head should stay just outside or on top of the rod’s angle (not crashing into it). Keep an eye on your HackMotion sensor for abrupt wrist changes—these often coincide with rolling the club inside.
- Start Slow: Alternate 3–5 slow takeaway rehearsals with the stick in place, then hit a ball.
Bucket Drill
The Bucket Drill is a good option for golfers who are known to roll the club inside. For this drill, all you need is a small range bucket or something similar.
You’ll do this drill without hitting golf balls just to get the feeling down.
- Video Timestamp: 4:38-5:28
Bucket Drill – Step by Step
- Setup: Hold a small range bucket (or similar object) in your golf posture.
- Execution: As you turn back, “reverse twist” the bucket as if tipping it under. This steepens your shoulder turn and keeps the arms in front of you instead of rolling the club behind your body.
- Replace the bucket with your club: After a few reps, try to replicate that same feeling with a golf club in your hands.
- Shots: Hit slow half-swings focusing on the “bucket” feeling.
- Wear your HackMotion: If you see a big spike in wrist extension on HackMotion, it likely indicates a roll inside; keep working on this exaggerated “twist under” move.
Left-Hand-Only + T-Peg Drill
This left-hand only drill from Danny Maude helps ensure the concept of the one-piece takeaway.
Some golfers worry about starting their swing with their hands or arms and not getting the lower body involved or over hinging the wrists before it’s necessary.
For this drill, you need a tee and a club, but it’s a simple way to work on your takeaway.
- Video Timestamp: 3:40-5:40
Left-Hand-Only + T-Peg Drill – Step by Step
- Setup: Place a tee in the butt end of your club’s grip. Address the ball with only your lead hand on the club.
- Execution: Make a small wrist set, then move the club back to P2 with your lead arm only. Keep the tee pointing near your body—if it drifts way out, you’re rolling the club inside.
- Add the Trail Hand: After a few reps, add your trail hand (lightly) without disrupting that takeaway shape.
- Shots: Hit short shots starting with a brief pause at P2, ensuring the tee remains near your body.
Setup & Wrist Variation Drill
A neutral takeaway with the club on the correct path is much easier to achieve if you are in the correct position at address.
This video from Rob Cheney helps you learn how to experiment with the handle height of the golf club at address to find the perfect starting position.
- Video Timestamp: 2:00-3:00
Setup & Wrist Variation Drill – Step by Step
- Setup: Wear your HackMotion sensor and note your lead wrist’s extension at address (often ~15–25°).
- Raise or lower the handle slightly: Do this to see how it changes your extension number: Higher handle = more “ulnar deviation” = less extension = helps close the face early. Lower handle = more extension = helps open the face early.
- Execution: Once you find a comfortable address (e.g., 20° extension), make slow takeaways to P2. Keep your extension/flexion stable for the first few inches. If it spikes, you’re manipulating the face in the takeaway.
- Try small swings: Keep the HackMotion on to verify that the extension reading remains consistent from setup through the initial move. If you’re prone to a slice, experiment with a slightly higher handle at address; if you hook too much, try lowering it.
Practice Guidelines
Here are a few things to keep in mind as you work on building the perfect golf swing takeaway:
- Combine Drills: Alternate between a checkpoint-style drill (e.g., P2 Checkpoint) and a connection drill (Towel or T-Peg) in each session. Getting a mix of finding the correct positions and keeping the body working together will help you develop a better takeaway.
- Start Slow: Perform 5–10 slow rehearsals, focusing on your HackMotion metrics, before adding speed.
- Stay Consistent: Make these takeaway drills part of your regular warmup. Some golfers use pieces from these takeaway drills in their pre shot routine. Consistency at P2 leads to better positions at the top.
- Review Wrist Data: If your extension or flexion numbers jump drastically within the first 12 inches of takeaway, troubleshoot with the above drills until your readings stabilize.
Final Thoughts
At this point, you should be well-equipped to head out to the range to work on your golf takeaway.
If you want to measure the amount of wrist hinges or extension you have during your takeaway, then HackMotion is the perfect tool. You’ll be able to check on your consistency and look for any errors that stand out in the motions you make.
Takeaway drills can be fun to practice as they make you focus on such a small but important part of the motion. If you want a second set of eyes on your takeaway, you can also work with golf instructors near you who use HackMotion to teach proper wrist hinge and early-swing positions.


