How to Fix an In-to-Out Golf Swing Path: 6 Easy Tips for Straighter Shots
An in-to-out swing path occurs when the club travels too far from the inside during the downswing, sending the clubhead out toward the right of the target line through impact (for a right-handed golfer).
While a slight in-to-out path and a perfect clubface angle can produce a desirable draw, many amateur golfers overdo it.
If you struggle with an in-to-out swing path, here are six proven tips for straighter shots and a more neutral club path.
Key Takeaways
If you don’t have time to work on these drills right now, here are some important takeaways that can help you.
- It’s not just the swing path — it’s the face-to-path relationship.
An in-to-out path becomes a problem when the clubface is left open to that path. This often leads to blocks and hooks and is usually caused by poor wrist structure or transition sequencing. - Poor wrist positions at the top can cause a deep, inside backswing.
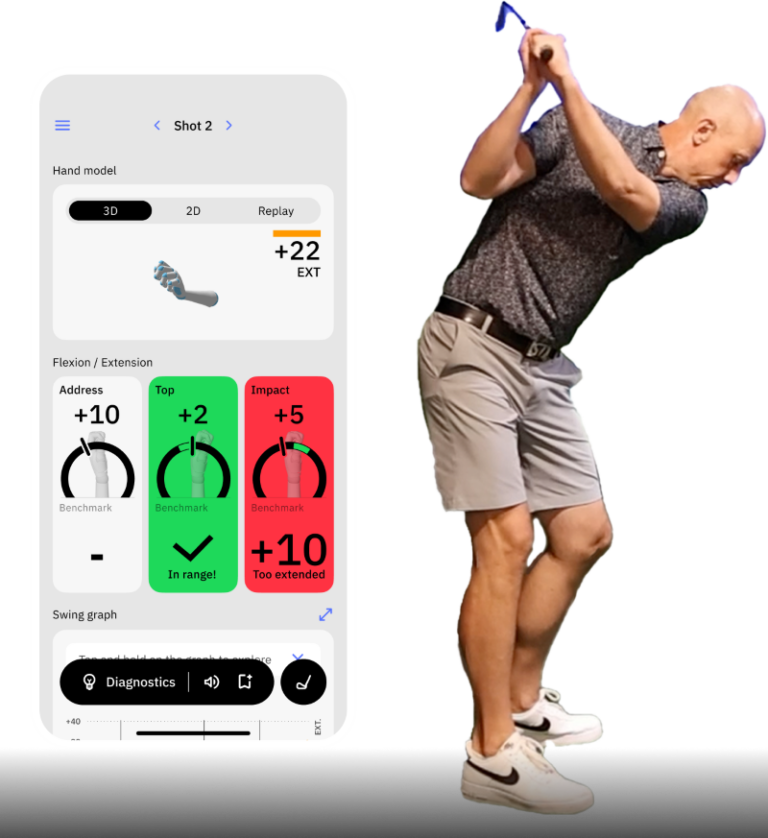
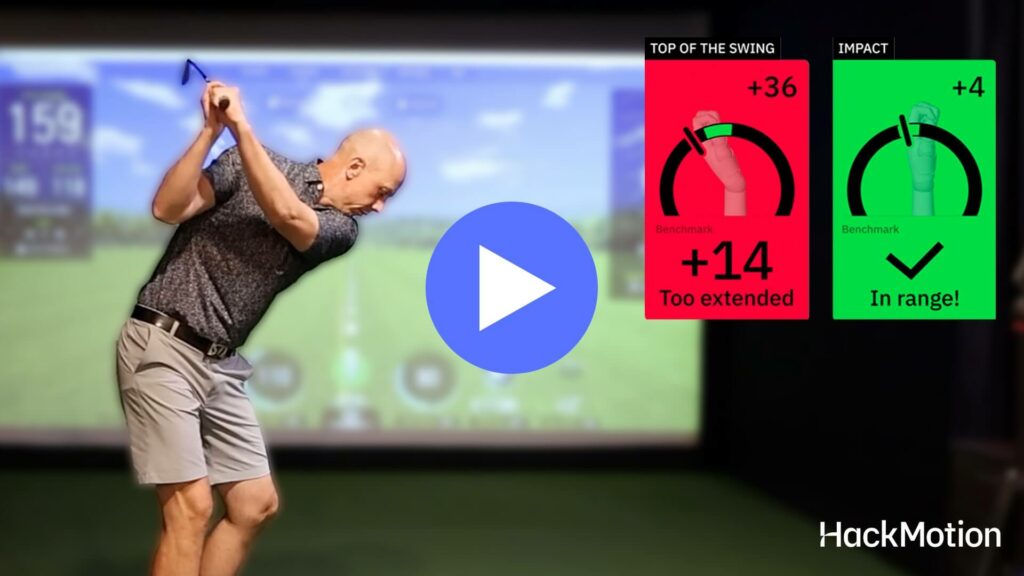
A cupped (overly extended) lead wrist gets the club behind you, setting up an in-to-out downswing path and an unpredictable clubface at impact. - Use HackMotion to measure and improve your wrist angles.
The app provides real-time feedback on extension, flexion, and sequencing, allowing you to correct the underlying wrist issues that lead to an in-to-out path. - Drills like the Motorcycle and Casting drills build better transition control.
These drills help square the clubface earlier and sequence the downswing correctly,y both of which encourage a more neutral club path and more consistent ball flight.
How to Fix an In-to-Out Golf Swing
Check Your Alignment at Setup
Do you see your shots consistently start out to the right of your target and stay right?
If you do that could be because your feet and shoulders are aiming too far right and they are encouraging the club to move excessively inside on the backswing.
This setup puts you in a position for the in-to-out swing path before you even take the club back.
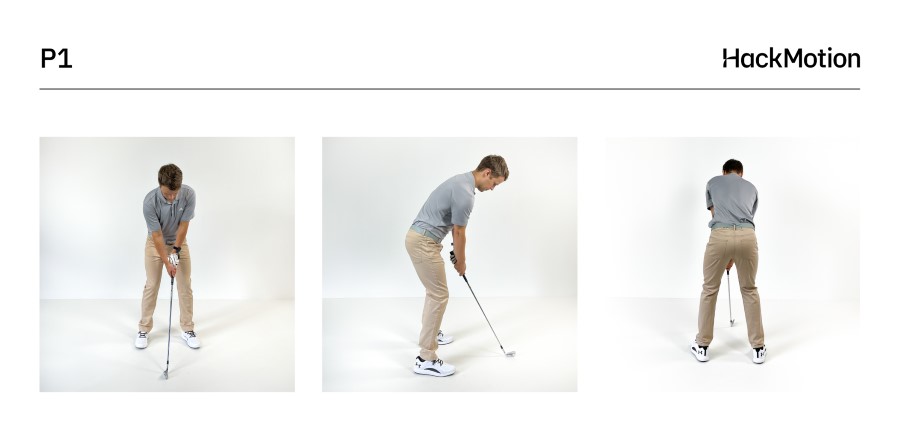
Check Your Alignment at Setup – Step by Step:
- Use Alignment Sticks: Place one stick on the ground pointing directly at your target. Place a second stick parallel to it for your feet alignment.
- Square Your Shoulders: Make sure your shoulders are parallel to the target line, not turned too far right.
- Check Hip & Foot Flare: Keep your trail foot neutral or only slightly flared to avoid promoting an inside takeaway.
- Hit Short Shots: Start with half-swings to check ball flight and confirm proper alignment.
Stop Over-Extending Your Lead Wrist at the Top
At the top of the backswing if your wrist is extended it could be because your swing was too far inside on the way back.
The clubhead gets “deep” behind you, leading to a path that’s far in to out.
You may miss to the right (blocked shots) or overdrawing/hooking the ball. If you can square your wrist at the top of the swing, it will help get you back on the correct path.
- Video timestamp – 1:58 – 3:10
Stop Over-Extending Your Lead Wrist at the Top – Step by Step:
- Check Wrist Extension with HackMotion: Put the HackMotion sensor on your lead wrist. At address, a small amount of extension is normal — observe what happens at the top.
- Observe the Numbers: If your extension increases dramatically (for example, from 20° at setup to 40°+ at the top), the club is likely getting too far inside and behind you.
- Practice Flatter Wrist Feels: Rehearse backswings while feeling the back of your lead wrist stay flatter and more stable.
- Check in Slow Motion: Take slow swings, pause at the top, and use the HackMotion app to confirm your wrist stays closer to flat, not overly extended.
Get the Clubface Closed Sooner From The Top
The best golfers move their lead wrist from square (or extended) to a slightly flexed position before they even get to the golf ball.
If the clubface is lagging behind and is too open on the downswing, players may start rolling their hands or forearms to square the face.
The Motorcycle drill helps you increase wrist flexion as your first move down from the top of your golf swing. This drill is built into the HackMotion app so you can work on it in real time.
This is one of the most famous wrist action drills in golf, and you can work on it in real-time using the HackMotion app.
Motorcycle Drill – Master Wrist Flexion in the Downswing
Focus on continuously adding flexion until the club reaches parallel, then smoothly complete your swing.
The Motorcycle Drill – Step by Step:
- Set Up Normally: Address the ball in your regular posture.
- Feel the Flex: As you start the downswing, gradually flex your lead wrist more (like revving a motorcycle throttle downward).
- Pause at P6: When the club is parallel to the ground (the “P6” position), check that your lead wrist has more flexion than it had at address.
- Maintain & Release: Carry that flex through impact — this helps prevent an open clubface.
- Use Slow Swings: Try half-speed swings at first to get used to the feel, then gradually increase your speed.
Use the Casting Drill to get on Plane
Casting is when your trail wrist straightens too soon in the downswing.
The clubhead outraces your hands often swinging excessively from the inside and flipping at impact. The result can be an in to out path with weak contact that either blocks or hooks the golf shot.
To fix this issue, try the Casting Drill. This is another drill built into the HackMotion app.
Fix Your Casting with HackMotion
Train to fix casting by generating power with your core and lower body.
HackMotion Casting Drill – Step by Step:
- Slow Motion Rehearsals: Make a normal backswing, then begin the downswing by shifting weight to your lead side and rotating your hips. Avoid “throwing” the club from the top with your hands and arms.
- Maintain Trail Wrist Bend: Use HackMotion to monitor your trail wrist. Keep it extended (bent) as you start down — don’t let it straighten right away.
- Allow the Arms to Drop: Let your arms naturally fall from the top of the swing. This helps shallow the club and reduces casting or pulling the club out to in.
- Build Speed Gradually: Start with slow, controlled swings. Only increase speed once you can maintain proper trail wrist angles throughout transition.
HackMotion Tip: If HackMotion shows your trail wrist flattening too early, rehearse the transition slower and focus on preserving wrist bend longer into the downswing.
Train the Upper Body With the Hands-to-Pocket Rehearsal
Some players rotate their upper body too soon in the downswing while keeping their hands high and behind them.
This can shove the club too far inside and leave you nowhere to go but inside out for the swing path.
You may notice that the ball tends to start to the right and sometimes overdraw back left.
- Video timestamp – 7:20 – 8:40
Hands-to-Pocket Rehearsal – Step by Step:
- Go to the Top: Make a normal backswing with a full shoulder turn.
- Pause: Before rotating your shoulders aggressively, feel like you’re simply lowering your hands toward your trail-side hip or “pocket.”
- Keep Upper Body Quiet: Let your arms drop naturally while keeping your chest from spinning open too early.
- Blend in Rotation: Once your hands are lower (club near waist height), start rotating your body through the shot. This helps keep the club on-plane instead of too far inside.
- Progressively Add Speed: Begin with half-swings and slower tempo. Once you’re hitting straighter shots, gradually build to full speed.
Use the Ruler-in-the-Glove to Prevent Excessive Wrist Cupping
Even if you have a great setup and start square, the club may get “behind” your hands in the backswing, pushing you into a shallow, inside path.
Shots often miss right or hook back severely as the face angle becomes unpredictable.
- Video timestamp – 5:56 – 7:00
Ruler in the Glove Drill – Step by Step:
- Insert a Sturdy Ruler: Slide a small plastic ruler or stiff card inside your glove so it runs along the back of your lead wrist.
- Set Up: At address, you may feel light pressure from the ruler against your forearm—this is normal.
- Take It to the Top: As you swing back, focus on keeping the ruler from digging into your forearm. Too much wrist cupping (extension) will cause discomfort or bending.
- Feel a Flatter Wrist: Aim for a neutral wrist at the top of your backswing to avoid the club getting too far inside.
- Hit Slow Shots: Practice with small half-swings while keeping the ruler in place. Remove the ruler once you can consistently feel a flatter wrist position.
Final Thoughts
An in-to-out path can cause blocks, push-draws that turn into hooks, and inconsistent contact.
One of the main reasons you may struggle with this in-to-out path is your wrist position being incorrect.
Use HackMotion to measure your wrist angles and practice drills in real time to get your path more neutral.
