Golf Follow-Through: What a Proper Finish Looks Like, Why It Matters, and the Drills to Train It
If you spend most of your practice time worrying about the takeaway, the top of the swing, or the first move down, you’re not alone.
Most golfers ignore the follow-through completely, thinking that once the ball is hit, there is nothing to worry about.
Your follow-through results from everything that happened earlier in the swing. It exposes your sequencing, rotation, weight transfer, path, and even your ability to control the clubface.
When the follow-through breaks down, it’s usually because something before impact wasn’t quite right.
This guide walks you through what a proper follow-through looks like, why it matters, and how to train it with simple, actionable drills.
Proper Follow-Through in Golf (Key Takeaways)
- A good follow-through is a result of proper rotation, weight shift, and sequencing, not a pose you hold at the end of the swing.
- Finishing on your lead side with your chest facing the target is one of the best indicators of solid ball striking.
- The club should exit left (for right-handed golfers), not straight down the target line.
- The wrists should stay stable through impact and release naturally afterward—forcing the release leads to flips and timing issues.
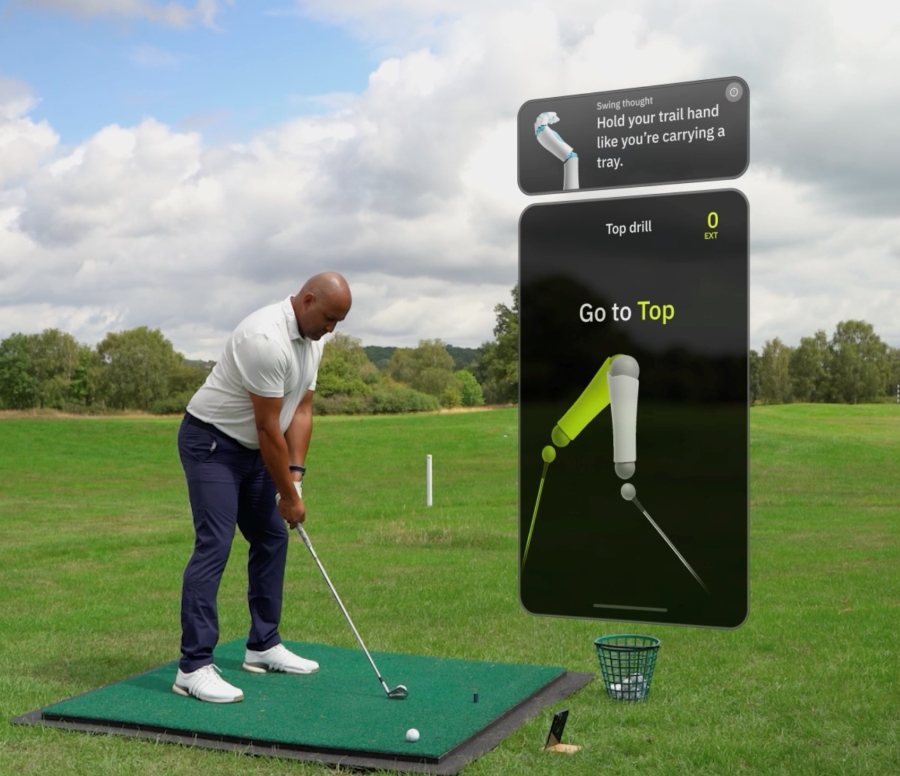
- Tools like HackMotion provide real-time feedback on wrist patterns, helping you train a consistent release.
Contents
What the Follow-Through Actually Is
The follow-through begins immediately after impact and continues until the club finishes around your shoulder height (or higher). It’s a continuation of your rotation, extension, and weight transfer.
A proper follow-through includes:
- Pressure shifting fully onto the lead side.
- Chest rotating past the ball.
- Arms extending toward the target before folding.
- Club exiting left and wrapping around the body.
- Balance through the entire finish.
Why the Follow-Through in Your Golf Swing is So Important
This is the question golfers ask all the time: “If the ball is already off the face, why does the follow-through matter?”
The follow-through tells you a lot about mechanics.
If you had a perfect swing, your follow-through would look pretty good. When it’s not good, you can learn a lot about what’s going on and why you’re losing both accuracy and distance.
For example:
- Hanging back leads to a falling-back finish.
- Early extension leads to a high, unstable finish with bent arms.
- A shut face often produces an over-rotated, whip-like finish.
- A stalled body creates a flippy, handsy finish.
A predictable, balanced, well-rotated finish is one of the strongest indicators of a repeatable swing.
The Key Elements of a Great Follow-Through
To perfect your follow-through, these are the six things you should focus on.
Some will come naturally after a great swing, but things like balance and tempo often take practice for most golfers.
Weight Transfer and Pressure Shift
The follow-through is simply the ending position of a proper weight shift. By the time the club reaches waist-high in the follow-through:
- Most of your pressure should be on your lead foot.
- Your trail heel should be light.
- You should be able to lift your back foot without losing balance.
Golfers who hang back or “flip” rarely arrive in this balanced lead-side finish. Improving this one element alone can clean up fat shots, thin shots, and path issues.
Chest and Body Rotation Through the Ball
Your chest should rotate past the golf ball, not stop or stall at impact.
A proper follow-through includes:
- Ribcage opening.
- Chest pointing left of the target line.
- Belt buckle facing the target.
- Hips and torso fully releasing.
When the body stops turning, the hands take over, and the clubface often closes or flips. This is where you lose compression, control of your ball flight, and consistency.
Arm Extension and Width
Arm extension is an aspect that golfers don’t talk about often enough. Right after impact, the arms should extend toward the target before folding.
Having that extra extension helps maintain width, avoid a chicken wing, and improve the contact on the center of the clubface.
If you want an even deeper breakdown of how the lead arm should behave, specifically after impact, see our article on the Lead Arm Position After Impact.
Club Exit and Overall Finish Position
A misconception many golfers have is that the club should travel straight down the target line. When you watch great players, you’ll notice that the right-handed golfer has the club exit left after impact.
Signs of a proper exit:
- Club moves left as the body turns.
- Handle rises.
- Trail shoulder moves down and through.
- The shaft finishes around the lead shoulder.
A club that stays too far out to the right (down the line) usually indicates a flip at impact or a blocked path. Sometimes it’s even the result of over-the-top compensation.
Wrist Behavior in the Follow-Through
The wrists are a big part of the equation of a perfect follow-through.
In simple terms:
- Lead wrist: flexed or flat at impact – extends naturally after impact.
- Trail wrist: extended at impact – gradually loses extension afterward.
You shouldn’t force the release, and you shouldn’t release early. For a deep dive into this, see Wrists in the Golf Follow-Through.
Balance and Tempo Into the Finish
A strong follow-through should feel balanced and unforced. If you can’t hold your finish for a second or two, it’s usually a sign that something in the sequence broke down earlier.
Here’s what better players do well:
- Their weight moves fully onto the lead foot.
- Their chest keeps rotating past the ball so the arms don’t take over.
- Their trail heel lifts naturally as the body turns.
- Their tempo allows the swing to flow through the ball instead of stopping at it.
If you fall backward, slide forward, or feel stuck on the trail foot, it’s a sign to revisit your rotation and pressure shift. A balanced finish isn’t cosmetic; it’s confirmation the swing moved through the ball the right way.
Drills to Improve Your Follow-Through
These drills address the entire follow-through, body, rotation, balance, and release. Drills are a great way to work on your follow-through position because they can help you feel what you need to do to hit a great shot.
For more follow-through specific drills, check out our article completely dedicated to golf follow-through drills.
HackMotion Release Drill (Waist-High to Waist-High)
The HackMotion release drill trains a consistent release without flipping or rolling the wrists.
The release drill is located in the HackMotion app, so you can work on it in real time.
Perfect Your Release with HackMotion
Fine-tune your release for consistent contact. Start with a short swing to master control before adding power.
HackMotion Release Drill – Step by Step
- Start with the club waist-high in the backswing.
- Keep the lead wrist flat or slightly flexed.
- Swing to impact and continue to waist-high on the other side.
- Use HackMotion to verify the release happens after impact.
- Build to full swings once the sequence is consistent.
Lead-Side Balance Drill (“Trail Foot Lift”)
If you are struggling with balance, the lead-side balance drill is a great one to work on.
Sometimes it’s a real test to hold your balance after a golf swing, and that can be an indicator that something is wrong. Use this as a warm-up to set your tempo for the day.
Lead-Side Balance Drill – Step by Step
- Hit a 30–50% shot.
- After contact, lift your trail foot completely off the ground.
- Hold your finish for 2–3 seconds.
- Feel chest and hips facing the target.
- Progress to full swings.
Step-Through Follow-Through Drill
The step-through follow-through drill takes some practice, and at first, you should just be doing this with a club, no golf ball.
It’s a great option for players who struggle with weight transfer. Practicing this drill should help make your swing more efficient and your weight transfer more effective.
Step-Through Follow-Through Drill – Step by Step
- Take your normal stance.
- Swing back.
- As you swing through, step your trail foot toward the target.
- Let rotation carry the body forward.
- Repeat until the motion feels fluid.
Final Thoughts
A great follow-through isn’t something you “pose” into. It’s the natural result of a well-sequenced golf swing.
When you rotate, shift pressure correctly, keep your arms extended, and let the wrists release naturally, the finish position takes care of itself.
If you want a deeper look at wrist behavior in the follow-through, specifically, check out Wrists in the Golf Follow-Through or work through the drills in Golf Follow-Through Drills. With HackMotion’s real-time wrist checkpoints, you’ll know exactly why your follow-through looks the way it does and what to adjust for more consistency.