How to Practice Golf at Home – Complete Guide & Best Drills to Actually Get Better
Practicing golf at home has never been easier thanks to technology, but it’s also never been easier to practice incorrectly.
Without full ball flight or a coach watching, even dedicated golfers can spend hours repeating movements that make their swing worse, not better.
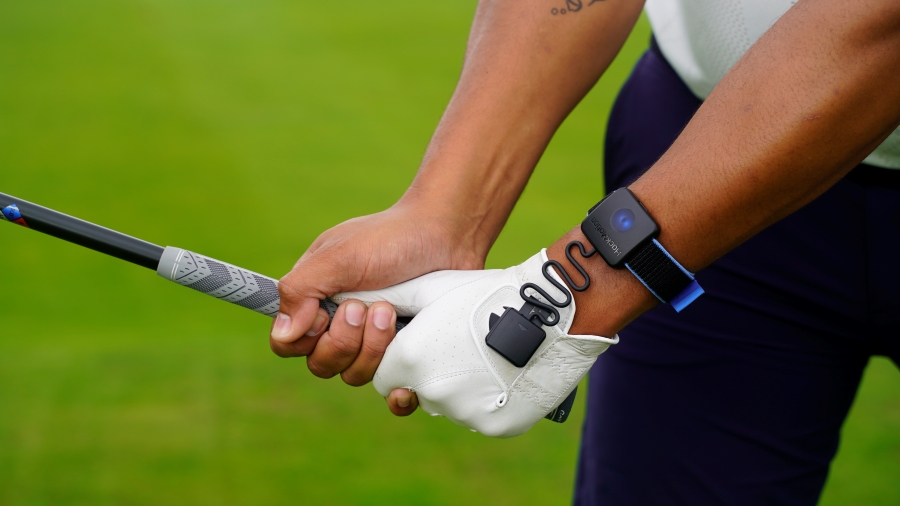
That’s why the key to productive at-home practice isn’t just time, it’s feedback. Tools like HackMotion bridge the gap between feel and real by giving you instant data on what your wrists are doing throughout the swing.
Whether you’re refining your takeaway, building a better top position, or working on putting rhythm, you can practice the right motions instead of guessing.
This guide walks you through how to structure your at-home sessions, which drills actually build skill, and how to make sure every rep moves you closer to lower scores on the course.
Practice Golf at Home (Key Takeaways)
Here are the most important things to know about practicing golf at home:
- Feedback is everything – without it, you risk training the wrong habits.
- Build a small, accessible space that encourages regular practice.
- Structure 30-minute sessions 3–5 days per week for steady progress.
- Use HackMotion biofeedback to measure wrist motion, tempo, and improvement.
- Focus only on drills that directly transfer to better on-course performance.
Contents
Create a Space You’ll Actually Use
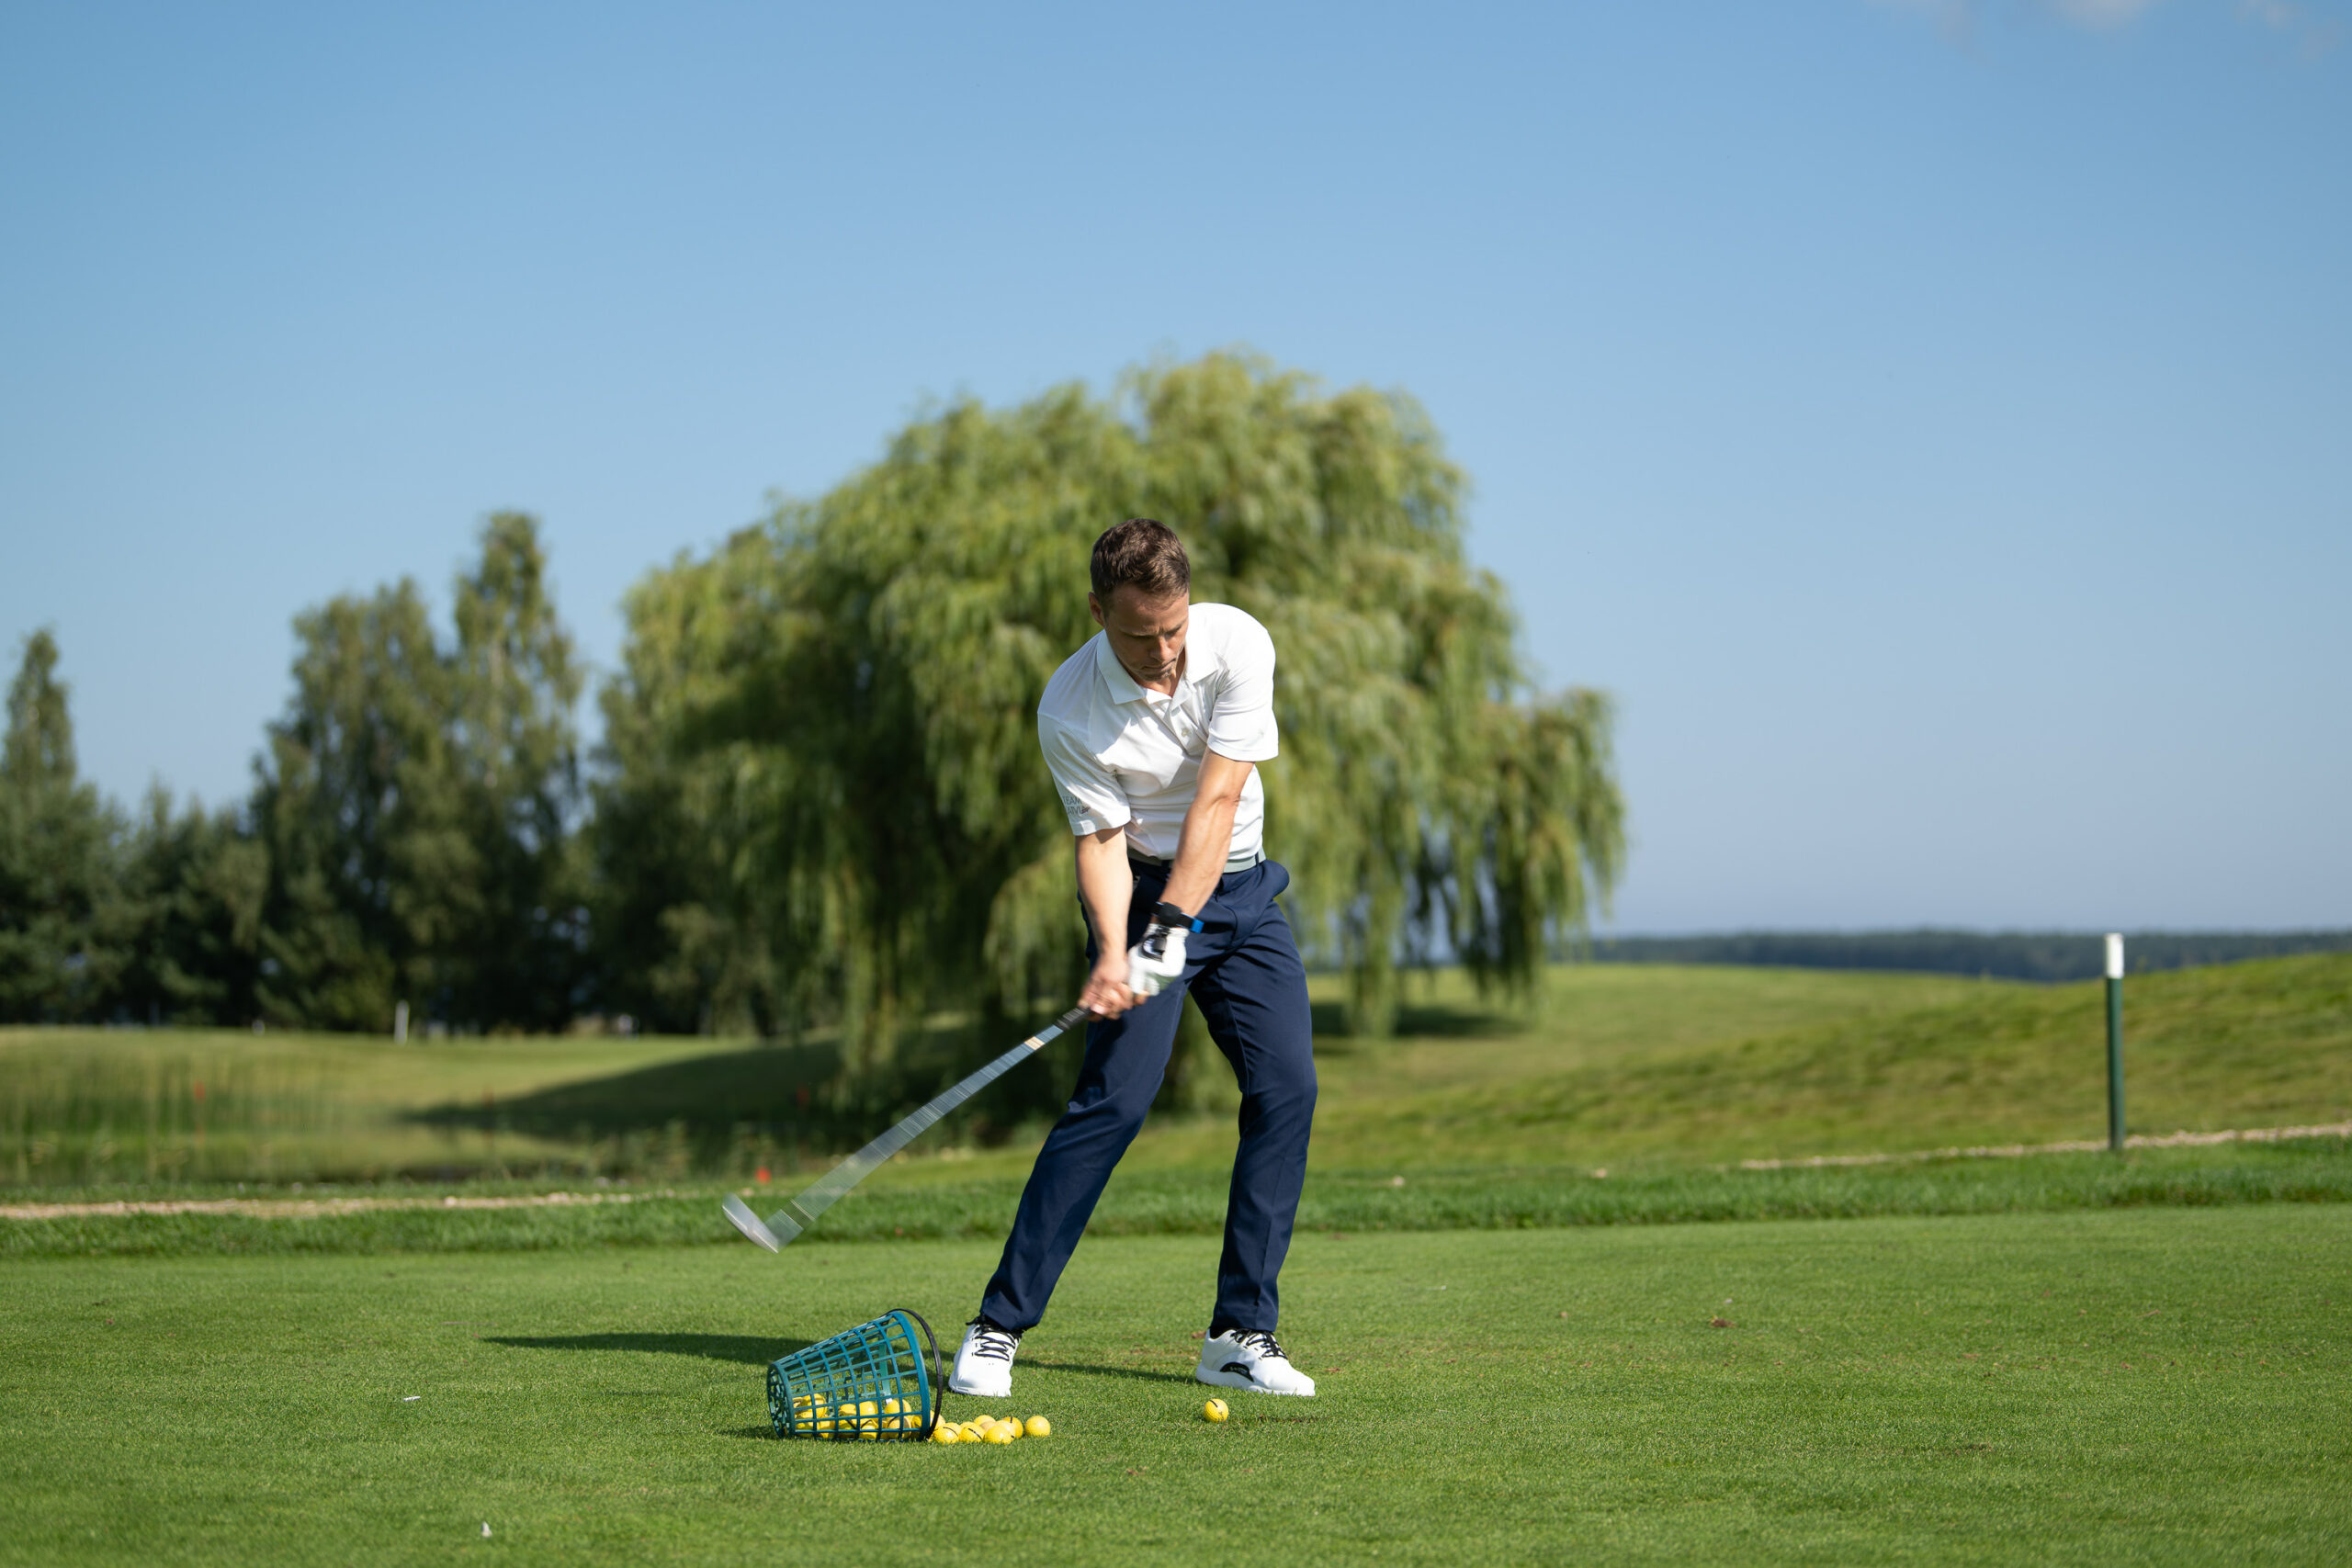
You don’t need a simulator bay or garage makeover. Create a space that’s easy to access, has enough clearance for a partial swing, and feels inviting.
Whether it’s a spare room, a patio corner, or a spot in your basement, keep your practice tools visible.
When your mat, mirror, and HackMotion sensor are ready to go, you’ll be far more likely to put in consistent reps.
Pro Tips
- Keep your HackMotion sensor charged and stored near your hitting mat.
- Use a full-length mirror or your phone tripod for visual feedback.
- If space allows, set up a small chipping net and putting mat so you can mix in different skills.
If your practice space feels like a place you want to be, you’ll use it daily and that’s how improvement compounds.
Don’t let your game freeze this winter — get better from home! Try our Off-Season Golf Training Plan with customized drills and routines for consistent year-round improvement.
Structure Your At-Home Practice Sessions
Random practice rarely produces real progress. Instead, structure short, focused sessions that cover key movement patterns.
Sample 30-Minute Routine:
- 5 minutes: Mirror warm-up and body movement rehearsals.
- 10 minutes: Full swing drills with HackMotion feedback.
- 5 minutes: Short game (chipping or pitching).
- 5–10 minutes: Putting drills.
- 5 minutes: Review HackMotion or video feedback.
Rotate your focus daily. Spend one day on takeaway mechanics, the next on impact conditions, and another on putting rhythm.
The goal is to get consistent feedback, not just repeat the same swings.
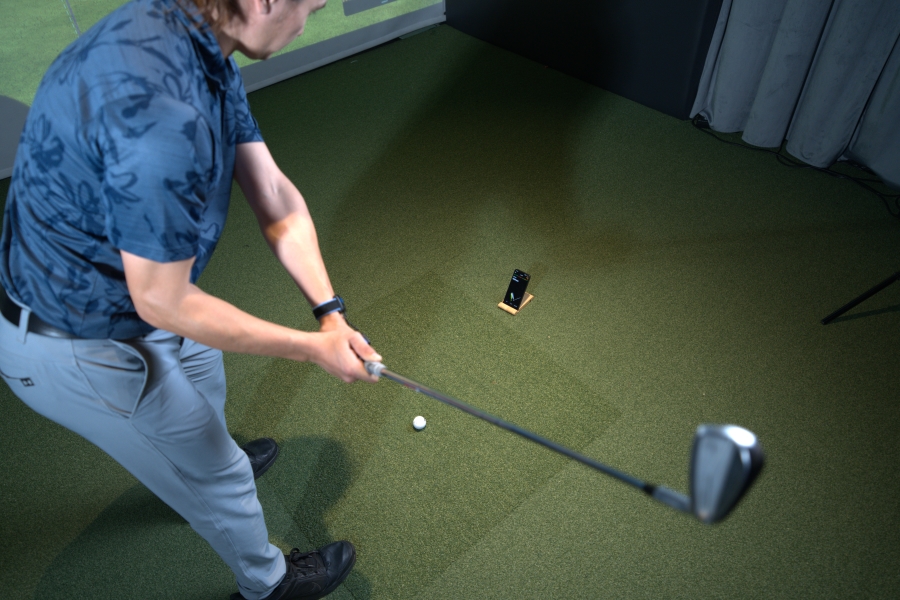
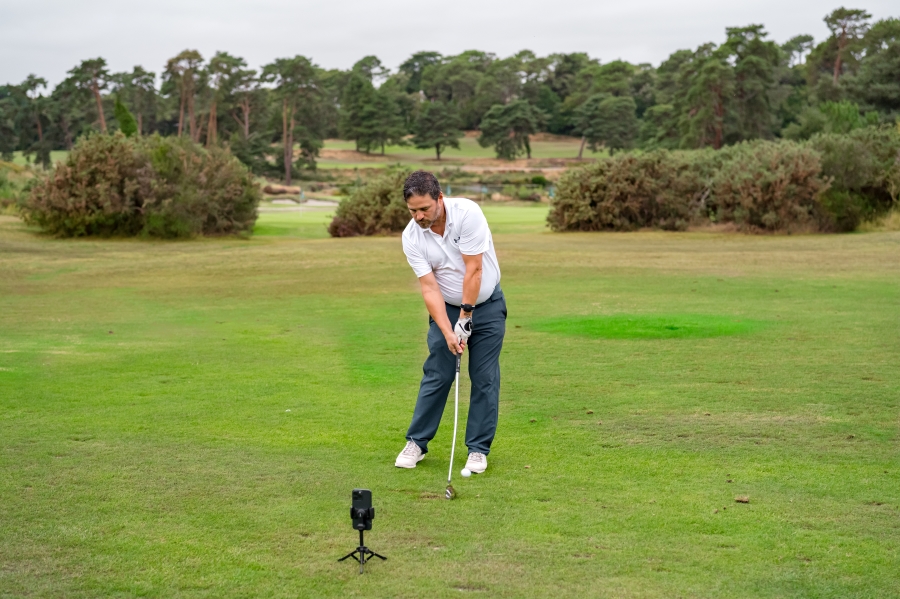
Full Swing Practice at Home
When you practice at home, you can’t rely on full ball flight to tell you what’s happening. You need feedback that measures movement quality.
That’s where HackMotion becomes essential. It gives you real-time biofeedback on wrist angles, ensuring your practice is based on accurate positions rather than feel alone.
These drills build wrist control and improve your clubface awareness through every phase of the swing. They can all be done at home.
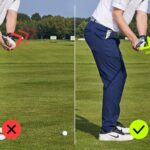
Drill 1: Stable Wrist Takeaway
Trains a flat or slightly flexed lead wrist early in the backswing to prevent the face from opening and the club from rolling inside.
Stable Wrist Takeaway – Step by Step
- Set up with a mid-iron or wedge.
- Turn on HackMotion and select either the stable wrist takeaway drill or the inside takeaway drill. Both allow you to train the takeaway positions.
- Start in your normal address position.
- Take the club back to first parallel and check the takeaway position.
- Continue the backswing and maintain proper wrist position.
- Repeat until you consistently keep the wrist stable and the clubface square.
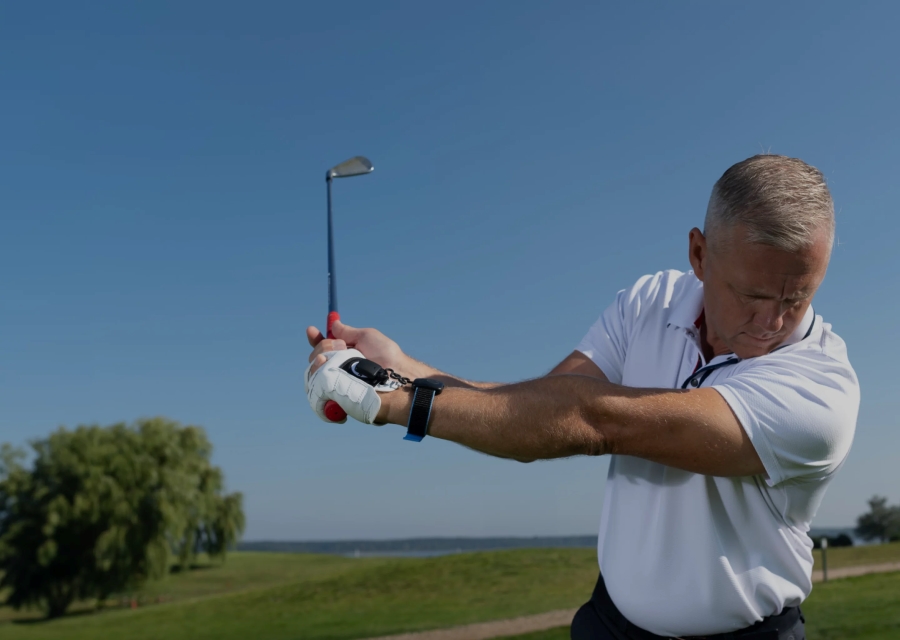
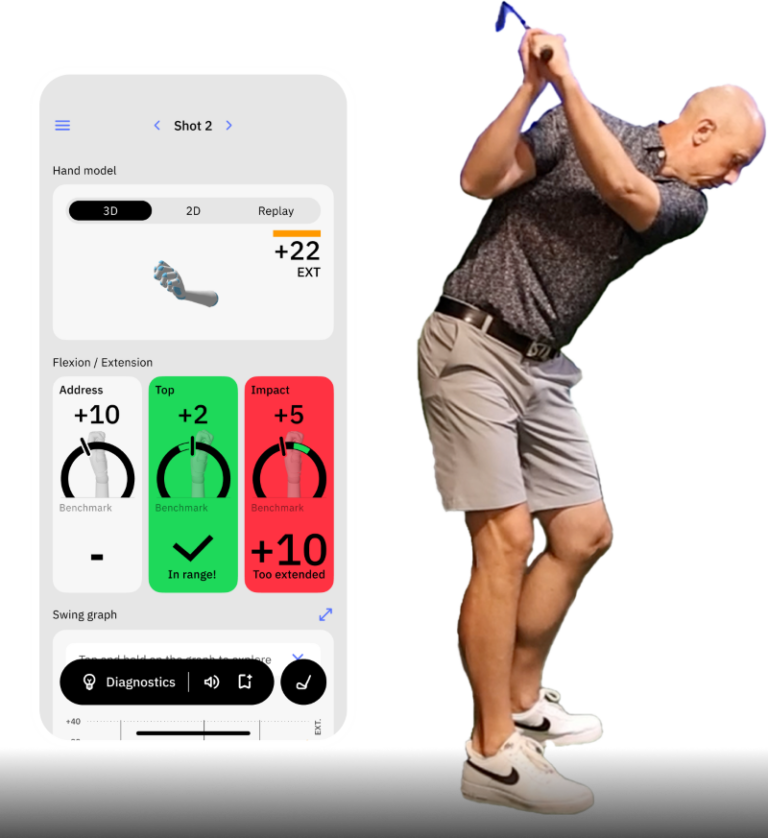
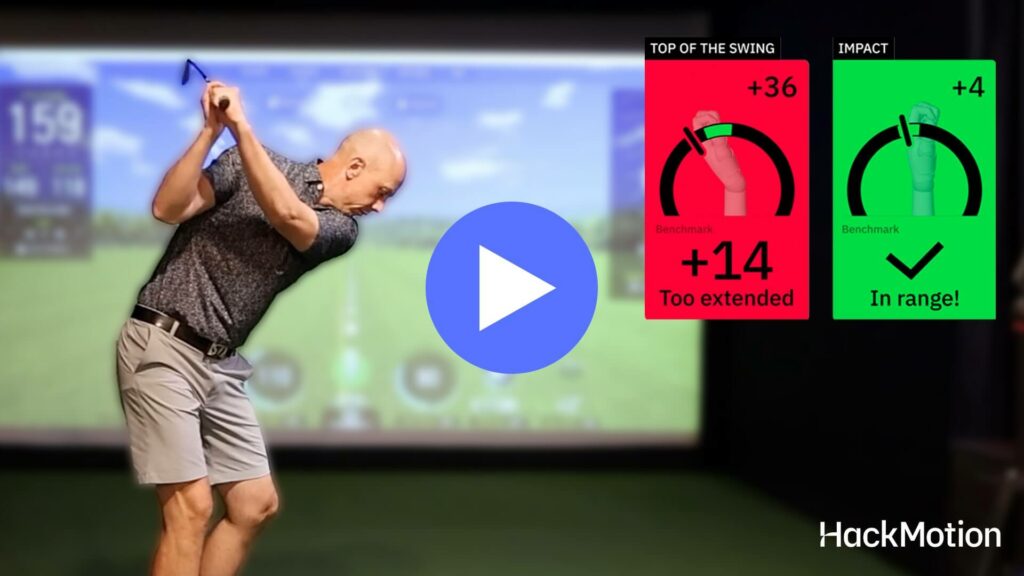
Drill 2: Top Drill
Builds awareness of the proper wrist position at the top of the swing for better control of clubface angle and ball flight.
Getting the top of the swing in the correct position allows you to go through the ball at full speed.
Top Drill – Step by Step
- Select Top Drill in HackMotion.
- Take a slow backswing and pause at the top (P4).
- Use the live graph or feedback sound to find your ideal lead wrist position slightly flexed, not cupped.
- Hold the top for 2 seconds, then swing through slowly.
- Repeat 10 times, experimenting with over-bow and over-extend to learn how to control the face through impact.
Drill 3: Motorcycle Drill
The most popular wrist-action drill is the HackMotion motorcycle drill. It teaches lead wrist flexion through impact, eliminating the flip and improving compression.
Motorcycle Drill – Step by Step
- Set HackMotion to the Motorcycle Drill
- Take your club to the back of your golf swing.
- On the downswing, continually add lead wrist flexion so that you can add shaft lean and keep the clubface square.
- Blend this motion into faster swings and experiment with how much flexion to add on the downswing.
- Check your HackMotion graph to confirm consistent flexion at impact.
Putting Practice at Home
Putting is the easiest skill to train indoors and also the most overlooked. Many golfers think that because they don’t have a golf green to work with, they can’t practice their putting, and that’s not the case.
Even five minutes a day with these putting drills can make a massive difference in distance control and consistency.
You can use a simple carpet, a putting mat, or a mirror station. The key is to combine feel and feedback.
With HackMotion, you can measure wrist rotation, tempo, and symmetry so you know whether your stroke is improving.
Drill 1: Rotation Control Drill
The rotation control drill trains consistent wrist rotation throughout the stroke, keeping the putter face square through impact.
Putting Rotation Control Drill – Step by Step
- Open HackMotion to the Rotation Control Drill with wrist rotation tracking.
- Set up your putter on a flat surface or mat.
- Make 10 strokes, keeping the putter face square, and watch live feedback for over-rotation.
- Practice adjusting until rotation readings stay within your ideal range.
Goal: Eliminate face twist through impact for straighter, more predictable putts.
Drill 2: Timing (Rhythm) Drill
The timing drill develops a smooth, repeatable putting tempo, which is crucial for distance control.
Putting Timing (Rhythm) Drill – Step by Step
- Open the timing drill in the HackMotion app.
- Practice without a ball, syncing your stroke to the metronome.
- Hit a putt to see if your stroke matched the beat.
- Maintain consistent speed through impact; don’t accelerate or decelerate abruptly.
- Try to complete five or ten in a row.
Drill 3: Ratio Drill
The ratio drill improves tempo balance between backswing and follow-through for smoother distance control. If you struggle with distance control, this is a drill you’ll want to use.
Putting Ratio Drill – Step by Step
- Open HackMotion’s ratio drill.
- Practice first without a ball, syncing your stroke to the “one one thousand” guidance.
- Hit a putt to see the backstroke to downstroke ratio.
- Try to get that 2:1 ratio.
Chipping and Pitching Practice at Home
You don’t need a short-game area to improve your wedge mechanics. Use foam golf balls or even towels to train proper impact and wrist motion.
Use HackMotion to monitor your lead wrist at impact. A small amount of flexion prevents flipping. However, having more extension in the lead wrist can be helpful for higher pitches and sand shots.
Some of the most important work you can do is to train awareness of the wrist action.
Drill 1: Plane Chipping Drill
The plane chipping drill trains your chipping swing to stay on plane, preventing the club from moving too far inside or outside during takeaway.
This helps deliver the club more consistently and improves strike quality.
Plane Chipping Drill – Step by Step
- Place four water bottles (or similar objects) around the ball to form a narrow “swing gate.”
- Leave extra space when starting; narrow the gate as your precision improves.
- Take short chipping swings back and through, avoiding contact with the bottles.
- Use foam or airflow balls indoors for safety.
- Focus on a smooth, arcing motion with a slight wrist hinge, not a straight-line jab.
Drill 2: Toss-to-the-Bucket Drill
Here’s one that doesn’t even require a club. This drill (watch the video above) improves your short-game feel and touch.
By tossing balls underhand into a target, you learn to visualize trajectory, landing spots, and rhythm exactly what great chippers do instinctively.
Toss-to-the-Bucket Drill – Step by Step
- Take your normal chipping stance slightly open with light knee flex.
- Hold a golf ball in your trail hand and make a soft underhand toss toward a bucket or small container.
- Focus on a smooth, fluid release, just like a gentle chip shot.
- Change distances or target heights to challenge yourself.
- Once you build a rhythm, repeat the same feel with your wedge in hand.
Drill 3: Towel-Under-Arms Drill
The towel-under-arms drill builds a stronger connection between your arms and your body to prevent disjointed, hand-dominant chipping.
Great for mid-distance shots that need a little wrist hinge without losing control.
Towel-Under-Arms Drill – Step by Step
- Place a small towel under both arms, keeping it snug against your chest.
- Stand slightly farther from the ball with a wider stance for balance.
- Take the club back until your thumbs point upward, forming an “L” shape with your lead arm and shaft.
- Swing from L-to-L, maintaining torso rotation and keeping the towel in place.
- Focus on a smooth, connected motion where the wrists hinge naturally but don’t dominate the stroke.
Common At-Home Practice Mistakes
Practicing at home can fast-track your improvement but if you’re not carefully it can quietly reinforce bad habits. The difference comes down to awareness and feedback.
Without ball flight or structured feedback, it’s easy to make the same mistake hundreds of times before realizing it.
Here are the most common at-home practice pitfalls and how to sidestep them before they stall your progress.
- Practicing long sessions without focus or feedback.
- Ignoring short game and putting work.
- Using training aids incorrectly.
- Repeating motions without evaluating results.
- Expecting instant on-course improvement without consistency.
Even at home, quality beats quantity. Every swing should serve a clear purpose and provide measurable information. Incorporating your HackMotion into your practice will make this process easier for you.
Final Thoughts
Practicing golf at home can transform your game but only if you practice correctly. With HackMotion, every swing, chip, or putt gives you real data that guides improvement.
Start with short, focused sessions, track your trends, and make each movement count.
If your at-home practice still feels like guesswork, try online golf lessons near me with coaches who use HackMotion to give clear, real feedback.