The Lead Wrist in the Golf Swing: Your Key to Consistency
The lead wrist (left wrist for right-handed golfers, right wrist for left-handed golfers) greatly influences ball flight and contact quality.
As your main connection to the club, your wrists control how the clubface moves from address to impact.
In this guide, you’ll learn precisely how the lead wrist should move, why a flat (or slightly flexed) lead wrist is ideal for most amateurs, and how to use HackMotion to get real-time feedback for quicker results.
Lead Wrist in the Golf Swing (Key Takeaways)
A correctly positioned lead wrist can transform your ball striking, promote a consistent clubface, and simplify your golf swing. Here are the main points you need to remember:
- Flat or Slightly Flexed at the Top: Keeps the clubface close to square, removing the need for late manipulation.
- Flat or Slightly Bowed at Impact: Delivers forward shaft lean and solid compression for cleaner, more powerful shots.
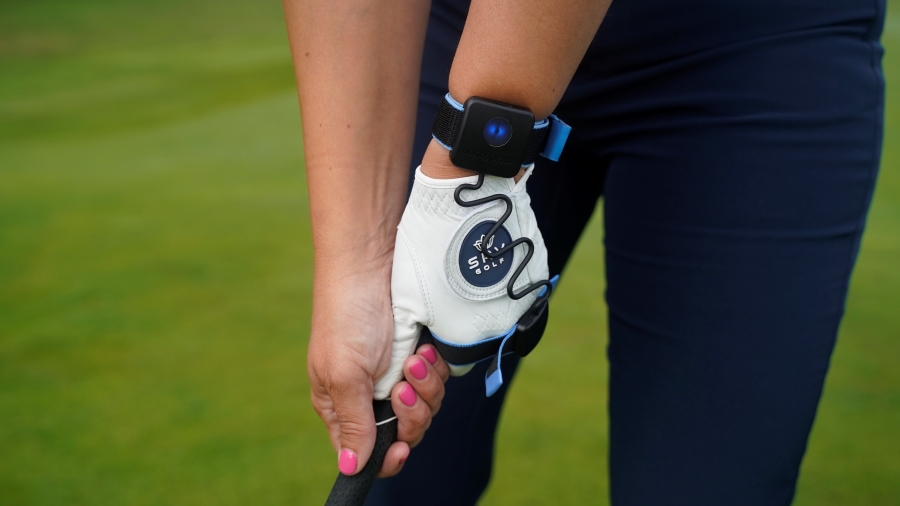
- HackMotion Sensor = Rapid Feedback: Use instant audio or visual alerts to learn and ingrain proper wrist angles quickly.
- Simple Drills, Big Changes: Combine HackMotion with basic moves like the Motorcycle Drill or Static Top Drill to build muscle memory and get your lead wrist position perfect.
Prefer video? Check out Rob Cheney’s breakdown of the lead wrist in golf.
Contents
Why the Lead Wrist Matters
Your clubface angle at impact determines about 80% of your shot direction.
Because your hands and wrists are the only part of your body directly touching the club, paying close attention to your lead wrist is critical.
A well-controlled lead wrist:
- Promotes a square clubface from takeaway through impact.
- Lets you compress the ball properly to maximize distance.
- Simplifies your swing by reducing compensations and manipulations.
Wrist Definitions You Should Know
If you want to take a deep dive into the way the wrists can move in the golf swing, check out our full article on wrist action in the golf swing.
Here are some basics to understand for now:
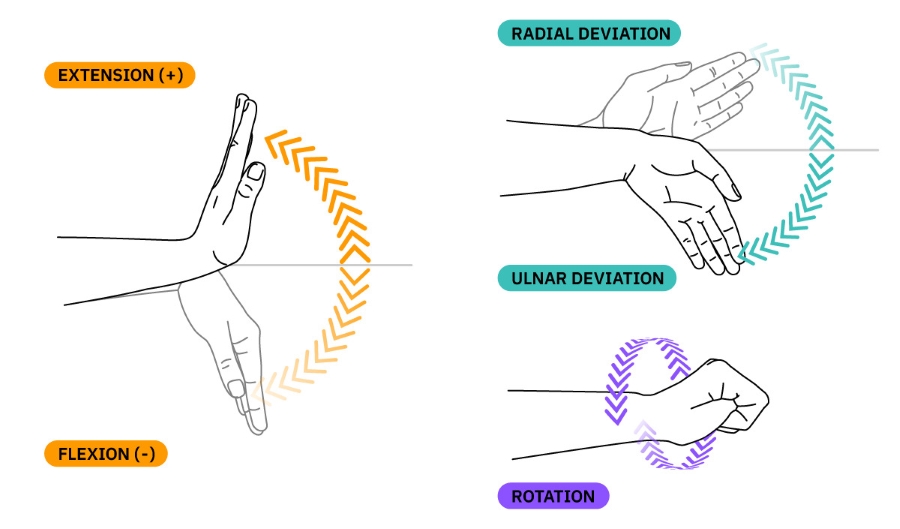
- Extension (Cupped Wrist): The back of your hand bends toward your forearm, opening the clubface.
- Flexion (Bowed Wrist): Your palm moves toward the underside of your forearm, closing the clubface.
- Radial Deviation: Wrist hinges upward (toward your thumb).
- Ulnar Deviation: Wrist unhinges downward (toward your pinky).
Ideal Lead Wrist Positions in the Golf Swing
To determine the perfect lead wrist position throughout the golf swing, we need to start at address and work through the most important areas of the game.
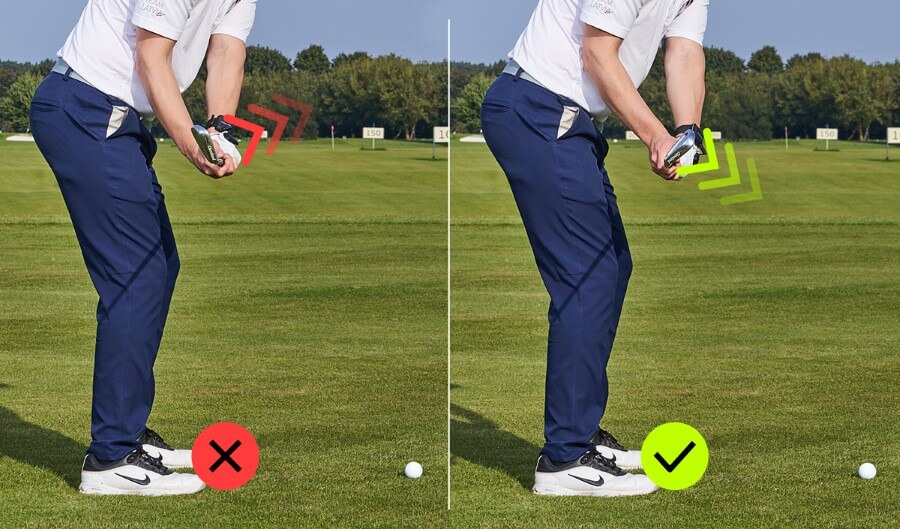
Address
Wrist position at address is not universal across all great golfers.
The way you grip the club and your physical ability will impact the amount of extension/flexion in the lead wrist at impact. It’s common to have a slight extension at setup (5–15°).
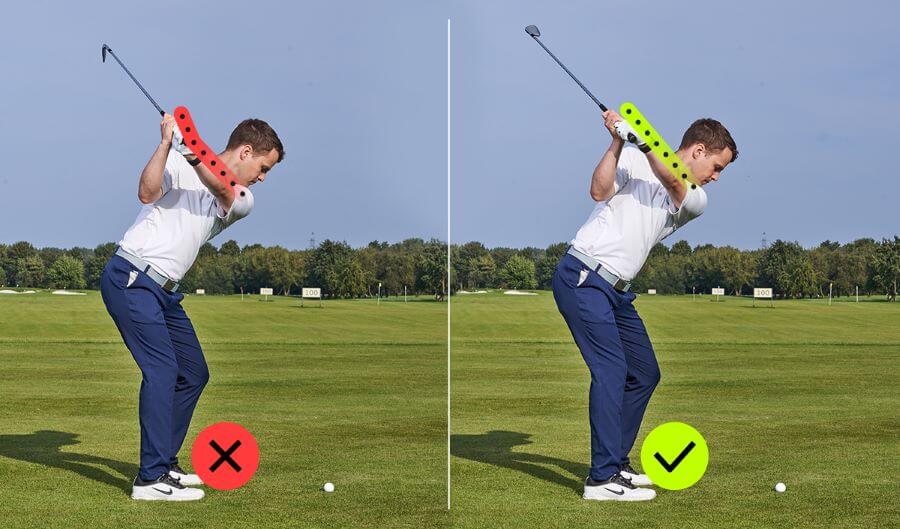
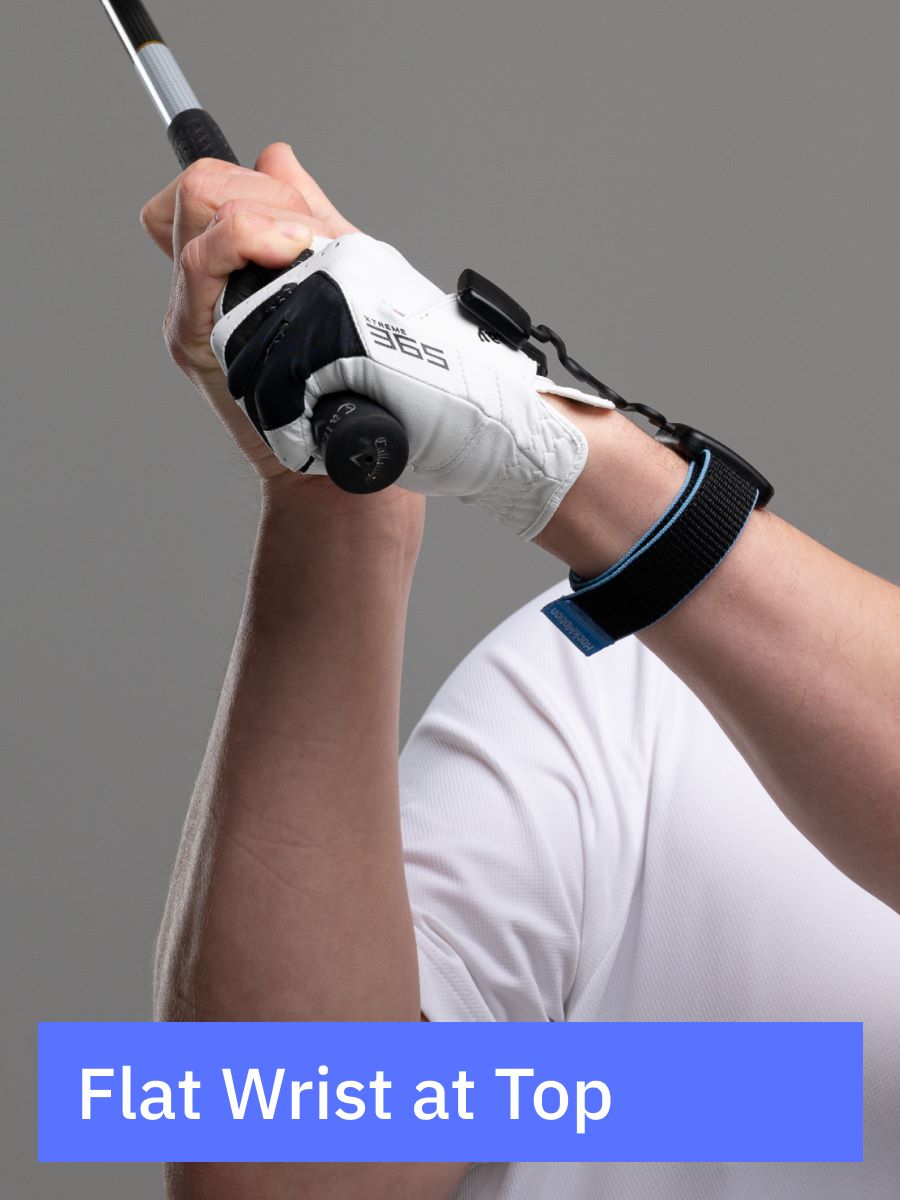
Top of Backswing
For most amateurs, a flat or gently bowed lead wrist is the simplest way to keep the clubface square.
Yes, pros like Jon Rahm or Dustin Johnson have a more pronounced bow, but they match it with exceptional rotation and timing.
Most amateur players should aim for a flat lead wrist at the top of the backswing.
Transition and Downswing
The most important part of the transition is to ensure you are never adding extension and cupping your wrist.
The goal is to keep the wrist flat or move slightly toward flexion (slightly bowed). This will keep the clubface square.
When the clubface is too open (extended lead wrist), it opens the face too much.
Impact & Early Follow-Through
Strive for a flat or slightly flexed lead wrist at impact with forward shaft lean. Immediately post-impact, the wrist will begin to extend.
Always avoid flipping the club before you get to the ball; maintain that lead wrist flexion through impact.
Drills to Improve Your Lead Wrist Position
The lead wrist position is a difficult thing to think about while you are practicing. It’s much easier to feel what the lead wrist should be doing.
These three drills should help you feel the proper wrist action in your swing and improve at a faster pace.
Motorcycle Drill
The motorcycle drill is probably the best wrist action drill for golfers looking to make a more consistent impact.
With the motorcycle drill, you’ll feel exactly what it takes during transition to reduce cupping and get a square clubface at impact.
Motorcycle Drill – Step by Step
- Take your normal setup.
- Swing to the top of the backswing.
- As you start the downswing, feel as if you’re revving a motorcycle throttle with your lead hand. This applies bowing (flexion) instead of cupping (extension).
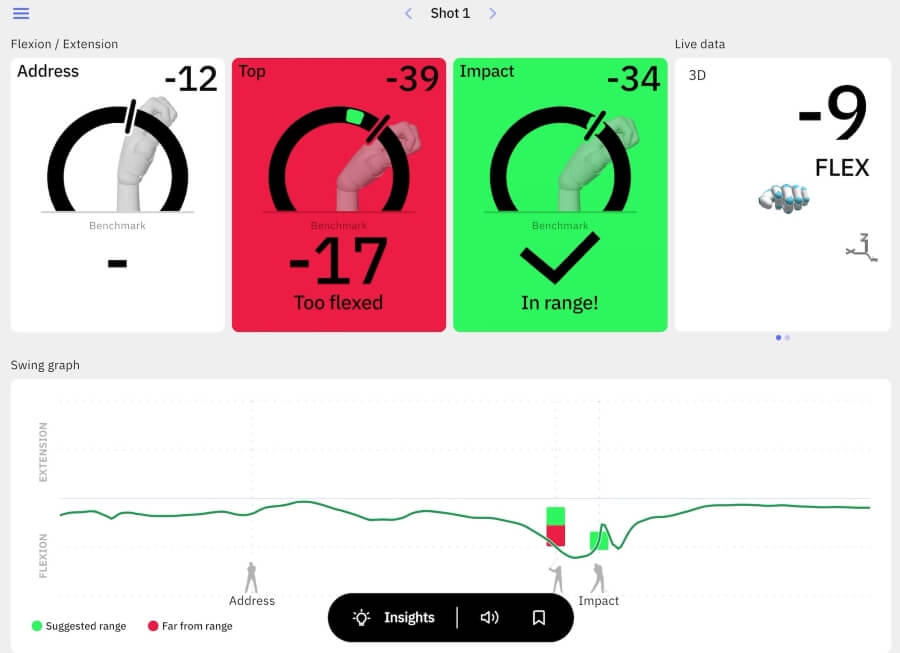
- Use HackMotion to get instant feedback as to if you are maintaining the correct wrist position.
Static Top Drill
The Static Top Drill is a slow motion way to work on the position at the top of your backswing.
If you don’t have the correct position at the top, you’ll rarely get the correct position at impact.
Static Top Drill in HackMotion
By working on the Static Top Drill, you can create muscle memory and achieve a flat lead wrist at the top of the backswing.
Static Top Drill – Step by Step
- Swing slowly to the top and pause.
- Look or feel for a flat or slightly bowed lead wrist, then check HackMotion data to see if you are in the green zone.
- Make micro-adjustments until you’re at or near your ideal angle.
- Start again at the address position and repeat this move 10 times.
Release Drill
One of the more difficult concepts for golfers to figure out is the release. The wrists will impact your ability to release the club properly.
The release drill ensures you don’t flip the clubhead too early; it also helps you maintain your wrist angles through impact.
Perfect Your Release with HackMotion
Fine-tune your release for consistent contact. Start with a short swing to master control before adding power.
HackMotion Release Drill – Step by Step
- Take a half-backswing with a flat or slightly flexed lead wrist.
- Move down to impact, focusing on retaining that flat or bowed position.
- Use HackMotion’s feedback to ensure you don’t cup (extend) too early.
- Repeat 10 times and then work on taking bigger swings with more speed.
Key Feel: Keep the handle leading past impact, delaying wrist extension until after the ball is struck.
Troubleshooting Your Lead Wrist
If you’re unsure whether your lead wrist is causing issues in your game, try the HackMotion Swing Diagnostics (Guided Practice feature) in the app.
You’ll learn which areas of your swing have the most issues in wrist position. The HackMotion app will then recommend drills and practice to help you.
Here is a basic table to help you know how to fix lead wrist related issues in the golf swing.
| Issue | Likely Wrist Position | Recommended Drill |
|---|---|---|
| Topping or Thin Shots | Excessive extension (cupped) at impact | Release Drill |
| Hooks or Pulls | Too much flexion (bowed) at impact | Motorcycle Drill |
| Weak Fades or High Slices | Maintaining extension (cupped) through swing | Motorcycle/Static Top |
| Fat or Heavy Shots | Early casting (losing wrist angles) | Release Drill/Static Top |
| Inconsistent Direction (Push/Pull) | Fluctuating wrist angles in downswing | Static Top + HackMotion Feedback |
Conclusion
Focusing on your lead wrist is one of the fastest ways to improve your ball-striking and consistency.
A flat or slightly flexed lead wrist at the top helps square the clubface while retaining that flat or bowed position through impact ensures better compression and predictability.
You can fix your lead wrist position without measuring it and collecting data, but it’s slower progress. Use HackMotion for data-driven feedback.