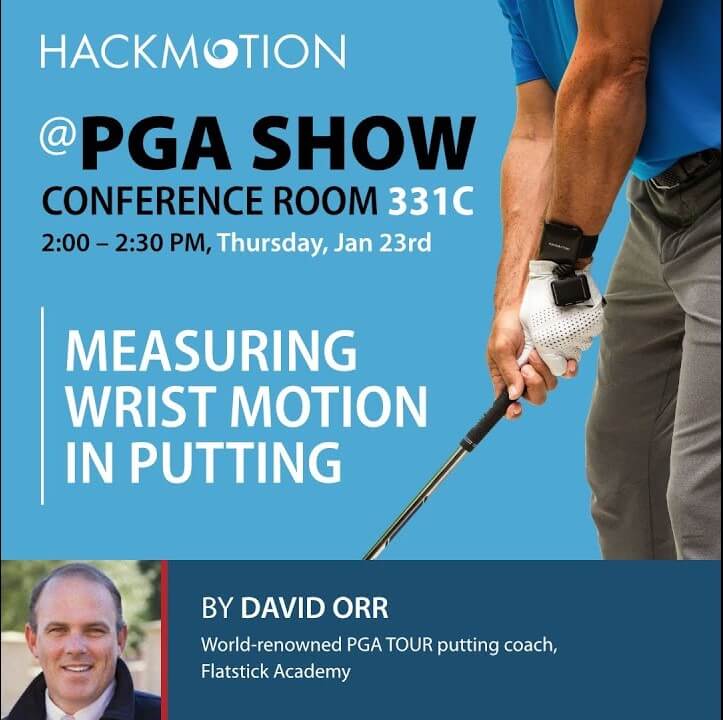
Measuring Wrist Motion in Putting – 5 Putting Technique Insights from David Orr
Putting techniques, drills, and strategies are helpful regardless of your handicap. Coach David Orr has worked with some of the best putters on the PGA Tour. He has made an extensive analysis of his 3D data using the HackMotion wrist sensors.
His expertise in biomechanics and wrist mechanics is an excellent source of information for anyone looking to understand a bit more about putting technique. In addition, he offers insights that allow you to make real changes to your golf game today.
Key Takeaways
If you don’t have time to watch the video from David Orr and read through his techniques and data insights, here are his key takeaways.
- Absolute values will vary from calibration to calibration and player to player; the most important thing to look for is the pattern being followed.
- Test wrist motion from 10, 20, and 30ft in order to get the data and information you need.
- All golfers have wrist motion in their putting stroke, even if they feel like they are leaving the wrists out of it. There is always wrist motion!
- From less than 10ft, it’s more likely to have no wrist motion.
How to Optimize Wrist Motion to Improve Your Putting Technique
Look at this video from David Orr and then read through some of his best tips and discoveries he has made through the years. Wear your HackMotion, collect some initial data, and then use these strategies to get you to the next level.
Tip 1: Avoid Excessive, Unnecessary Wrist Motion
To work on your putting technique in golf, measure the wrist motion from varying distances: 10ft, 20ft, 30ft. David Orr has worked with and measured the wrist motion of some of the best putters in the world.
Based on his insights, no players have zero wrist motion from all 3 distances tested. There is minimal wrist motion from less than 10ft only.
However, the goal is to avoid unnecessary wrist movement, as it can be hard to control.
Tip 2: Analyze the Motion, Not the Position
In putting, every degree of wrist angle change can affect the accuracy of your putt.
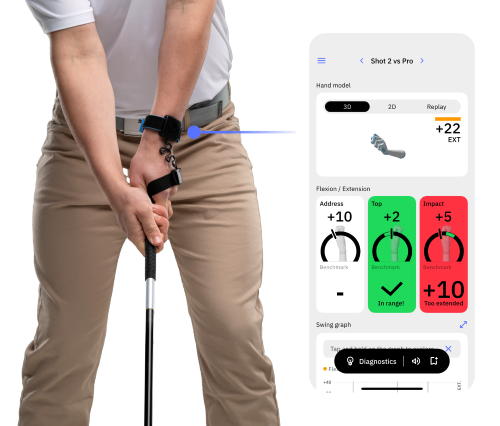
But you should note that the absolute values of wrist angles depend on the player’s setup position, grip type, and how you have calibrated the HackMotion sensor.
Therefore, in putting it is essential to look at the wrist motion throughout the stroke and examine the wrist motion graphs from the HackMotion sensor.
Start with individual wrist motion first (for example, extension/flexion), then all look at the different motions together.
The goal should be to develop a functional and consistent wrist motion in your stroke.
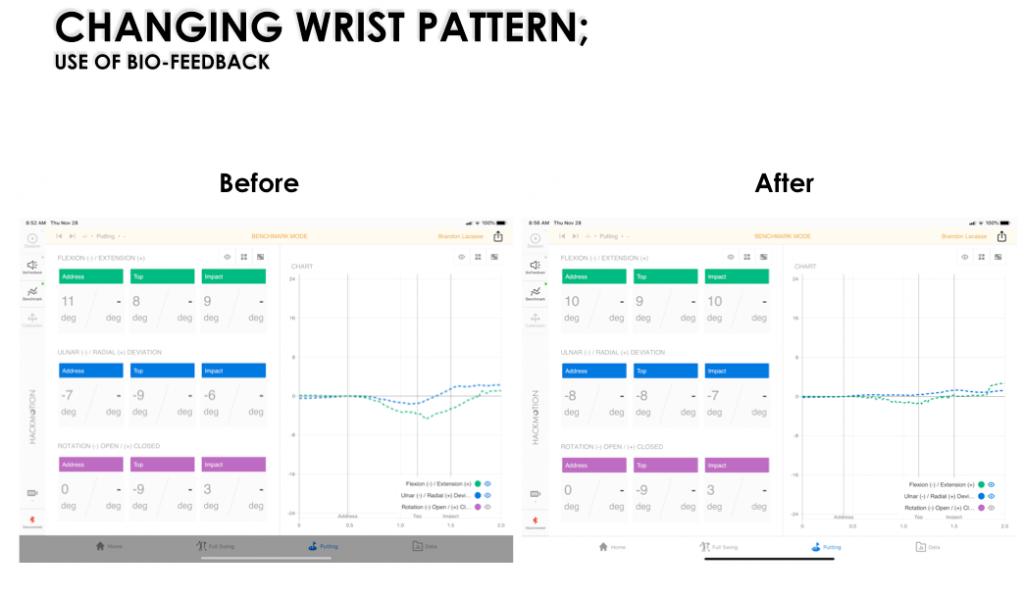
Tip 3: Use Biofeedback to Improve Your Putting Technique
Setting biofeedback (audio signal) range effectively controls wrist motion and decreases it if needed.
It is specifically designed to teach the feeling of the wrist during the putting stroke. Instead of physically limiting the movement of the wrist, the biofeedback plays a sound, thus letting us know when the player is getting out of the suggested range of the movement.
Take a look at before and after data from a student of David Orr. There is less unnecessary wrist motion after working with biofeedback. HackMotion collected data showing that by using biofeedback, players can improve significantly even after a short lesson.
Tip 4: Follow the Sequence of Great Putters
Take a look at Brad Faxon’s lead wrist data broken down into parts. Pay attention to the sequencing of wrist motion – rotation, ulnar deviation, and flexion.
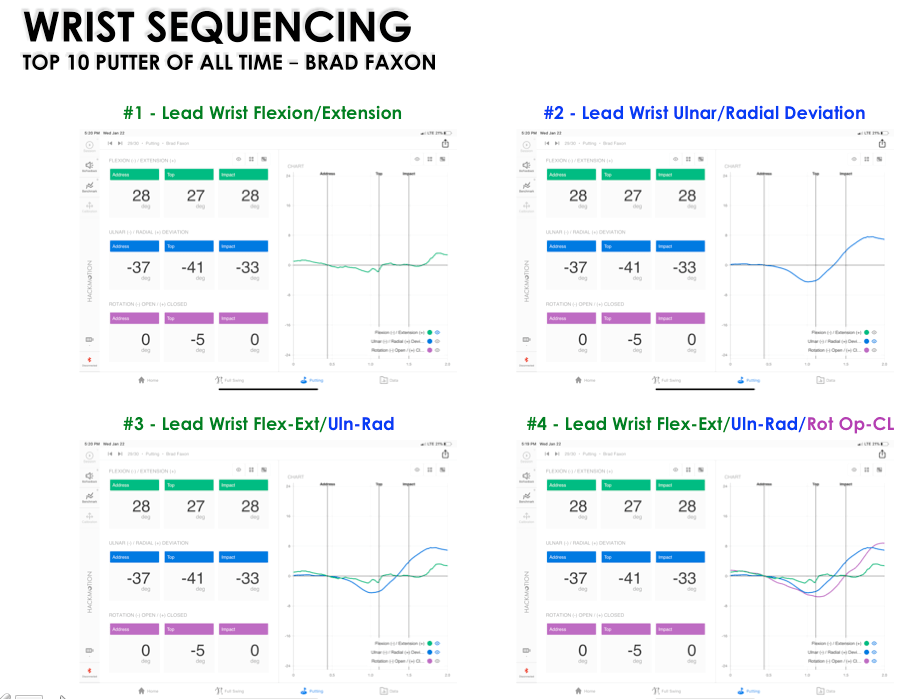
Since some wrist motion is inevitable, it is very important to understand if the wrist motion pattern is functional or non-functional.
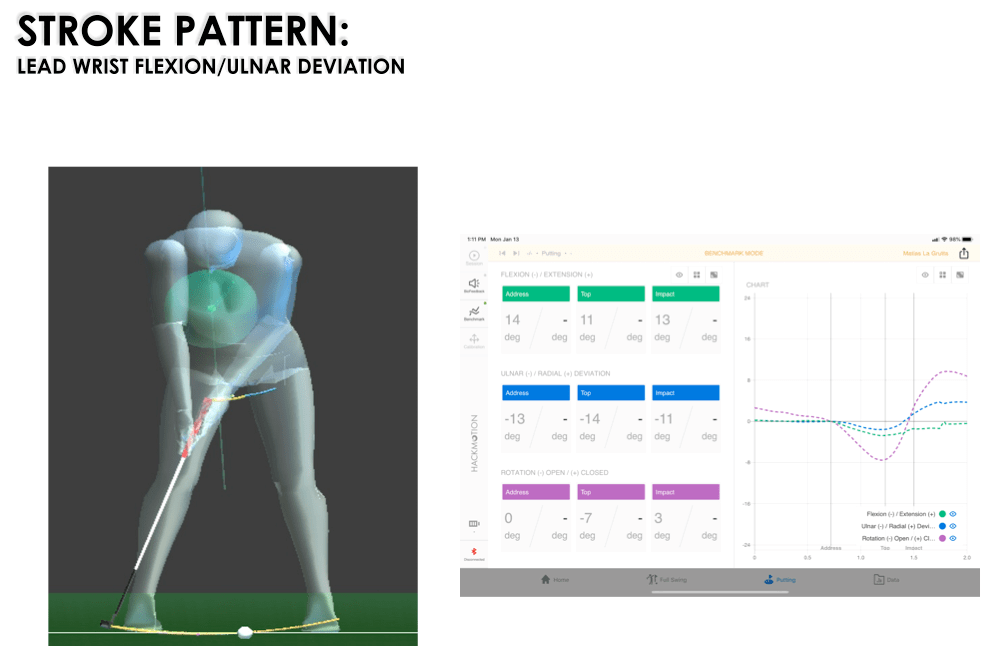
Here is an example of a FUNCTIONAL PATTERN – lead wrist moves into flexion and ulnar deviation during a backswing. The green and Blue graph lines are both moving in a negative/downward direction.
Tip 5: Keep Extension in the Backswing to a Minimum
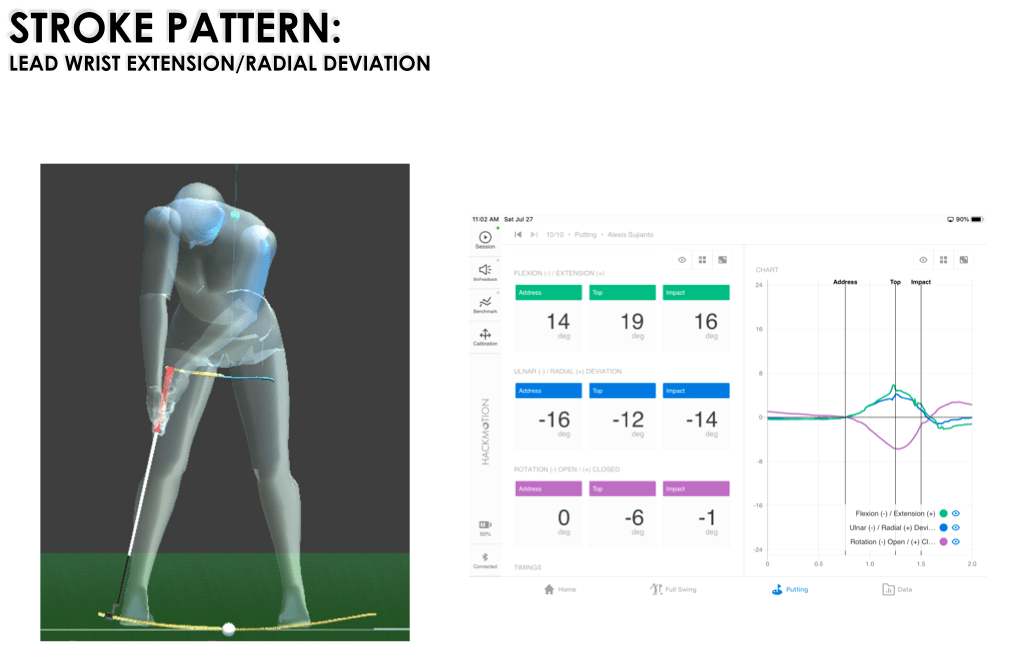
Here is an example of a LESS FUNCTIONAL pattern – the lead wrist moves into extension and radial deviation during the backswing.
It’s much more challenging to play from this position. The green and Blue graph lines are both moving in a positive/upward direction.
Final Thoughts
David Orr gives us the data and information we need to make connections between what the professionals are doing and what the amateurs are doing.
The biggest takeaway is to ensure you use your HackMotion data to track patterns. It’s normal to have wrist action in the golf swing; minimal wrist action is best when it comes to putting.