Supination in the Golf Swing: What It Is, Why It Matters, and Drills to Train It
Most golfers have heard words like supination, pronation, and forearm rotation and immediately felt their brain shut down.
Supination is just how your lead arm and wrist rotate so the clubface can come back to square. It’s happening in every good golf swing you see.
You don’t need a biomechanics degree to understand it, but you do need a basic picture of how it works if you want more control over your start line and curve.
In this guide, we’ll keep it practical: what supination actually is, where it shows up in the swing, how it pairs with your wrist motion, and a few easy drills (including one with HackMotion) to help you train it.
Supination in the Golf Swing (Key Takeaways)
- Supination is rotation. In the golf swing, it’s your lead forearm and wrist rotating in a way that helps the clubface square up through impact.
- Both wrists and forearms are involved. When one forearm is supinating, the other is pronating. Your wrists are turning with them, not hinging up and down.
- Too little supination (and rotation) usually leaves the face open – balls start right and stay right. Too much, too fast tends to slam the face shut – pulls and hooks.
- Supination works best when it’s blended with a good lead-wrist pattern: losing extension in the takeaway, staying stable to the top, then adding flexion in transition.
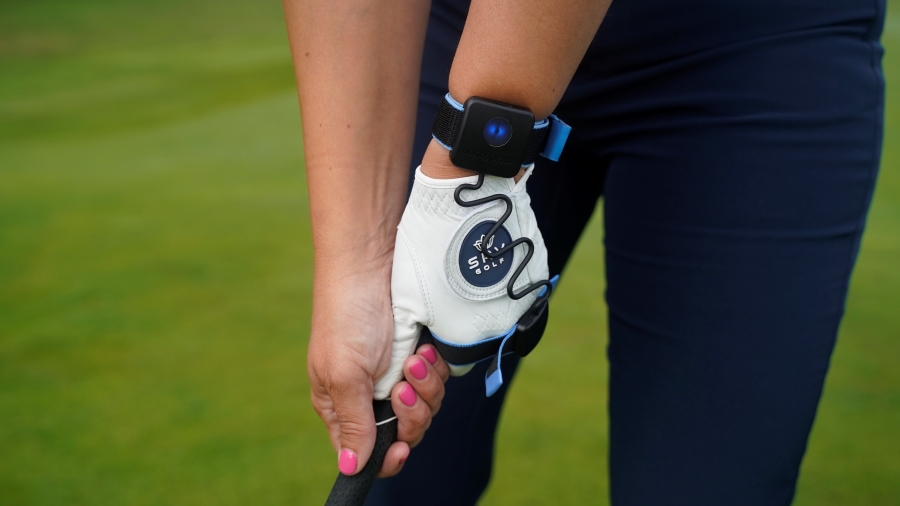
- HackMotion lets you see how your wrists are rotating and flexing so you’re not guessing about your release pattern.
- Simple drills can help you feel more (or less) rotation and match what you feel to what your HackMotion data is actually showing.
Contents
- What Is Supination in the Golf Swing?
- How Supination and Wrist Motion Show Up in Your Swing
- Why Supination Matters for Clubface Control (And Ball Flight)
- How Much Supination Do You Actually Need?
- How Supination Works With Lead-Wrist Flexion
- Supination & Wrist Rotation Drills to Improve Clubface Control
- Common Mistakes to Avoid
- Final Thoughts
What Is Supination in the Golf Swing?
In simple terms, supination is rotation.
For a right-handed golfer:
- Your lead arm (left arm) and wrist are supinating when they rotate in a way that helps the clubface square or close.
- At the same time, your trail arm (right arm) is doing the opposite motion (pronation).
A few “non-golf” pictures that help:
- Turning your lead hand so your palm faces more up is a supinating motion.
- Think of turning a doorknob, or gently skipping a stone – your lead arm and wrist are rotating, not just hinging.
In the swing, this rotation is layered on top of everything else you’re doing with your body and wrists.
You’re not just supinating in isolation; it’s working together with your lead wrist flexion/extension, and your body turn.
How Supination and Wrist Motion Show Up in Your Swing
If you are someone who needs to see/feel how supination impacts your game (instead of just reading about it one of the easiest ways is to try this:
- Stand tall, out of your golf posture.
- Hold a mid-iron in front of you with the shaft level to the ground.
- Make small “swings” back and through, trying to keep the shaft level the whole time.
If you keep the shaft level, the only way the club can move around you is if your forearms and wrists rotate:
- In the backswing, your lead forearm and wrist rotate one way, your trail forearm and wrist rotate the other.
- In the downswing and follow-through, they keep rotating back the other direction so the face can return to square and then release.
When you bend back into your normal golf posture and add your usual side-bend, that same motion suddenly looks like a normal backswing and follow-through.
Why Supination Matters for Clubface Control (And Ball Flight)
Forearm and wrist rotation are a big part of how the clubface gets back to square. We know that every clubface rotates throughout the golf swing, and without supination, it would not be possible to square the clubface completely.
For a right-handed golfer:
- If you don’t rotate enough (not enough supination of the lead arm/wrist), the face tends to stay open. You’ll see:
- Shots starting right of the target and staying there.
- Weak fades or slices.
- If you rotate too aggressively or too late, the face can close too quickly. You’ll see:
- Pulls or pull-hooks.
- Shots starting left or starting on line and diving left.
There’s no one “perfect” amount of rotation. Instead, you’re trying to find a way to manage your body turning, your forearms and wrists rotating and an overall squaring of the clubface to create speed.
If you want a deeper dive into how the wrists control the face, read our full guide on wrist action in the golf swing and how to square the clubface more consistently.
How Much Supination Do You Actually Need?
The amount of supination you need in your golf swing depends on your habits and your swing characteristics.
Some players naturally use more of a body-driven release – the chest keeps turning, and the clubface looks very stable. Others use more of an arm-and-hand release, where you can see more obvious rolling of the club through the ball.
The easiest way to decide if you need more or less rotation is to look at your ball flight:
- Chronic slice / weak right miss: You probably need more rotation (and better wrist angles) through the bottom.
- Chronic pull/hook: You likely need to tone down the amount of roll and rely more on body turn and stable wrists.
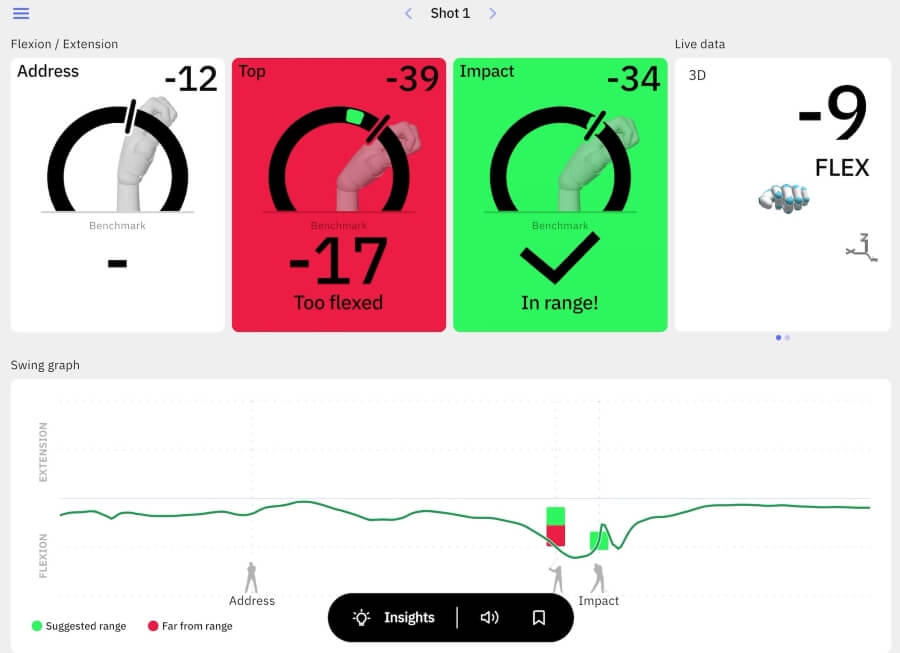
This is where HackMotion helps. When you wear the HackMotion sensor, you can see how much rotation your wrists and forearms are producing in the downswing. You won’t have to guess.
How Supination Works With Lead-Wrist Flexion
Supination doesn’t happen on its own. It sits atop a lead wristpattern that almost all good ball strikers share.
For the lead wrist (right-hander’s left wrist), HackMotion data shows a very consistent pattern:
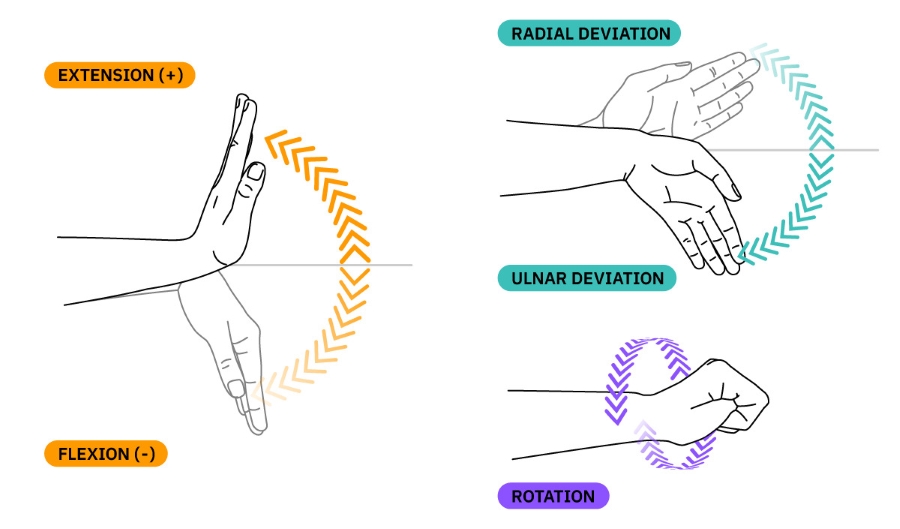
- Setup: A neutral grip usually has some extension (slight cup) – often around 15–20°.
- Takeaway (P1 – P2): That extension reduces toward flat by P2 (shaft parallel to ground in the backswing).
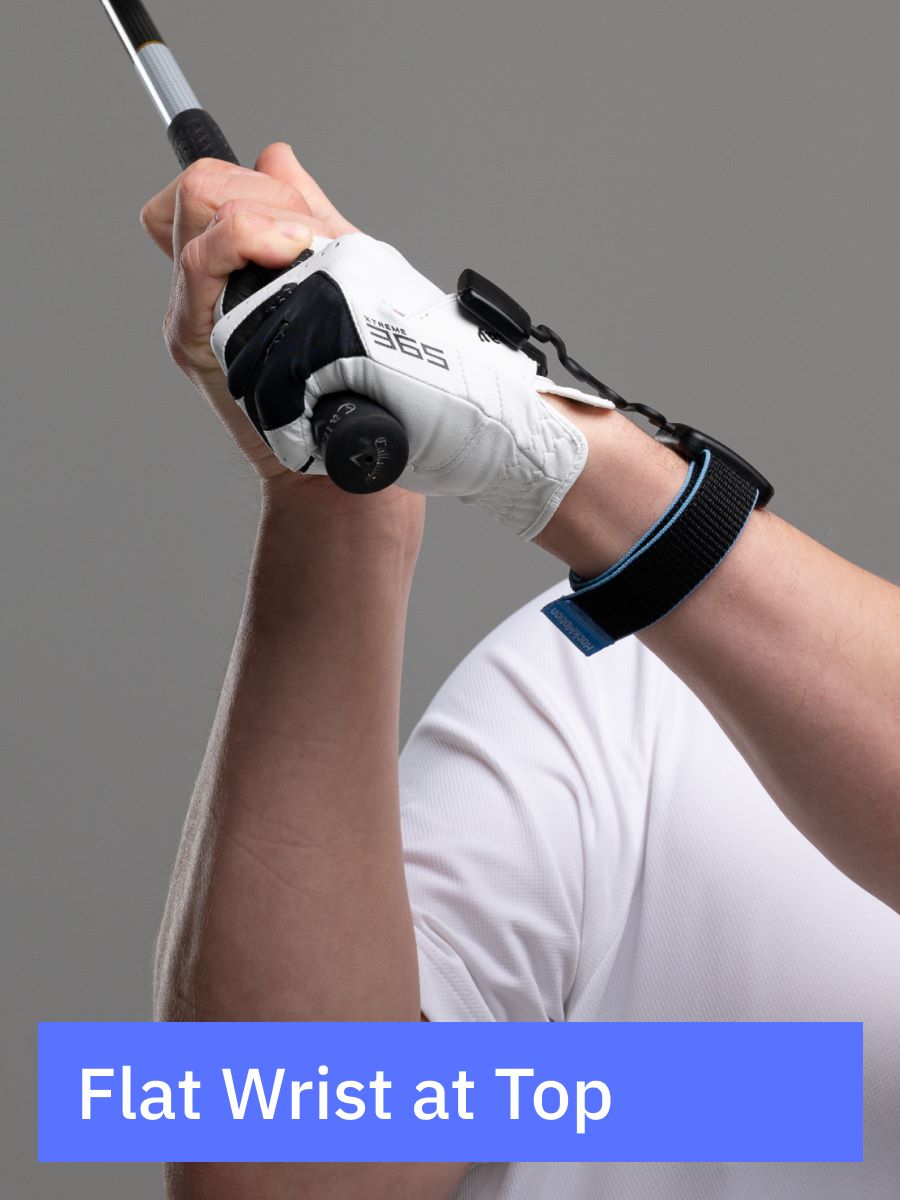
- To the top (P2 – P4): Once set, the lead wrist stays quite stable. It’s not twisting all over the place.
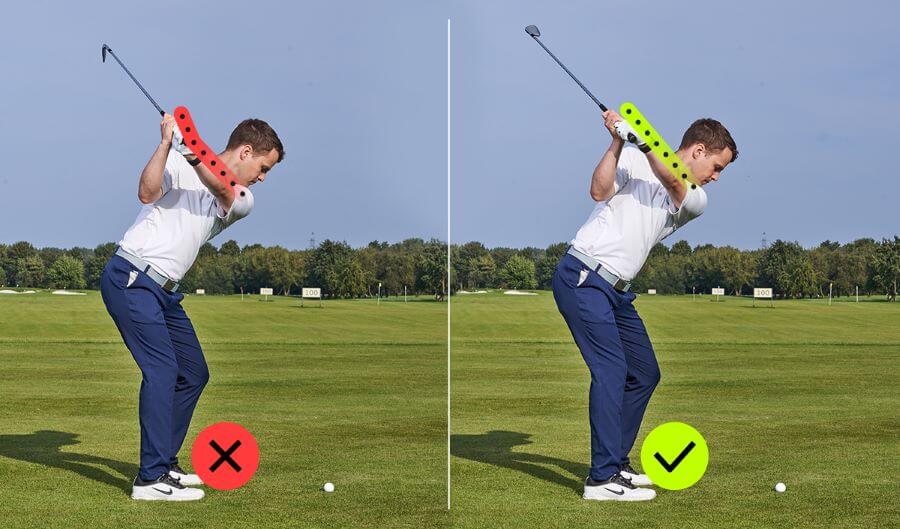
- Transition (P4 – P6): Good players move the wrist toward flexion (the “motorcycle” move) as the club starts down.
- Impact: There is more flexion at impact than there was extension at address, that’s how they get forward shaft lean and a stable clubface.
Now layer supination on top:
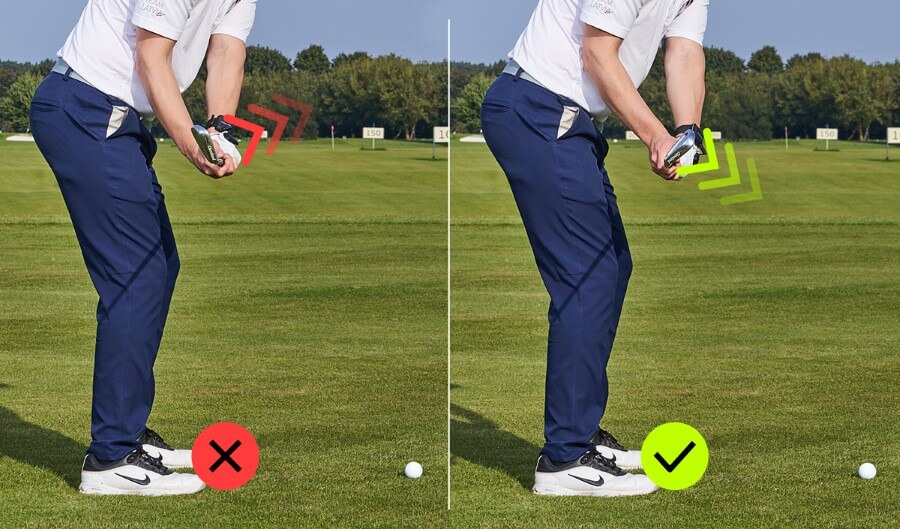
- As you rotate (supinate) the lead arm and wrist through the bottom of the swing, you’re ideally doing it with a wrist that’s moving into and through flexion, not one that’s adding extension and flipping.
If everything goes correctly, you’ll be able to square the face, present a forward shaft lean, control loft, and keep your slices and hooks more like draws and fades.
Supination & Wrist Rotation Drills to Improve Clubface Control
You don’t need to stand on the range thinking about “supination” all day. These drills give you simple movements that naturally improve the rotation of your wrists and forearms.
Level-Shaft Rotation Drill
This is the easiest way to see rotation.
Level-Shaft Rotation Drill – Step by Step
- Stand upright out of your golf posture, holding a mid-iron out in front of you.
- Keep the shaft level to the ground.
- Make small back-and-through swings, trying to keep the shaft level the entire time.
- Watch how your forearms and wrists rotate to allow the club to move around your body.
- Add your normal side-bend back in and notice how that same motion now looks like a normal backswing and follow-through. Do this a few times before hitting balls so your brain has a simple picture of what “normal” rotation looks like.
- Wear the HackMotion sensor and learn what this rotation looks like and how it can help you square the face.
Feet-Together Release Drill (For Slicers / Weak Right Misses)
If your ball always travels to the right of the target, you probably need to feel more release.
Feet-Together Release Drill – Step by Step
- Take your normal address, then bring your feet together so they’re touching.
- Make a few small practice swings to find your balance.
- Hit half-swings, focusing on letting the clubhead swing past you and allowing your forearms and wrists to rotate naturally.
- Notice how the ball starts to turn over more, or at least flies straighter.
- With HackMotion, record a few of these swings and check: How does your rotation from P6 to P8 changes? Whether you’re adding more flexion in transition while allowing a cleaner release.
For many golfers, this is the first time they really feel the clubhead release instead of dragging the handle.
No-Roll Body Release Drill (For Hooks / Left Misses)
If you’re the opposite of a slicer and you hit a lot of shots to the left or hook the ball, you are going to want to calm the amount of rotation and get your body a little more active in this process.
No-Roll Body Release Drill – Step by Step
- Take your normal stance with a mid-iron.
- Make a downswing and follow-through where your only goal is to turn your chest to the target while keeping the club from rolling past your lead arm too quickly.
- Stop when your chest is turned about 90° toward the target.
- Check that: The club and lead arm are still roughly in line. The shaft is slightly trailing your lead arm instead of crossing over.
- Hit balls with this feel. With HackMotion, you can confirm that your rotation numbers at the bottom are lower, and that your lead wrist stays in a stronger, more stable position through impact.
HackMotion Transition & Casting Drill (Time Flexion and Rotation)
This drill connects your transition wrist move with a more predictable release pattern. You can find this, the Casting Drill, built into the HackMotion app and work on it in real time.
HackMotion Transition & Casting Drill – Step by Step
- Put on your HackMotion sensor and open the app in live mode.
- Make a backswing to the top and pause. Note your lead wrist position.
- Slowly move from the top down to P6 (shaft parallel in the downswing) while: Adding a small amount of lead-wrist flexion (think “motorcycle”). Avoiding an early “throw” of the clubhead (no casting).
- Watch the live numbers and try to stay in “the green”.
- Blend this into three-quarter swings, trying to keep the same pattern into P7 (impact).
- Over time, you’ll start to see a consistent pattern that more lead-wrist flexion at impact than at setup, plus a repeatable amount of rotation through the bottom. That’s where straighter, more predictable shots live.
Common Mistakes to Avoid
As with any part of your golf swing, when you start working on something new, there are mistakes you should watch out for.
Here are some common ones that can come with supination or rotation work.
- “Flipping and rolling” at the ball – dumping extension and rotation right at impact instead of spreading it through P6–P8.
- Ignoring the lead-wrist pattern and only thinking about the forearm roll. Flexion/extension and rotation need to work together.
- Copying extreme Tour swings instead of building something neutral and repeatable for your body.
- Trying to “freeze” the clubface with zero rotation – there is always some rotation in good swings.
Final Thoughts
Supination in the golf swing doesn’t need to be complicated. It’s simply how your lead arm and wrist rotate as part of your release pattern so the clubface can square up consistently.
If your shots keep leaking right or diving left, that’s your sign to start paying attention to how your wrists are moving, not just what your arms and body are doing. Use the drills above to feel more (or less) rotation and pair it with a stronger lead-wrist pattern.
HackMotion is there to act like a coach on your wrist, showing you the exact mix of flexion, extension, and rotation you’re creating from takeaway to impact.
Once you can see it, you can change it – and build a release pattern that produces the ball flight you actually want.