Trail Wrist in Putting – David Orr
World-renowned PGA tour putting coach David Orr presents trail wrist mechanics in putting.
Watch the webinar by David Orr (33 min).
Learn how important trail wrist is in putting and what are the typical wrist motion patterns in putting.
In the second part of webinar, David answers various questions related to wrist, hand and body coordination, grip types and armlock grip.
Takeaways from David when Optimizing Wrist Motion in Putting:
1. Analyse the motion, not the position
Absolute values might vary from player to player, so look at the pattern of the motion.
2. Study the wrist graphs
Start with individual wrist motion first (for example, extension/flexion), then all look at the different motions together.
3. Test wrist motion from varying distances – 10ft, 20ft, 30ft
Players almost never have zero wrist motion from all 3 distances tested. Wrist movement is likely to increase as the distance grows.
4. Certain wrist sequences are very compatible and functional
Wrist motion during transition phase is key in certain stroke patterns.
Examples of Trail Wrist Mechanics Demonstrated by David Orr
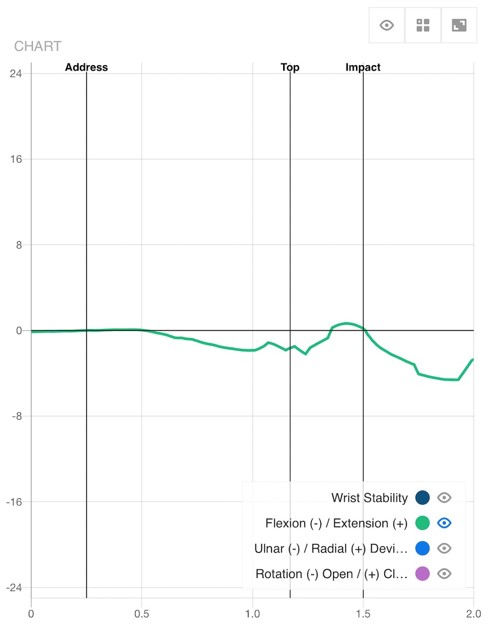
1. Carry/Throw pattern – “The Disaster Stroke”, a really bad pattern
Intent: “Keeping the Face Square”
- Trail Wrist Moving into Flexion
- Forearm Motion – “Carry/Throw”
- Adding loft in the backswing
- This is “The Disaster Stroke” – a really bad pattern!
Example of “disaster stroke”

2. Brush/Hold Pattern
Intent: “Keeping the Putter Low”
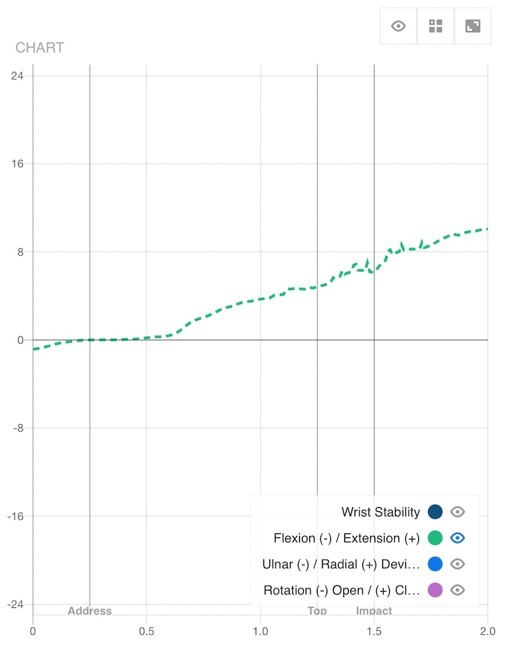
- Trail Wrist Moving into Extension
- Hand/Forearm Motion – “Brush/Hold”
Example of Brush/Hold pattern
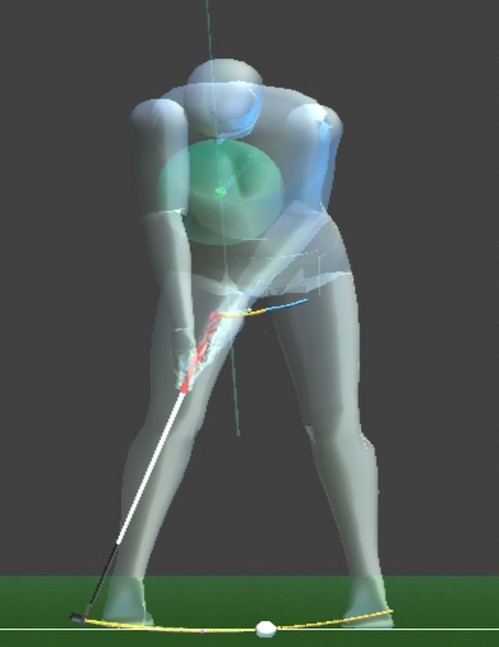
3. Changing Wrist Pattern (in less than an hour)
Intent: short back, accelerate & follow-thru
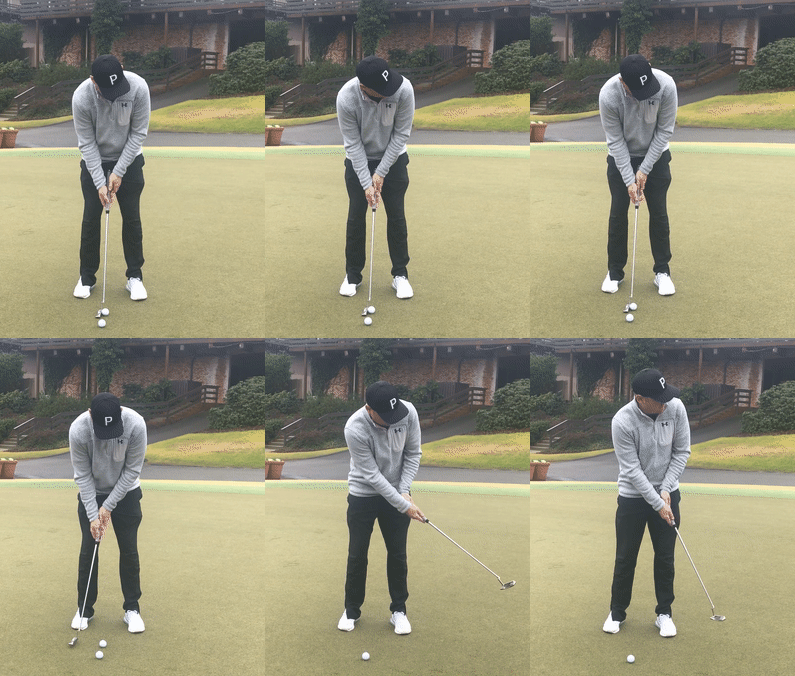
Before:
- Trail Hand Throw
- Trail Arm Throw
- Excessive Body Motion/Sway
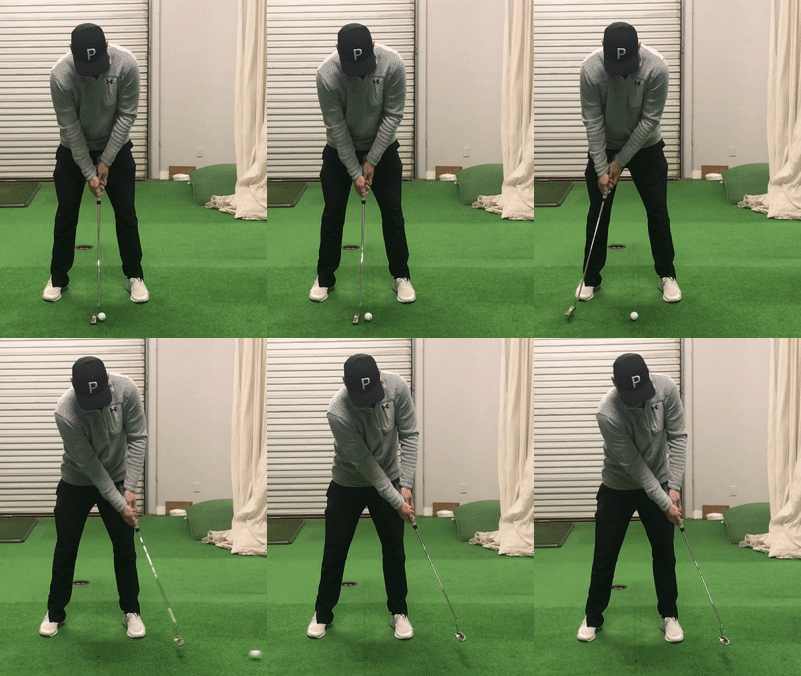
After:
- Reduced Trail Hand Throw
- Reduced Trail Arm Throw
- Separation w/Slight Brush Feel
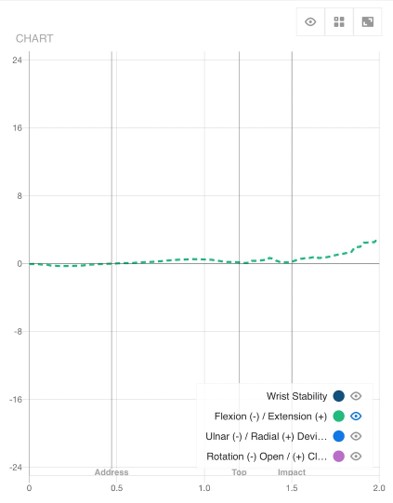
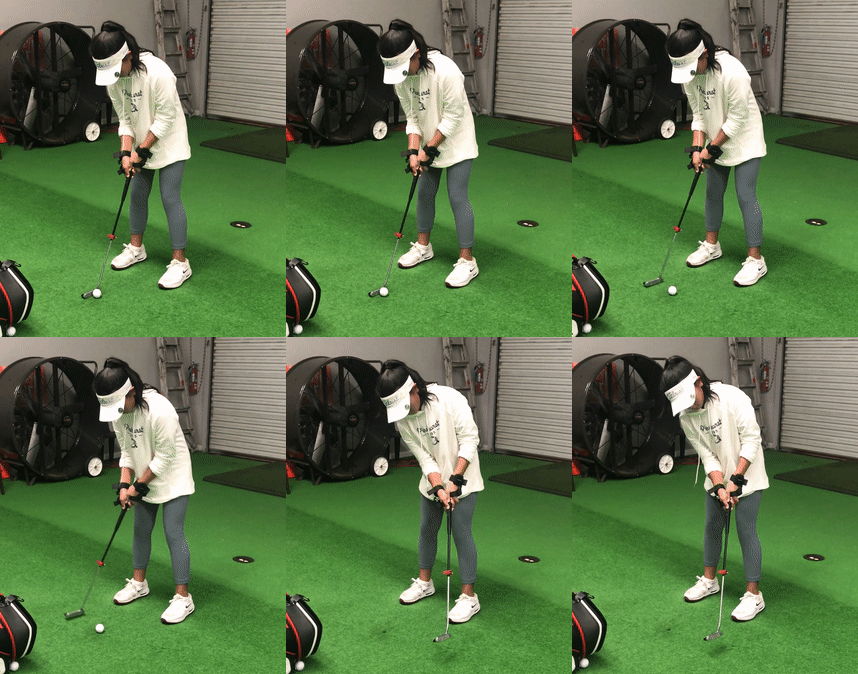
4. Attempting Zero Wrist Motion with HackMotion Biofeedback
Although it is not common, on rare occasions zero wrist motion (or close to it) can be achieved.
It is illustrated by an 11-year old girl using HackMotion bio-feedback.
NOTE: it should not be the main goal to achieve zero wrist motion. Better work on your pattern and consistency.
Example of zero wrist motion:
