Proper Wrist Hinge in the Golf Swing Explained & Drills to Improve
How much should the wrists hinge in golf? Do they hinge with your irons but not your driver? What do you do if the wrist hinge doesn’t feel right?
These are all common questions golfers have, and for a good reason. The wrist hinge in golf is crucial for achieving power and consistency in your shots.
If you’re struggling with wrist hinge and believe it could be the key to unlocking more power and repeatability in your results (which it often is), we have all the information you need.
Discover when and how to hinge your wrists in golf, and learn the importance of proper wrist positioning to ensure a square clubface.
TL;DR What is Wrist Hinge in Golf?
Wrist hinge is the upward cocking of the wrists (radial deviation) that helps set the club and keeps the clubface easier to control. A good checkpoint is at shaft-parallel, where the club points toward the target and your wrists feel set, not overdone.
Wrist Hinge in the Golf Swing (Key Takeaways)
Wrist hinge is about controlling the amount and direction of movement so the clubface stays square and the swing stays consistent.
- Most golfers get wrist hinge wrong; it’s not just “cocking the wrists,” but getting the right amount and direction of movement to keep the clubface square.
- At setup, it’s normal for the lead wrist to be slightly cupped and the hands a little lower, but these angles need to change during the backswing.
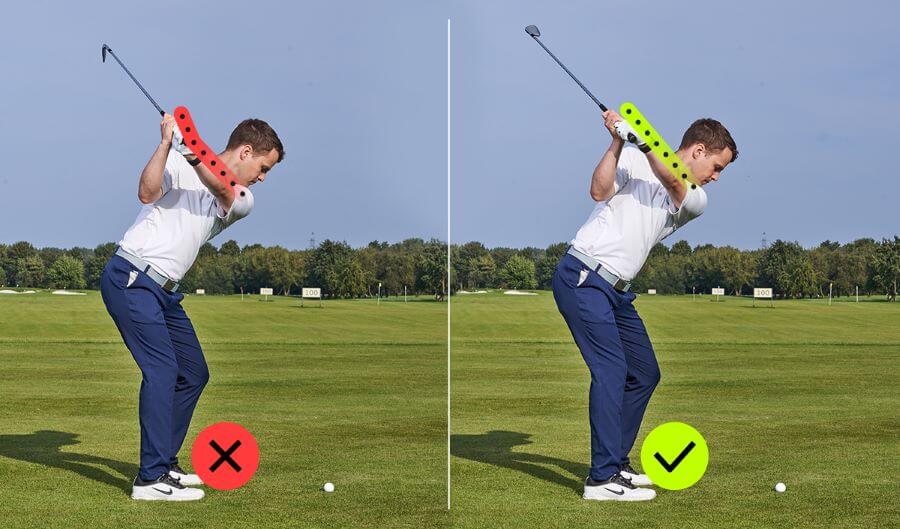
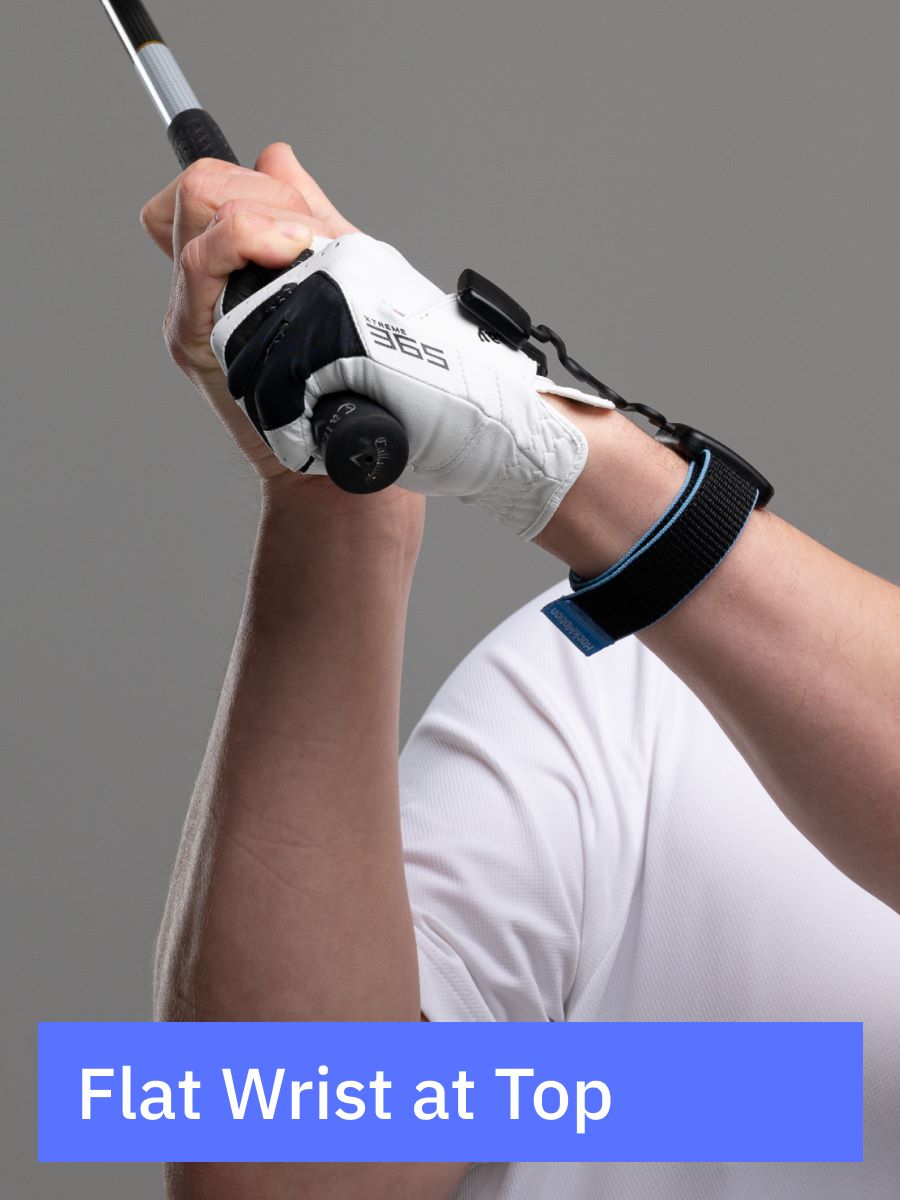
- At the top of the swing, your lead wrist should be flatter (not cupped) and your wrists should have a controlled upward hinge – just enough, not too much.
- A good checkpoint is when the shaft is parallel to the ground, the club should point toward your target, and your wrists should feel set but not overdone.
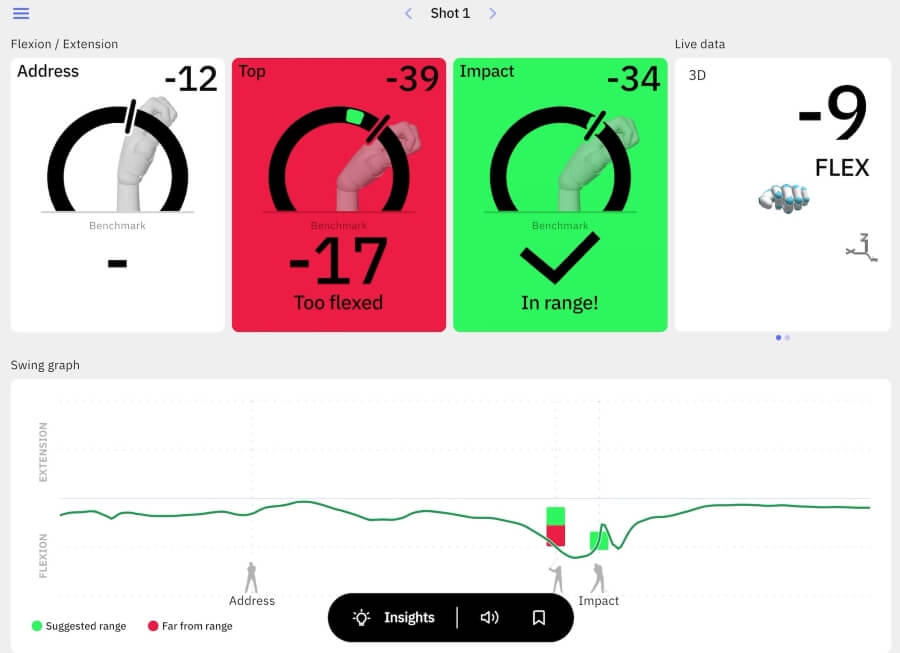
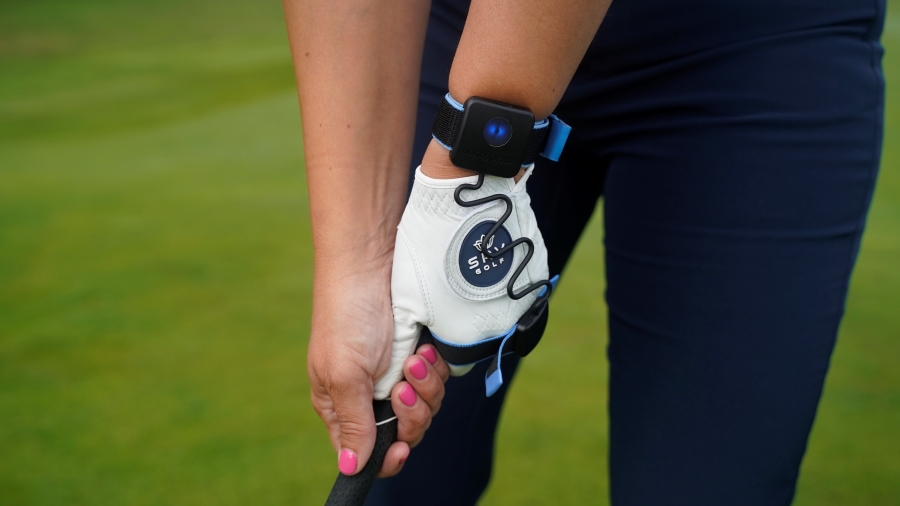
- Using HackMotion, you can get real-time feedback (sound or vibration) to help you stay in the correct wrist position throughout your swing.
Contents
- Do the Wrists Need to Hinge in the Golf Swing?
- What is the Proper Wrist Hinge in Golf?
- How to Hinge the Wrists in the Golf Swing
- Why Is Wrist Hinge Important in the Golf Swing?
- How Much Wrist Hinge Do You Want?
- Early vs. Late Wrist Hinge
- Typical Wrist-Hinge Checkpoints
- Best Ways (and Drills) to Practice Your Own Proper Wrist Hinge
- FAQs
- Final Thoughts
Do the Wrists Need to Hinge in the Golf Swing?
The wrist hinge is a normal, necessary part of the golf swing. The key is that the hinge should not be forced or exaggerated.
It should blend naturally with your takeaway and rotation.
Your only real goal is to control the amount and direction of the hinge so the clubface stays square at impact.
What is the Proper Wrist Hinge in Golf?
The proper wrist hinge in golf will vary depending on the player, type of golf swing, and even the shot you are trying to play.
However, when it comes to wrist angles and hinge patterns, there are certain positions that great ball-strikers consistently repeat.
After analyzing more than 1,000,000 swings with HackMotion, it becomes easier to see what most good players do – even though their swings look very different.
At a basic level, the goal of proper wrist hinge is to help you get the club into a square position at impact. To do that, most players benefit from hitting a few simple checkpoints in the backswing:
Common Wrist-Hinge Checkpoints (Typical Patterns)
- Shaft parallel: slight radial deviation; lead wrist trending flatter.
- Lead-arm parallel: wrists feel “set,” club points toward the target.
- Top of backswing: lead wrist flatter (not cupped), controlled hinge – not over-set.
- Transition: hinge is maintained, not dumped early.
- Downswing to impact: lead wrist increasingly flexed; trail wrist extended to keep the face stable.
How to Hinge the Wrists in the Golf Swing
Most golfers can hinge their wrists; the real challenge is knowing how much to hinge and when to do it. The goal is a hinge that supports the swing instead of disrupting it.
A simple way to think about the proper wrist hinge is this:
1. Start the takeaway without forcing a hinge
Keep things smooth and wide for the first few feet. Your wrists shouldn’t snap up early or stay locked and rigid.
2. Let the club “set” as it reaches waist height
This is where most golfers naturally create a hinge if they let momentum work. You want a comfortable, controlled wrist set not a sudden “cock” of the wrists.
3. Check your lead wrist at the top
Good players get into a position where the lead wrist is:
- flat or slightly flexed (not cupped).
- supporting a controlled amount of radial deviation.
- helping the clubface stay in a predictable position.
4. Maintain that hinge into the transition
You don’t want to “dump” the hinge early, which kills lag and forces a flip. Good players keep their hinge while the body starts rotating.
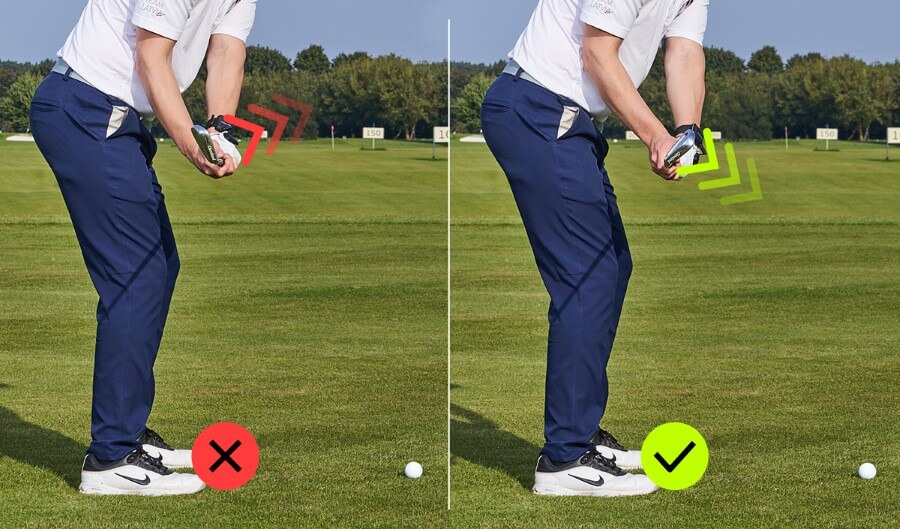
5. Deliver the club with a firm lead wrist
On the downswing, the lead wrist moves into flexion while the trail wrist stays extended to keep the clubface stable at impact.
Why Is Wrist Hinge Important in the Golf Swing?
The wrists control the clubface.
If you want to have a square clubface at impact, you must be able to manage the wrist hinge in your golf game.
The wrist hinge influences the club’s position at the top, which in turn affects the transition to the downswing and ultimately determines where your clubface is at impact.
If you are not aware of your wrist hinge and its impact on the golf swing, try this drill:
Take one swing where you feel like you don’t hinge your wrists until the top of the swing. Then take a swing where you set your wrists almost immediately after taking the club away from the ball.
The difference in these two swings will likely feel huge, and one or the other may make it easier for you to get a square clubface at impact.
How Much Wrist Hinge Do You Want?
At this point, I’ve probably got you curious about whether you hinge your wrists early or late – or even if you hinge them enough.
In this video from Zach Allen, you can learn a great deal about the timing of wrist hinge and what that does to your golf swing. You may be surprised to see how ulnar and radial deviation play into this process.
Early vs. Late Wrist Hinge
Something else to consider in the golf swing is when the wrists hinge. Even if your hinge amount is correct, poor timing can make the club feel out of sync.
That’s where early vs. late wrist hinge patterns come into play.
| Pattern | Best For | Pros | Watch-Outs | Quick Test |
|---|---|---|---|---|
| Early hinge (set by club-parallel) | Compact, rotational swings; wedges/irons | Simplifies motion; easier to square the face | Can reduce width; risk of over-setting | Hit 10 balls preset – check dispersion |
| Late hinge (set near top) | Players seeking width/arc; driver | Wider arc; smoother transition | Requires excellent timing; must square face early | Hit 10 balls delaying hinge – check launch + speed |
The best way to figure out which works for you is to test both styles and use HackMotion to measure how they affect your face angle and wrist positions at key checkpoints.
Typical Wrist-Hinge Checkpoints
Not every golfer will have the same wrist angles or hinge amounts, and you don’t need to match a Tour player’s numbers to swing well.
However, after measuring more than a million swings, HackMotion data shows clear patterns that most consistent ball-strikers share.
These aren’t strict rules, but they give you reliable checkpoints and goals you can work toward based on your grip, mobility, and the shot you’re trying to hit.
- Shaft parallel: small amount of radial deviation; lead wrist trending flatter
- Lead-arm parallel: wrists feel “set,” club should point toward the target
- Top: lead wrist flatter (not cupped) with a controlled upward hinge
- Downswing: lead wrist increases flexion while trail wrist stays extended
Use these patterns as guidelines, not absolutes. The key is adjusting them to your natural swing and the shot you’re trying to play.
Best Ways (and Drills) to Practice Your Own Proper Wrist Hinge
The problem with the wrist hinge is that you need to train it so it’s just the right amount and at the right time. One of the best ways to achieve this is with wrist hinge drills. Here are three of our favorites.
Preset Wrist Hinge Drill
This is one of the most effective ways to train proper wrist hinge. By presetting the correct wrist structure early, you take the guesswork out of how to hinge during the backswing.
Use HackMotion to receive real-time feedback and establish repeatable movement.
HackMotion Faldo Drill
Reach a solid Top position with just the right amount of wrist hinge.
HackMotion Faldo Drill – Step by Step:
- Set up in your normal address position.
- Without moving your arms or shoulders, hinge your wrists so the shaft is parallel to the ground and the butt of the club points toward the ball.
- Check that your lead wrist is flat or slightly flexed and you have 14 to 18 degrees of radial deviation.
- Use HackMotion to confirm your wrist angles are in range using either sound or vibration feedback.
- From this preset position, turn your shoulders to complete the backswing.
- Repeat slowly until it becomes automatic. Then try hitting shots while recreating the same hinge position.
Over-Hinge Fault Drill
Sometimes the fastest way to learn the right move is to feel what’s wrong. This contrast drill shows you how too much wrist hinge (especially extension) can destroy your clubface control.
Over-Hinge Fault Drill – Step by Step:
- Take the club to the top of your swing and intentionally hinge your wrists too much.
- Feel the trail wrist overly bent and the lead wrist cupped. The clubface should feel open.
- If using HackMotion, observe how extension increases well past the ideal range.
- Reset and take the club to the top again, but this time keep the lead wrist flat and limit radial deviation to around 15 degrees.
- Alternate between the two positions to feel the difference and build awareness.
- Once you can feel the proper hinge, make slow practice swings, staying within the correct range.
Extend the Takeaway Drill
This drill helps if you are hinging too early or too quickly. By focusing on width and extension in the takeaway, you encourage a later wrist hinge that naturally blends with body rotation.
Extend the Takeaway Drill – Step by Step:
- Set up with a mid-iron and focus on a smooth, wide takeaway.
- Keep the clubhead low to the ground for the first few feet and avoid any sudden wrist action.
- Let the wrists begin to hinge naturally as the club reaches waist height.
- At the top of the swing, feel a full turn with a controlled hinge that hasn’t over-cocked the wrists.
- Use HackMotion to monitor when the wrist hinge starts and how much radial deviation you’re creating.
- Hit slow shots while maintaining width early and a gradual hinge to the top.
FAQs
I know that wrist hinge can feel a bit confusing at times, but the best part about it is that you can hinge at a time that works well for your swing.
What happens if my wrists hinge too much?
If your wrists hinge too much, you may get to a position with a plane that is too upright and have to slow down or even flip the club at impact to square the clubface.
What is the importance of wrist hinge in golf swing?
Hinging can help create power in the swing.
Depending on when you hinge, players can create extra lag in their swing or use their wrist hinge to simplify the swing and take more of a compact turn or rotation.
What happens if you don’t hinge your wrists in golf swing?
If your wrists never hinge in your golf swing, you will lose a lot of power.
In addition, the angle of descent into the golf ball will likely not be ideal and could cause issues with ball flight.
Do you hinge wrists with driver?
Wrists hinge with your driver, but it is best to avoid the hinge at the beginning of the golf swing.
Instead, wait until your golf club is extended and your takeaway has brought the club near the top of your backswing. This movement will increase the swing arc.
When should you unhinge wrists in golf swing?
Wrists should unhinge during the downswing. The exact timing of this unhinging will be impacted by the amount of rotation you have in your golf swing. The best players unhinge early and then rotate their bodies to gain speed.
Is it OK to set wrists early in golf swing?
It is completely acceptable to set wrists early in the golf swing, especially with irons and wedges. Be sure that when the club is set, it is on the proper plane.
Final Thoughts
At this point, you are probably itching to get out to the range to experiment with wrist hinge.
I highly recommend bringing your coach, the HackMotion, to ensure you are within range of proper wrist positioning throughout your entire swing. This is the best way to reach your goals in the shortest amount of time.