6 Golf Wedge Drills to Sharpen Your Short Game Fast
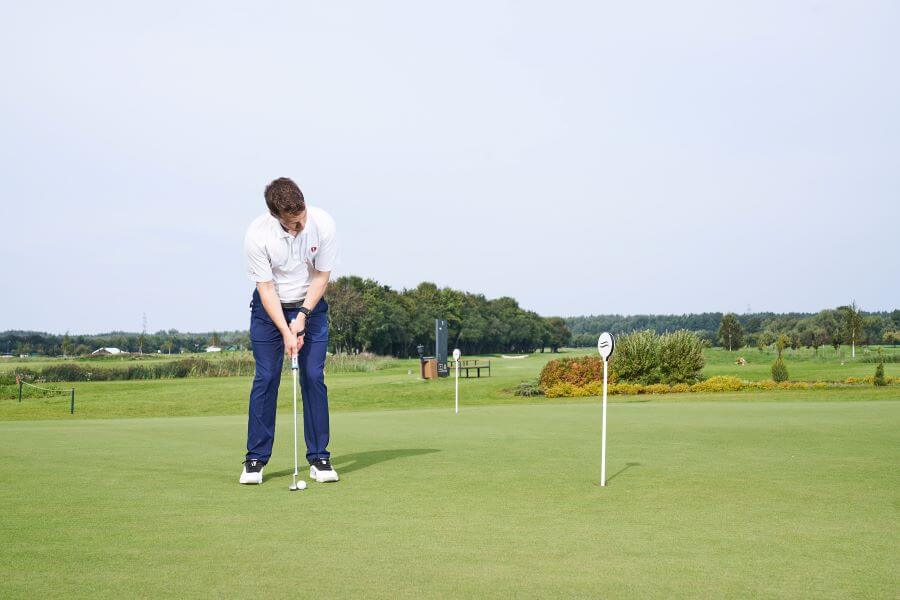
If you’re looking for some fresh wedge drills to make a difference in your wedge game, you’re in the right place. These drills can be paired with your HackMotion for improved feedback and understanding.
Each drill is designed to improve your wedge control, wrist mechanics, and overall feel, whether you’re working on shaft lean, launch windows, or soft distance control.
Improving your wedge game will help you save strokes and lower your scores.
Wedge Practice Drills (Key Takeaways)
If you need to save this information for the next time you go to the driving range, here are some of the most important things to take with you:
- Better wedge play starts with using your body, not just your hands.
- Wrist angles control trajectory, spin, and distance.
- Consistency comes from repeatable motion and structure. learn what both wrists need to do with wedge shots to develop better control.
- Small adjustments lead to better feel and contact, you don’t need to make big changes to see results.
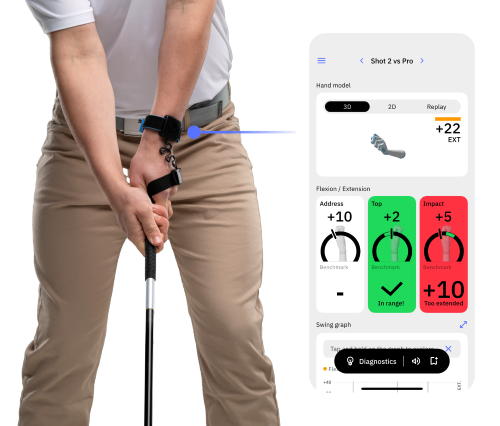
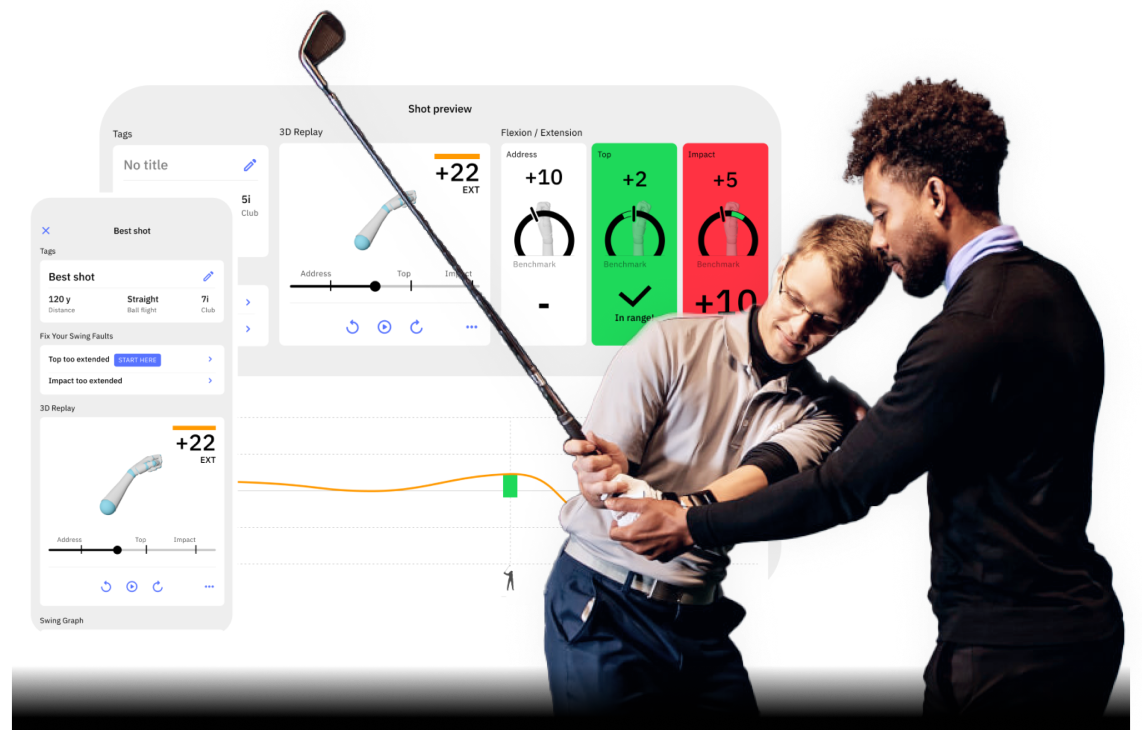
- Train with HackMotion to learn the proper wrist angles and movements in your wedge game. It helps you check for consistency and ensure you are improving.
Contents
- 6 Proven Wedge Drills Every Golfer Should Practice
- Towel-Under-Arms Drill (Mid-Range Chip Distance Control)
- Delofting the Wedge Drill (De-Lofting Through Wrist Motion)
- Left-Hand-Only Drill (Linear Club Motion and Flexion Control)
- Trail Handed Pivot Drill (Build a Body-Driven Chipping Motion)
- Deliver to the Wall Drill (Post-Impact Awareness)
- Plane Chipping Drill
The Secret to a Better Golf Swing Starts with Your Wrists!
Your clubface angle at impact controls over 80% of your shot’s direction—and it all comes down to your wrists. Click here for the best drills to master your wrist mechanics and take control of your swing.
6 Proven Wedge Drills Every Golfer Should Practice
Towel-Under-Arms Drill (Mid-Range Chip Distance Control)
This drill helps build a solid connection between your arms and torso.
You’ll begin to introduce a bit of wrist hinge here, which naturally adds loft and helps control trajectory and speed.
The towel helps you stay synchronized through the swing. It’s a great drill to try if you struggle with inconsistency in your wedge game.
- Video Timestamp: 3:24
Towel-Under-Arms Drill – Step by Step
- Tuck a towel under both arms to encourage a connected motion between your arms and upper body.
- Take a slightly wider stance than usual and position yourself farther from the ball.
- On the backswing and follow-through, allow your thumbs to point up, creating an “L” shape with your arms and club.
- Focus on a smooth, body-led swing. Your arms should move with your torso, staying connected throughout.
- Think of it as swinging from “L-to-L”, using a controlled wrist hinge to generate extra height and carry.
- Swing from L-to-L, controlling wrist hinge for added carry and height.
Delofting the Wedge Drill (De-Lofting Through Wrist Motion)
Delofting a wedge helps you flight the ball down, create more spin, and compress the ball better. It’s beneficial in the wind or when you need the ball to stop quickly.
This drill focuses on learning to maintain forward shaft lean through impact, which is essential for hitting lower-launching, controlled wedge shots that spin and check.
Delofting the Wedge Drill – Step by Step
- Set up with HackMotion and observe your lead wrist angle at address.
- Take short swings, focusing on keeping your lead wrist flat or slightly flexed through impact. Feel like you are intentionally delofting slightly through impact.
- Use HackMotion feedback to make sure you’re not adding loft by flipping (lead wrist extending).
- Gradually increase swing speed while keeping the wrist stable.
- Notice how a lower, more penetrating flight starts to show up and how consistent your strike becomes.
Left-Hand-Only Drill (Linear Club Motion and Flexion Control)
This drill promotes better control of lead wrist flexion through impact. It’s a great option for players who tend to over-rotate.
Having both a lead hand and a trail hand chipping drill in your practice routine is smart if you’re learning to improve around the greens.
To watch the full drill, check out the Steven Orr webinar recording above! It includes all the drills in detail—plus much more to help improve your wedge game.

Left-Hand-Only Drill – Step by Step
- Use your left hand only to grip the club and make half-wedge swings.
- Focus on keeping the lead wrist flat or slightly flexed at impact.
- Deliver the club with body rotation; don’t let the club overtake the hand.
- Use HackMotion to track flexion and extension and ensure your wrist does not move further into flexion after impact.
- Transition to two hands and repeat the same pattern.
Trail Handed Pivot Drill (Build a Body-Driven Chipping Motion)
This drill is designed to help you chip using your body rotation instead of relying too much on your hands and wrists.
Using a tool like HackMotion while performing this drill can provide valuable feedback on wrist movement and help you stay within the optimal range.
Trail Handed Pivot Drill – Step by Step
- Grip the club low on the handle using only your trail hand.
- Use your lead hand to lightly hold the bicep of your trail arm, this stabilizes your arm and reduces unwanted motion.
- Make short chipping swings using a controlled pivot of your torso. Keep your arms and hands quiet.
- Aim to brush the turf with a shallow, smooth stroke driven mostly by body movement.
- After several repetitions, return to your normal grip and try to maintain that same body-led motion.
Deliver to the Wall Drill (Post-Impact Awareness)
This drill is designed for advanced players. It helps you organize wrist angles and club delivery by focusing on post-impact structure.
It’s all about where the club is going, not just how it gets there.
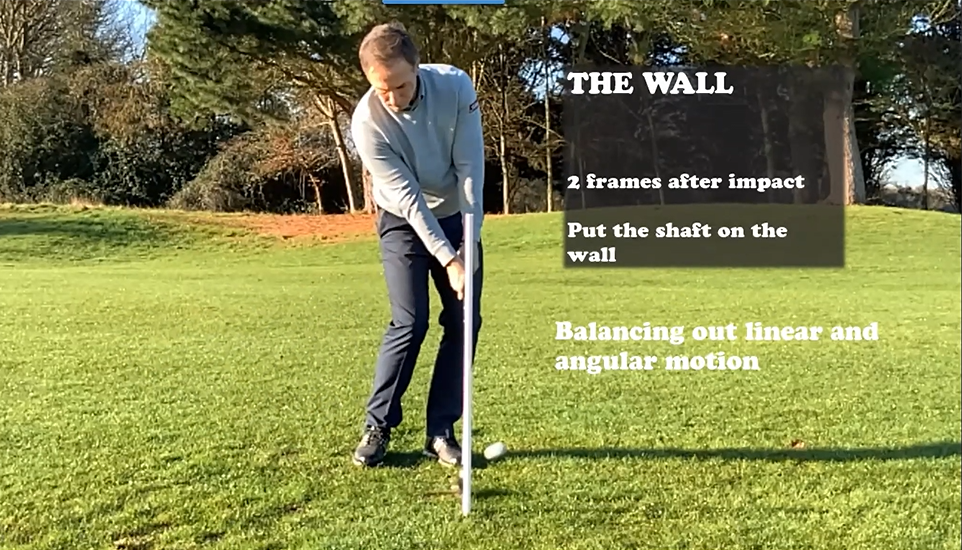
Deliver to the Wall Drill – Step by Step
- Visualize a wall about 12 inches past the ball; your clubface should “thump” into it after impact.
- Make wedge swings that deliver the club square and shallow into this imaginary wall.
- Ensure the clubface is slightly down and not flipping upward.
- Monitor HackMotion wrist graphs, look for flattening or slight flexion at impact, not excessive wrist motion.
- Build rhythm using slow reps before transitioning to ball contact.
Plane Chipping Drill
Many golfers forget about plane when they are chipping and only focus on it in the full swing. This drill helps you keep your chipping swing on the correct path.
When you take the club too far inside or outside as part of the takeaway, you don’t give yourself much time to get it back on plane.
- Video Timestamp: 0:20
Plane Chipping Drill – Step by Step
- Place 4 water bottles around the ball to create a “swing gate.”
- Leave some space at first, then narrow the gate as you improve.
- Practice swinging the club back and through without hitting the bottles.
- Focus on a smooth, arcing motion, staying on-plane.
Final Thoughts
If you’re looking to use HackMotion to improve your chipping and pitching, these drills offer the perfect introduction. They give you a feel for how the wrists move during different length wedge shots and how those movements affect distance, consistency, and strike.
Take your time, focus on feel, and let HackMotion guide you. With each session, you’ll gain more control over your short game.