Practical Drills to Improve Wrist Mechanics and Clubface Control
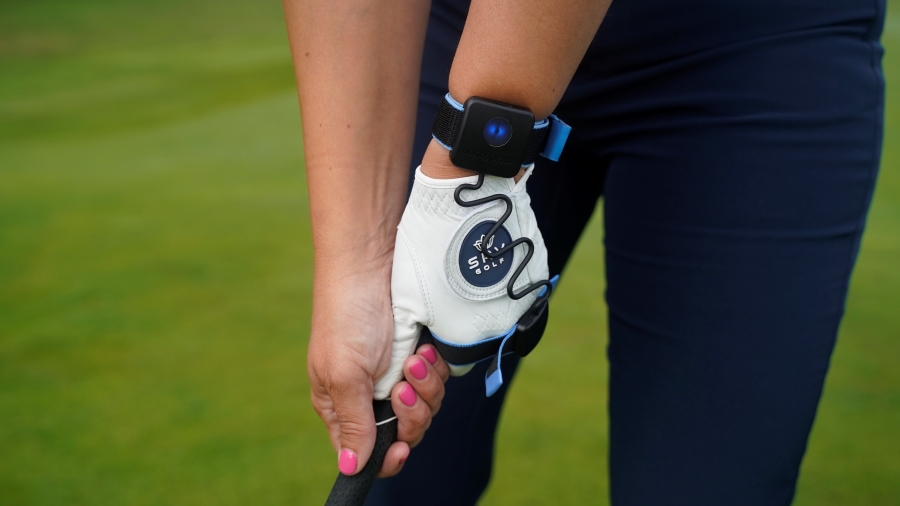
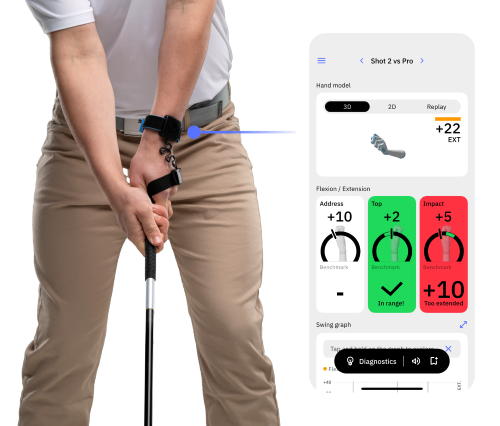
HackMotion was created so that golfers could see and feel (simultaneously) how their wrists are impacting their golf swing.
Stepping up to a golf ball and simply trying to “hit it better” just doesn’t work. Instead, we need practical drills that help us ingrain these concepts and ideas into our brains.
After analyzing more than one million golf swings, we have also discovered some of the best drills for improving wrist mechanics and clubface control.
Here are a few of our favorites:
Wrist Action Drills for Common Swing Issues
If you already know the issues you are struggling with, use this guide to help you find a quick fix.
Backswing Fixes
- Too much wrist cupping? Preset Wrist Drill
- Swaying instead of rotating? Hip Station Drill
- Arms getting disconnected? Tees Under Arms Drill
Downswing & Impact Fixes
- Steep downswing? Water Bottle Drill
- Flipping at impact? Hit Hard, Stop Quick
- Hitting behind the ball? Towel Drill
- Is clubface staying open? Motorcycle Drill
- Casting (losing lag)? HackMotion Casting Drill
Short Game & Putting Fixes
- Low chip shots? Low Chip Shot Drill
- High-flop shots? High Lob Shot Drill
- Inconsistent shots? Landing Spot Drill
- Too much wrist movement in putting? Putting Stability Drill
Forearm Rotation Fixes
- Need more forearm rotation? Feet-Together Drill
- Too much face rotation? Body Release Drill
Backswing Drills
Preset Wrist Drill (Flexion/Extension Focus)
If you struggle with too much cupping (extension) in the lead wrist or an open clubface early in the swing, this preset drill simplifies your takeaway.
It sets your wrists in a position that supports easier clubface control later.
Having some direction for starting the club can improve your backswing and impact position.
- Video Timestamp: 0:30 – 4:30
Preset Wrist Drill – Step by Step:
- Alignment Stick: Place one on the ground parallel to your target line.
- Set the Club at P2: Swing the club to waist-high (club parallel to the ground). Ensure the shaft sits just above the alignment stick.
- Wrist Angles: Your trail wrist bends back into extension. Your lead wrist moves slightly toward flexion (removing excessive cupping). The clubface should appear slightly tilted downward.
- Continue to the Top: From that “preset,” complete your backswing.
- Hit Shots Slowly: Start with slow swings to ingrain the correct wrist hinge, then progress to normal speeds.
HackMotion Tip: Watch your lead wrist extension readouts. If it’s too high at the top, revisit your preset position, as you may be extending the lead wrist too soon in the golf swing.
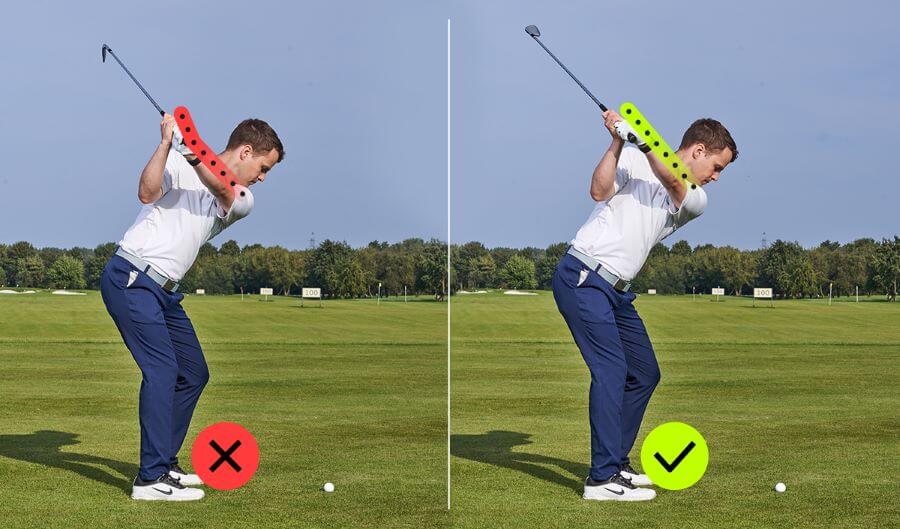
Hip Station Drill (Pivot & Setup)
Swaying causes a moving low point and inconsistent strikes.
Placing a physical barrier near your trail hip encourages a proper turn instead of a slide.
If you can stop the sway, your club should return to the same position at the bottom of the swing each time.
- Video Timestamp: 4:50 – 8:30
Hip Station Drill – Step by Step:
- Setup a Barrier: An alignment rod, golf bag, or chair just an inch outside your trail hip.
- Address: Normal stance and posture; the object is close but not touching your hip.
- Rotate Instead of Sway: Make your backswing, turning your trail hip behind you without bumping the barrier.
- Slight Trail Leg Straightening: This helps rotate the hip in place.
- Add a Ball: Once comfortable, hit half-swings or pitch shots, ensuring the hip doesn’t sway.
HackMotion Tip: If you see odd spikes in wrist extension or lead wrist flexion at the top, you may be compensating for a sway. A stable lower body often stabilizes the wrists as well.
Tees Under the Arms Drill (Connection)
Keeping the arms connected to your torso simplifies your backswing plane.
The Tees Under The Arms Drill is a simple connection drill that can give you the feel of a perfect backswing.
- Video Timestamp: 8:40 – 12:02
Tees Under the Arms Drill – Step by Step:
- Tuck Tees/Gloves: Place them under both arms to feel gentle pressure.
- Short Backswings: Rotate your shoulders instead of lifting your arms.
- Maintain Light Pressure: If a tee falls, your arms are disconnected.
- Progress to Larger Swings: Continue to three-quarter or full swings.
Downswing Drills
Water Bottle Drill
A steep downswing often pairs with insufficient forearm rotation. This drill helps you “shallow” the club by rotating your trail forearm.
It’s a simple drill, and all you need to complete it is a water bottle to help you visualize the motion of pouring the water bottle out.
- Video Timestamp: 4:10 – 5:00
Water Bottle Drill – Step by Step:
- Fill a Bottle Partway: Hold it upside down in your trail hand at address.
- Top of Backswing: Make a normal backswing and pause.
- Pour the Water: As you begin your downswing, rotate your trail forearm so the water would pour out to the side (not over your head).
- Replace Bottle with Club: After rehearsals, swing your club, feeling the same forearm rotation.
- Build Speed Gradually: Start small; work to full swings once you can sense that “pour.”
Hit Hard, Stop Quick Drill (Flexion/Extension Focus)
Golfers who flip through impact (early wrist extension) lose power and consistency.
This drill teaches how to strike solidly with forward shaft lean and quickly “brake” post-impact.
One of the best things about the Hit Hard Stop Quick Drill is that all you have to focus on is stopping the club, and the rest of the wrist issues are fixed for you.
- Video Timestamp: 3:01 – 5:00
Hit Hard, Stop Quick Drill – Step by Step:
- Setup & Grip: Address the ball normally with a neutral grip.
- Half Backswing: Take the club back to waist or three-quarters.
- Accelerate Through: Hit firmly through the ball, then stop your swing abruptly.
- Check Shaft Lean: At your stopping point, the handle should still be ahead of the clubhead.
- Repeat & Increase Speed: Once you can maintain the correct wrist angles at low speed, increase power.
HackMotion Tip: Watch for a spike in lead wrist extension at impact. The goal is minimal extension for crisp strikes.
Towel Drill
Placing a towel behind the ball promotes ball-first contact.
If you struggle with hitting behind the ball or find yourself scooping or flipping your wrists at impact, setting up this towel will help to fix it.
- Video Timestamp: 7:30 – 8:55
Towel Drill – Step by Step:
- Fold Towel: Make a small rectangle.
- Position It: Place the towel about one grip-length behind your ball on the target line.
- Avoid the Towel: Focus on striking the ball cleanly without hitting the towel.
- Gradually Move The Towel Closer: Challenge yourself as you improve your low point control.
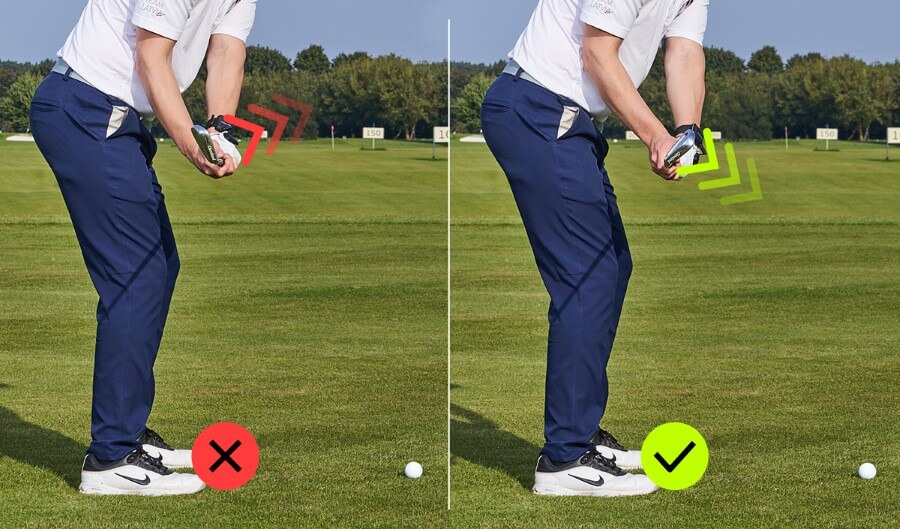
Motorcycle Drill
If you struggle with an open clubface or flip at impact, the motorcycle drill encourages bowing (flexing) your lead wrist, helping square the face sooner.
The idea is to feel that motion of revving the motorcycle throttle in your lead wrist on the downswing.
This is the most famous wrist action drill in golf, and you can work on it in real-time using the HackMotion app.
Motorcycle Drill – Master Wrist Flexion in the Downswing
Focus on continuously adding flexion until the club reaches parallel, then smoothly complete your swing.
HackMotion Motorcycle Drill – Step by Step:
- Normal Setup: A slight extension in the lead wrist is normal at address.
- Swing to the Top: Pause at the top position.
- Motorcycle Twist: In transition, it feels like you’re twisting the throttle “off.” This moves the lead wrist into flexion, closing the face.
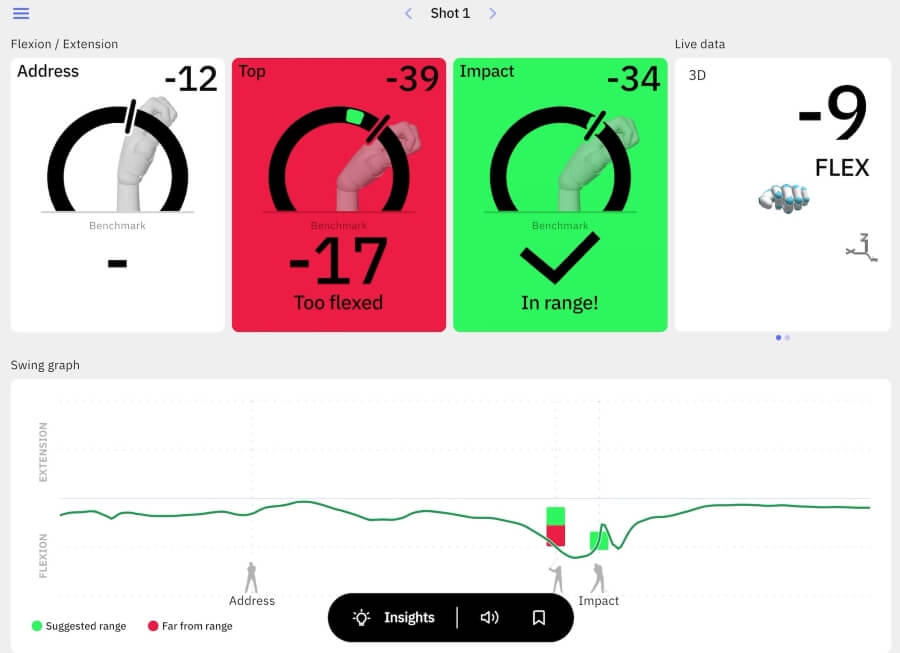
- HackMotion Feedback: See if your extension data drops into the flexion range.
- Adjust Ball Flight: Too much flexion might cause hooks; not enough keeps the face open.
HackMotion Casting Drill (Flexion/Extension & Sequence)
Early casting (throwing the club from the top) is a power killer yet many amateur players feel like this is a drill that increases power.
This drill trains a proper kinematic sequence; the lower body starts, and arms and wrists follow.
Fix Your Casting with HackMotion
Train to fix casting by generating power with your core and lower body.
HackMotion Casting Drill – Step by Step:
- Slow Rehearsals: Make a normal backswing, then begin the downswing by shifting weight left and rotating hips. Don’t pull down with your arms.
- Maintain Trail Wrist Bend: Check HackMotion data on your trail wrist. Keep it extended (bent) as you initiate the downswing.
- Arms Follow: Allow the arms to drop naturally, letting the club “lag” behind.
- Progressive Speed: Start slowly, building up speed while retaining your wrist angles.
HackMotion Tip: If your trail wrist extension straightens too soon, you’re casting. Keep the extension longer to store power.
Short Game Drills
Low Chip Shot (Minimal Wrist Hinge)
One of the most important things to work on when practicing wrist action in the short game is the pitch versus chip action.
This basic chip keeps the ball low with more roll-out. Stand closer to the ball, keep the shaft more upright, and limit the wrist hinge.
- Video Timestamp: 3:00 – 5:00
Low Chip Shot – Step by Step:
- Upright Setup: Stand slightly closer so the shaft is more vertical.
- Thumbs Down: Feel like your thumbs point at the turf (ulnar deviation). This reduces excessive wrist action.
- Back & Through: Use a small, controlled motion with your chest turn—avoid “flipping” the club.
HackMotion Tip: If your lead wrist extends at or before impact, you’ll often blade or chunk. Keep extension low in your data readout.
High Lob Shot (Increased Lead Wrist Extension)
While these flops or short-sided shots aren’t necessarily the safest shots, there are times when you will need to use them on the course.
If you are short-sided or simply want to learn to hit the ball higher, this should work for you.
To get higher and softer shots, you’ll need more wrist extension (cupping) and an open face to add loft.
- Video Timestamp: 5:00 – 7:00
High Lob – Step by Step:
- Open Face & Wider Stance: Aim the face slightly open; the ball can be forward in stance.
- Retain Cupped Lead Wrist: As you hinge in the backswing, keep the extension in your lead wrist.
- Swing Under the Ball: Maintain that extension through impact so the face stays lofted.
HackMotion Tip: Watch your lead wrist extension. Too little: face shuts down. Too much: potential to overdo it. Find a middle ground that yields a soft, high flight.
Landing Spot Drill
One of the biggest short-game mistakes is focusing too much on the hole instead of where the ball needs to land.
This drill helps you train your eyes and touch to consistently land the ball in the right spot for predictable roll-out.
- Video Timestamp: 5:42 – 7:15
Landing Spot Drill – Step by Step:
- Pick a landing spot: Depending on the shot, choose a spot about 3-5 feet from the green.
- Place a towel or coin on the landing area: This provides a clear visual target.
- Hit a series of chips, focusing ONLY on landing the ball on the spot: Don’t think about the hole; just try to land the ball on the towel/coin.
- Adjust for different lofts and roll-out: Use a lower-lofted club (e.g., PW or 9-iron) for more roll, and a higher-lofted club (e.g., 58°) for a softer landing.
- Test different distances: Move the landing spot farther away to develop better touch and feel.
Putting Drills
Putting Stability Drill (Flexion/Extension Control)
Excess wrist flicking during putting causes an inconsistent face angle. HackMotion’s Putting Mode tracks wrist flexion/extension in real time, helping you keep your stroke stable.
One of the things we notice when analyzing the strokes of the best players in the game is the consistency from one shot to the next.
Flexion / Extension Putting Drill – Control Loft with Wrist Stability
Make a stroke while keeping wrist movement within 2° of flexion/extension. Stay steady through the stroke for better distance control and consistent face angles.
Flexion / Extension Putting Drill – Step by Step:
- Activate Putting Mode: In the HackMotion app, select the “Flexion / Extension” putting drill.
- Set Up to Putt: Address the ball and stand still at setup.
- Smooth Stroke: Make a putting stroke while keeping wrist flexion/extension movement within 2° throughout.
- Watch Feedback: Use HackMotion’s green zone to confirm consistent wrist control.
- Repeat: Continue hitting putts while focusing on minimizing wrist motion for for better distance control and consistent face angles.
The Chopsticks Drill (Minimize Radial/Ulnar Deviation)
If you unintentionally hinge your wrists up/down during the stroke, two alignment sticks (“chopsticks”) can keep your putter moving on a simpler arc.
While this drill takes a few minutes to set up, once you get the hang of it, you can use it to improve other areas of your short game.
- Video Timestamp: 2:50 – 5:00
The Chopsticks Drill – Step by Step:
- Create Chopsticks: Secure two alignment rods at one end with a rubber band.
- Under Your Arms: Place them so they extend out in front, forming a channel for the putter shaft.
- Practice Without a Ball: Swing the putter back and forth, feeling how the rods prevent excessive radial (up) or ulnar (down) motion.
- Add a Golf Ball: Once comfortable, roll putts focusing on stable wrists.
HackMotion Tip: Check your radial/ulnar deviation in the app. Aim for a flat line indicating minimal up/down wrist hinge.
Forearm Rotation Drills
“Driver vs. Iron” Wrist Angle & Body Drill
Many golfers think the wrists in the driver swing differ drastically from iron wrists.
In reality, you need similar lead-wrist flex/extension patterns, but you must shift your hips more to create the correct attack angle.
This “door frame” drill teaches you to maintain the same forearm/wrist angles while changing body tilt for the driver.
- Video Timestamp: 3:39 – 5:56
Driver vs. Iron Wrist Angle Drill – Step by Step:
- Use a Door Frame: Stand so your lead ear is near the frame (or use an alignment stick just outside your lead ear).
- Setup & Pivot: Take a regular golf posture (driver or iron). Practice “pushing” hips forward in the downswing while keeping your head relatively centered near the frame.
- Drag an Alignment Stick: Some players put a stick on the ground and rehearse dragging it with body turn instead of flipping the wrists.
HackMotion Tip: Compare your lead wrist extension from iron swings to driver swings. They should be similar at impact, any big difference likely comes from poor hip shift or tilt, not from changing wrist angles.
Forearm Rotation Variations (Arm Release vs. Body Release)
The amount of forearm rotation (pronation/supination) you use helps square the clubface.
More “arm release” can fix slices; less “rolling” can help chronic hookers.
Experimenting with this movement of the arms can make all the difference in your impact position.
- Video Timestamp: 5:40 – 9:30
Increase Forearm Rotation (Feet-Together Drill)
- Stand with Feet Together: This setup lessens lower-body contribution, forcing more natural arm/forearm rotation.
- Small Swings: Focus on the arms swinging freely, your forearms “roll” through impact, helping you close the face if you slice.
- HackMotion Tip: Monitor your rotation from P6 (shaft parallel on downswing) to P7 (impact). If your reading is too low, add a bit more release.
Decrease Forearm Rotation (Body Release Drill)
- Normal Stance, Body Turn: Try to minimize the “rolling” of the forearms by rotating your torso and shoulders more.
- Stop at ~P8 (Short Follow-Through): Check that the club hasn’t passed your hands or turned excessively left.
- HackMotion Tip: If your data shows extremely high forearm rotation, reduce it by focusing on a stronger body pivot and less “arm roll.”
Final Thoughts
These practical drills to improve wrist mechanics and clubface control can be something you take out to the driving range with you today.
To benefit the most, set your HackMotion to record the session and use it as a baseline for the next time you attempt any drills.
Having this kind of data to compare and check on will make bringing these concepts to the golf course easier. If you want help interpreting the numbers and applying them on the course, consider working with a golf coach near you who uses HackMotion to guide wrist mechanics and clubface control.