Driver Setup Position: The 6 Key Fundamentals You Must Get Right for Consistent Drives
Most golfers think the setup is simple. Feet shoulder-width apart, ball teed high, and a smooth swing from there.
But the truth is that setup is where inconsistency begins. Every miss usually starts before the club ever moves.
This article breaks down the six key setup factors that separate consistent drivers from streaky ones. We’ll go beyond the basics of stance and alignment to cover how your wrists, hips, and feet actually control the face, path, and strike.
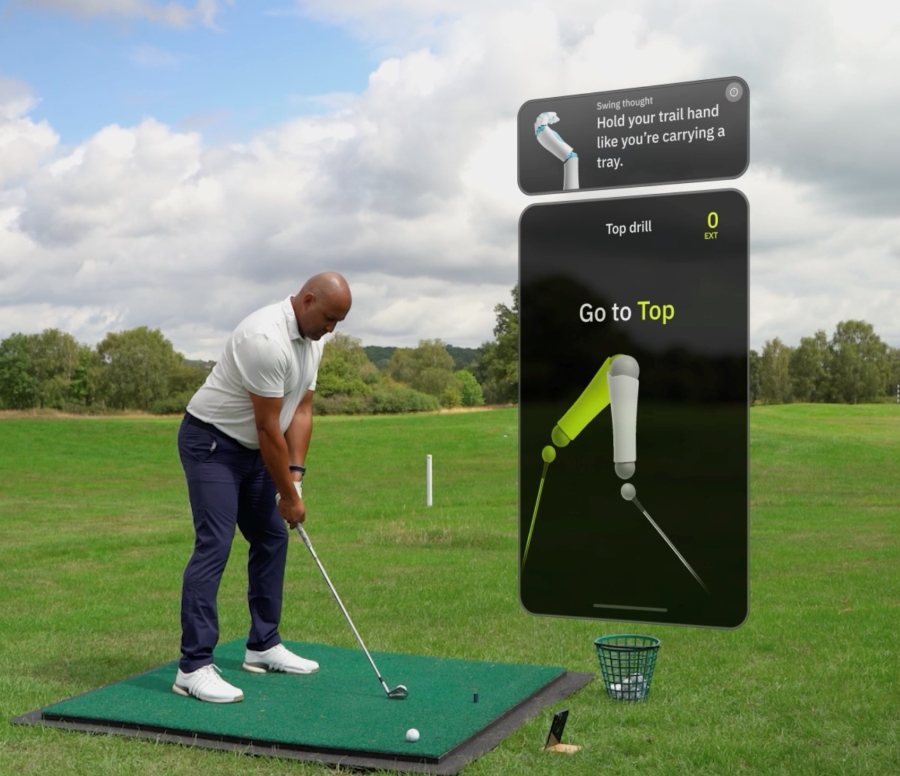
Using HackMotion, you can measure and repeat the exact setup conditions that produce your best drives.
Driver Setup Position (Key Takeaways)
- Consistency at setup is more important than chasing a “perfect” setup.
- The ball position should be based on your lead shoulder, not your feet.
- A small amount of lead-wrist extension (about 15–22°) creates a neutral, repeatable address.
- Weight forward with hip tilt produces the right launch conditions without leaning your chest back.
- Foot flare and trail-foot positioning unlock natural rotation and shallower path control.
- Using HackMotion biofeedback, you can measure setup angles and repeat them swing after swing.
Contents
6 Key Fundamentals for the Perfect Driver Setup
1. Ball Position Based on the Lead Shoulder
Ball position is usually talked about in relation to the lead foot. A better way to look at ball position for your driver setup is to consider the lead shoulder.
The ball should sit directly under the lead shoulder, as this represents the lowest part of the swing arc. If you position relative to the lead shoulder as opposed to the feet, you’ll get a neutral angle of attack.
This position promotes centered contact and avoids the extremes of hitting too far up or down on the ball. In addition, this ball position creates a straight line between the lead arm and the shaft at address (something you want with the driver).
Want to understand how proper setup translates into launch and clubface control? Check out Slow Motion Driver Swing (Step-by-Step Breakdown) to see the key positions that create speed, accuracy, and perfect impact.
2. Wrist Position at Address
The proper wrist position at address requires a few different components. Some golfers have looked at this as a hand position or grip, but the right position can be found by focusing on the wrist.
Grip
- Start with a neutral grip through the fingers, with 2–3 knuckles visible on the lead hand.
- Target 10–25° of lead-wrist extension at setup; the “sweet spot” for most players is 15–22°.
- Extension at address helps set up a predictable face angle and a manageable launch window.
Handle Height
Handle height influences face bias:
- Higher handle (ulnar deviation) reduces extension and closes the face (helps to fix the slice).
- Lower handle (radial deviation) increases extension and opens the face (helps to fix the hook).
Practicing your wrist position at address includes working on consistency. The more consistent you can be with this position, the easier it is to repeat a good drive. HackMotion lets you set a wrist extension tolerance (±3°) to ensure the same address every time.
3. Stance and Footwork for Power and Rotation
Now that the ball is in the right place and your hands are set you can start working on your stance.
Having your feet slightly wider than hip width will give you a stable but athletic base.
Something that golfers don’t talk about enough is the flare of the feet. Both feet flared outward will increase the range of motion and reduce resistance on your turn in the swing.
In addition, placing the trail foot slightly back from the lead foot encourages a deeper swing path and a more neutral plane.
The right foot positioning also supports better ground reaction force usage, smoother pressure shift and vertical push through impact.
4. Weight Distribution and Hip-Led Tilt
One of the most misunderstood parts of driver setup is how to create tilt.
Many golfers try to get behind the ball by leaning their upper body away from the target, but that move pulls the lead shoulder back and shifts the swing path across the ball.
Instead, start with about 60% of your pressure on the lead side and create tilt from the lower body, not the torso.
- Gently shift the hips forward toward the target while keeping your upper body centered.
- This forward hip position builds the correct spine angle naturally, helping you stay balanced and shallow through impact.
- With the lead hip slightly forward, the low point of the swing arc moves into the right place.
5. Upper-Body and Arm Alignment
The trail arm is one of the most overlooked parts of driver setup. Most golfers spend time worrying about shoulder tilt or grip pressure, but few realize how much the trail arm dictates upper-body alignment and, ultimately, shot direction.
When the ball sits forward in your stance, it’s easy for the trail arm to straighten and the shoulders to open. That small adjustment points your chest and arms left of the target, which sets you up to swing across the ball and hit weak fades or pulls.
- Soften the trail arm at address so the elbow sits slightly below the lead arm.
- This helps the shoulders stay square to slightly closed, promoting an in-to-out path.
- Pulling the trail foot slightly back also helps align the upper body correctly without forcing the motion.
6. Consistency Training with HackMotion
Once you’ve found your ideal setup position, the next step is making sure you can repeat it round after round.
Small differences in ball position, wrist angle, or trail arm position can change your face angle and strike point dramatically.
Using HackMotion biofeedback, you can measure your lead-wrist extension at setup (for example, 20° ± 3°) and train to repeat that number every time you step into a shot.
Below are three quick drills that help you maintain the same address position and improve consistency.
Trail Foot Back Drill
A simple setup adjustment that improves turn, depth, and path control.
Trail Foot Back Drill – Step by Step
- Begin with a normal driver setup.
- Pull your trail foot slightly back (1–2 inches) and flare it outward.
- Hit several shots to feel how much easier your backswing turn becomes.
- Experiment with how far to pull the foot back, too much can cause overturning.
- Goal: Find the position that allows full turn without losing balance or contact.
Trail-Shoulder Retraction Drill
Designed to lengthen your backswing and improve shoulder mobility for more consistent power.
Trail-Shoulder Retraction Drill – Step by Step
- Take your normal driver setup.
- Remove the trail hand from the club and make small backswings, moving the trail arm up and around your body to feel full shoulder retraction.
- Repeat with only the trail hand holding the club, feel the chest and shoulder open up.
- Finally, put both hands back on and recreate that deeper hand path in a full swing.
- Focus on maintaining spine extension and a full shoulder turn.
Strike Location Awareness Drill
Finding the center of the face is key to consistent launch and distance.
Strike Location Awareness Drill – Step by Step
- Apply impact tape or foot powder spray to your driver’s face.
- Hit several balls and note the pattern: heel, toe, or centered.
- Adjust setup variables (distance from ball, posture, or driver length) as needed.
- Heel strikes often indicate standing too close or swinging over the top; toe strikes can mean standing too far away.
- Work toward repeating centered contact your distance and dispersion will instantly tighten.
Common Driver Setup Mistakes That Lead to Poor Shots
If you start to struggle off the tee, start with a review of these issues to see if they could be causing it.
Sometimes golfers jump into issues with swing plane and advanced mechanics before starting with the basic setup.
| Mistake | What Happens | Better Setup Cue / Fix |
|---|---|---|
| Leaning the upper body back to create tilt | Pulls the lead shoulder behind the ball, causing an out-to-in path and high, weak contact | Create tilt from the hips forward, keeping ~60% pressure on the lead side |
| Ball positioned too far back | Encourages hitting down on the ball, leading to low drives or slices | Position the ball under the lead shoulder |
| Trail arm too straight at address | Opens the shoulders and sets up a left-aimed swing path | Soften the trail arm and let the elbow sit slightly below the lead arm |
| Feet square or pigeon-toed | Limits rotation and speed; makes the backswing feel restricted | Flare both feet outward to allow natural hip and torso turn |
| Handle height inconsistent | Changes wrist angles and face orientation from swing to swing | Use HackMotion to keep lead-wrist extension within ±3° of your ideal number |
| Weight evenly split at address | Promotes early sway and poor low-point control | Start with 60% pressure on lead side, hips slightly forward |
| Gripping too strong or weak | Alters clubface control and wrist motion throughout the swing | Find a neutral grip: two–three knuckles visible, wrist extended ~15–22° |
| Inconsistent pre-shot setup | Leads to variable launch, spin, and face angle | Use HackMotion biofeedback to train a consistent P1 wrist angle each time |
Take your setup to the next level—see how it connects to every phase of your swing. Read Driver Swing Checkpoints to perfect your motion and impact positions.
Final Thoughts
Every great driver swing starts with a consistent setup. It’s not just about where your feet or shoulders are, it’s about creating a position that lets your body and wrists work together the same way every time.
Using HackMotion to measure your setup removes the guesswork. You can see your exact wrist angles, verify your weight distribution, and practice until your “good setup” becomes automatic.
