How to Lower Your Golf Ball Flight with Irons: Actionable Tips and Proven Drills
Hitting a big, high lofted shot into a green will help you stop the ball quickly and be accurate with your shot.
However, on a windy day or when there is a little too much risk involved, a lower iron shot is a better idea. If you want to learn how to lower the ball flight with irons, you are in the right place.
We will give you some tips to get this done, a few drills you can try, and ultimately a brand new shot added to your golf bag.
Lower Your Ball Flight with Irons (Key Takeaways)
If you don’t have the time to read our entire article, here are the key points to take away on how to lower your ball flight with your irons.
- Lower ball flight gives you more control and lets you attack pins even when the weather is poor.
- The equipment you use (both ball and club) can help with lowering the ball flight.
- Keep the wrist angle of the lead wrist more flexed to ensure the ball flight stays lower.
- Ensure the ball position is slightly back from where it normally is.
- Holding your finish can help maintain that slightly delofted clubface through impact just a little bit longer.
Contents
How to Lower Ball Flight with Irons
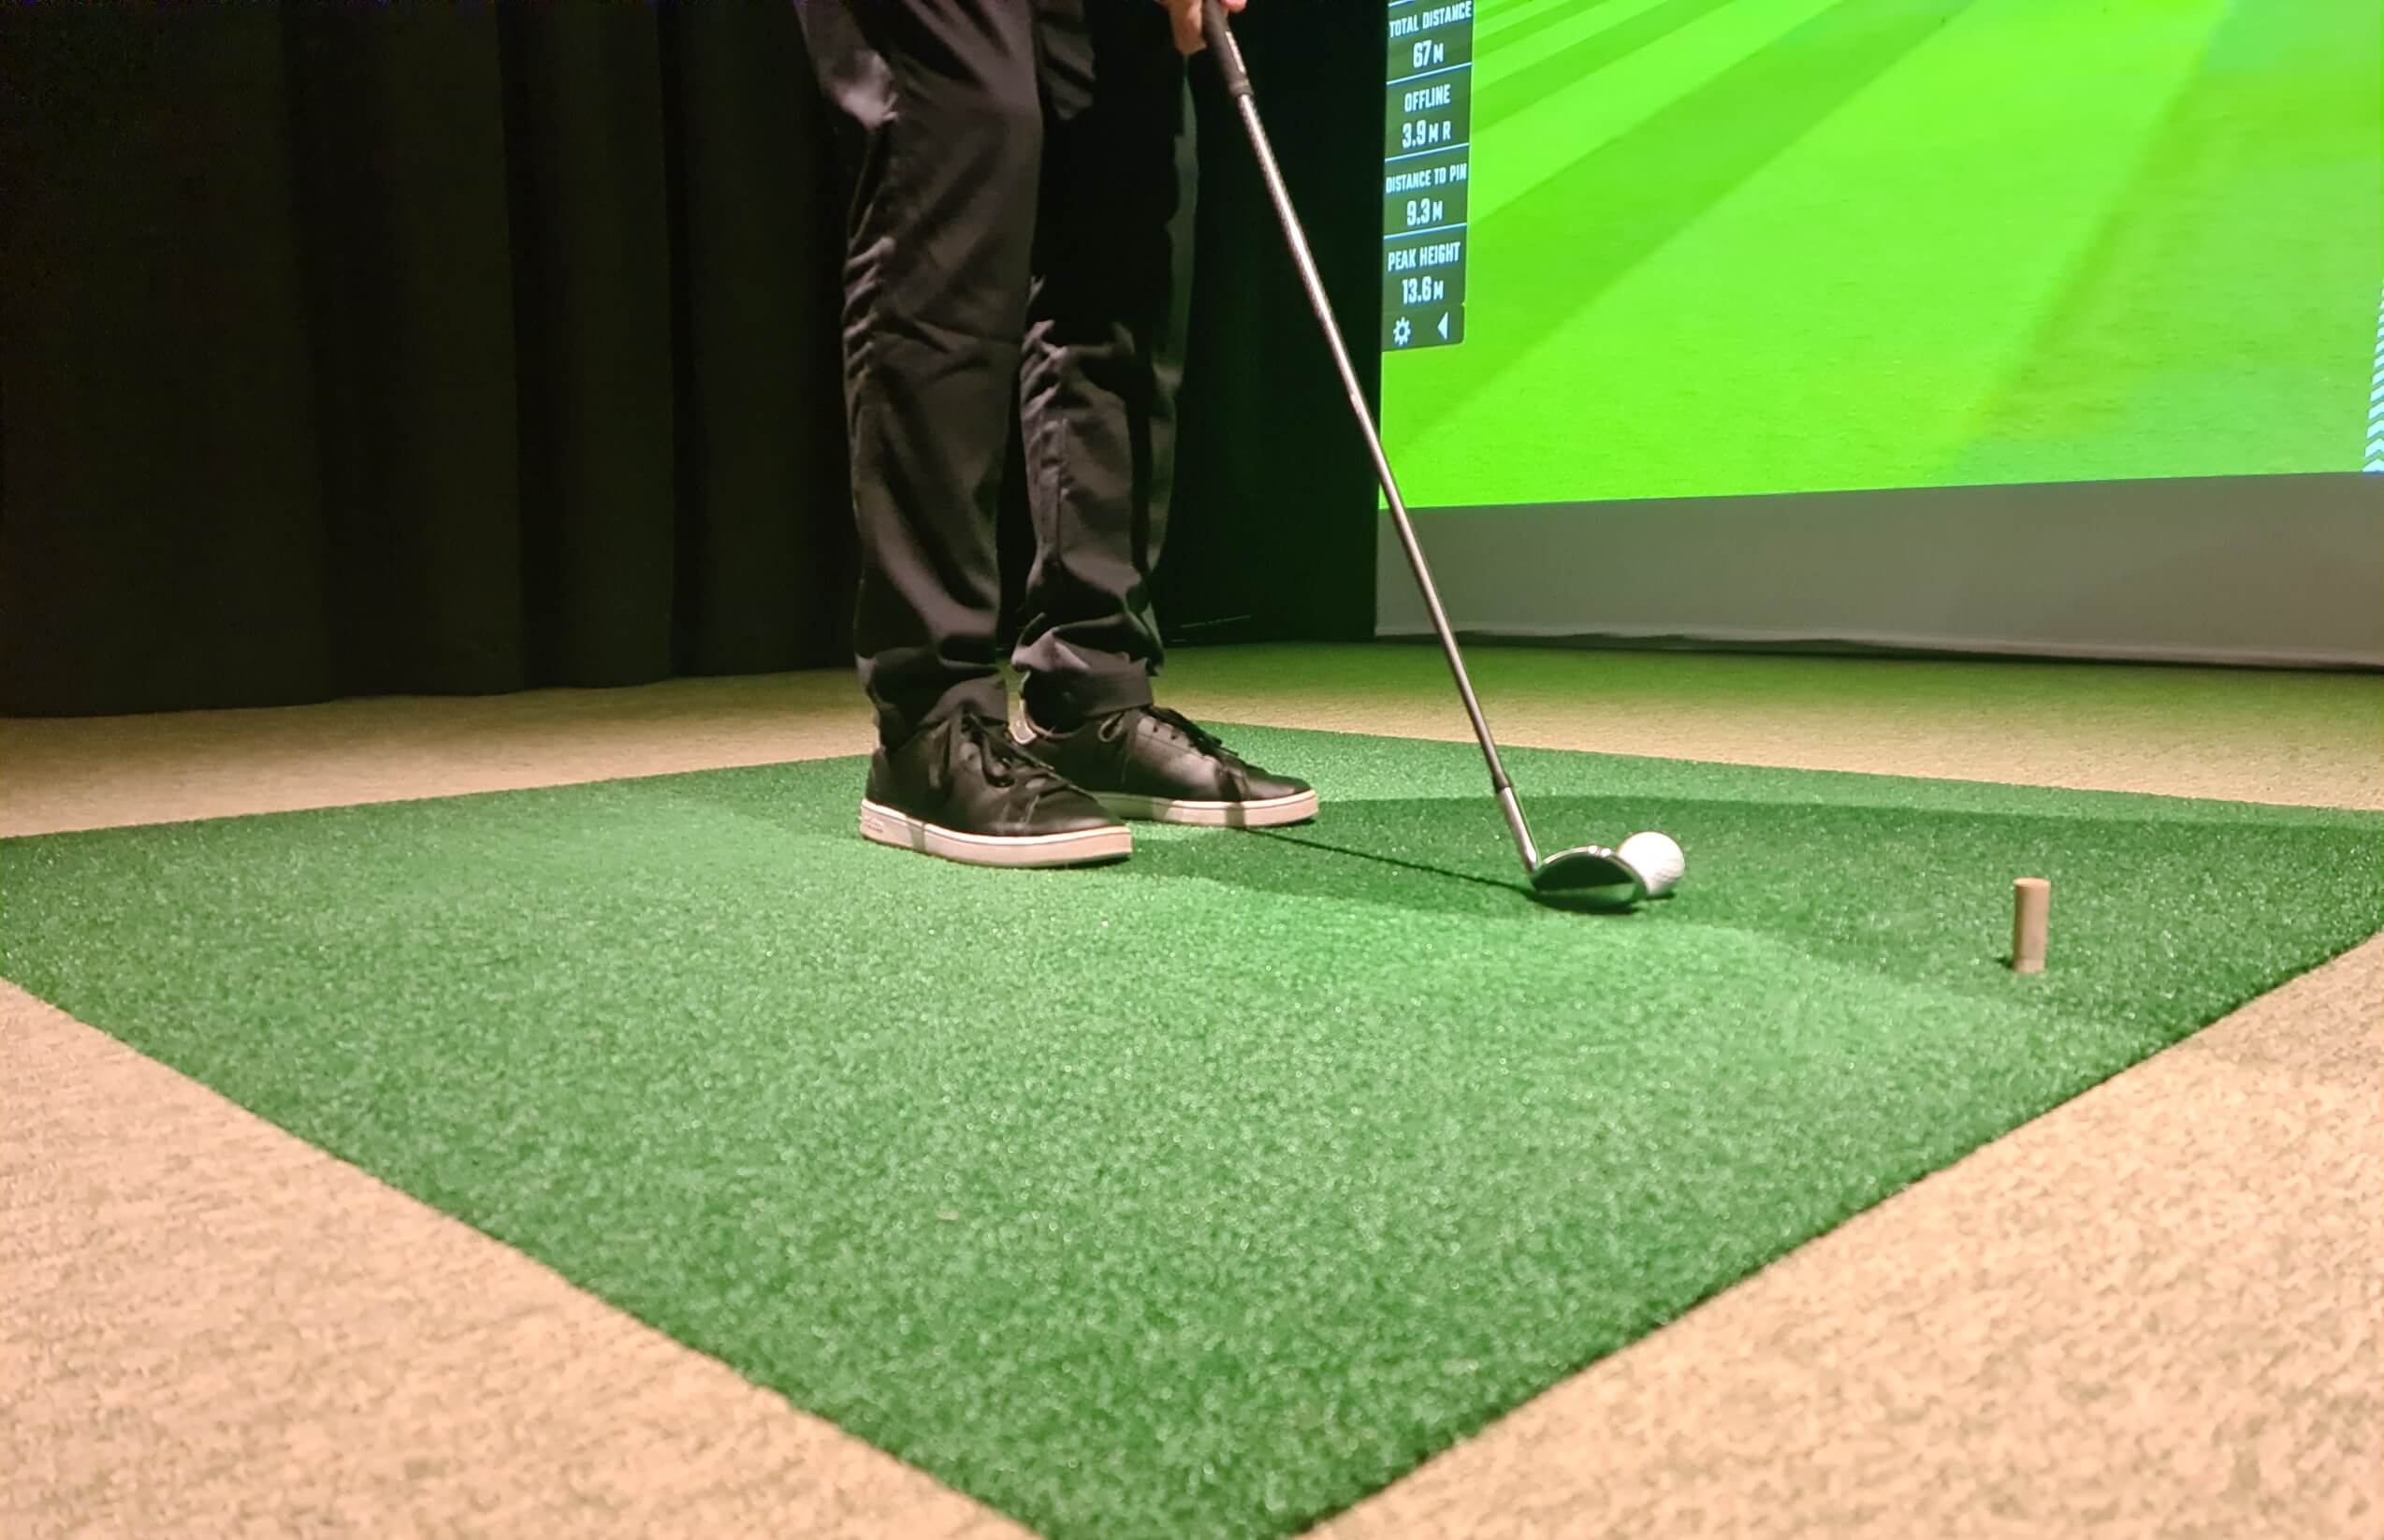
1. Get the Ball Position Right
Before adjusting your ball position, keep in mind that even small changes can have a big impact on both ball flight and strike quality.
To lower your ball flight, start by moving the ball slightly back in your stance. For example, with a 7-iron, try rolling it back about an inch and observe what happens.
By shifting the ball back, you encourage contact during the downswing, which reduces dynamic loft. When the ball is too far forward, the club may be adding loft during the follow-through, launching the ball higher.
After that initial inch adjustment:
- Evaluate the ball flight.
- If it’s still too high, roll it back a little more.
- Be careful not to go too far, too much back ball position can lead to pushes right (for right-handed players) since the clubface may still be open at impact.
2. Forward Press at Impact
Having your hands ahead of the ball at impact will help get the ball flight down. The forward press of the hands will deloft the clubface and result in a lower ball flight.

Before you start trying to create this, there are a few things to know.
First, don’t exaggerate this too much at setup. If you do, you’ll restrict the natural movement of your swing and your turn.
Instead, have the hands slightly ahead at setup and then work on matching that at impact.
Using an impact bag can help you learn this forward press position. Another great drill to try is to hold your finish, essentially stopping the club right after the ball.
You’ll create much more awareness of where the hands are, and you’ll have to keep them ahead of the clubhead to strike a clean shot.
3. Flexion in the Lead Wrist
Another way to lower ball flight is to keep the lead wrist flexed through impact.
The flexion in the lead wrist encourages a square clubface, and even slightly delofted at times. When your wrist is too extended, there is a tendency to open the face and increase the loft of the club.
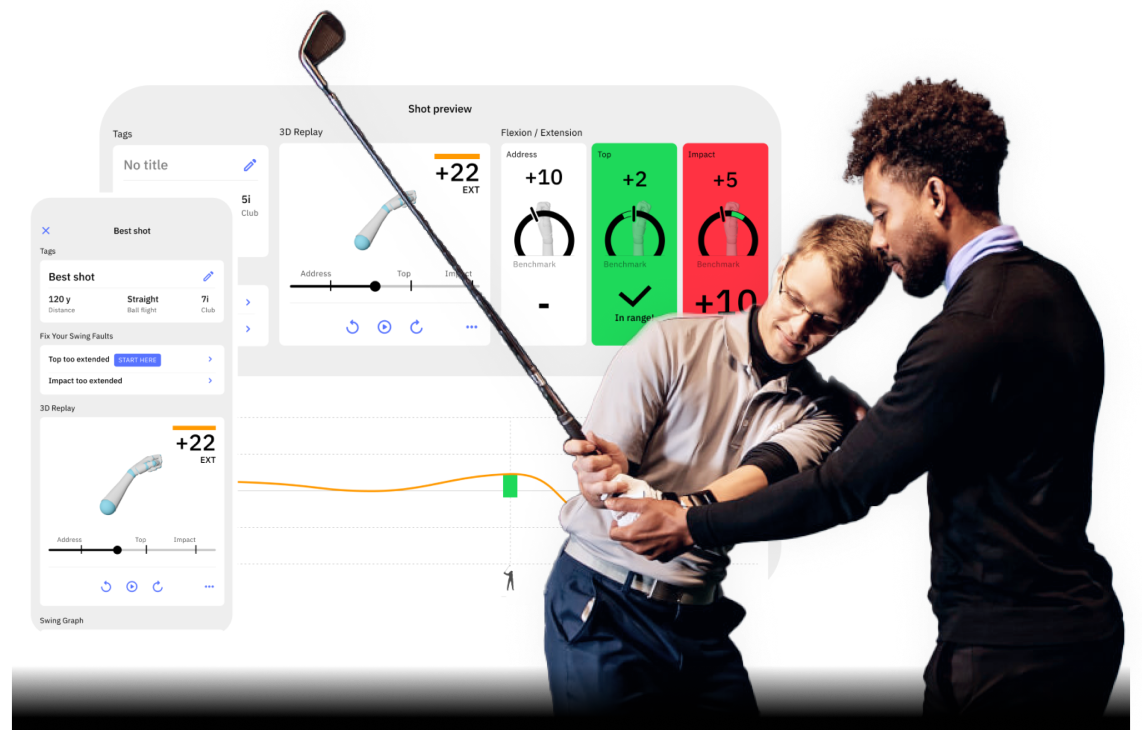
At HackMotion, we analyzed more than 1,000,000 golf swings, and one of our key findings was the relationship of flexion in the lead wrist at impact with the quality of the strike you make in golf.
This quality strike with a square clubface will help you get lower shots that also likely fly further than your high-lofted shots did.
Working on the HackMotion Motorcycle drill can help you improve flexion in the lead wrist at impact.
Motorcycle Drill – Master Wrist Flexion in the Downswing
Focus on continuously adding flexion until the club reaches parallel, then smoothly complete your swing.
HackMotion Motorcycle Drill – Step by Step:
- Set Up: Address the ball as usual.
- Downswing Flexion: As you begin your downswing, gradually add wrist flexion so that by the time the club is parallel to the ground (P6), you’ve achieved your desired wrist bend.
- Continue to Impact: Maintain that flexion into impact, then release naturally through the finish.
- Experiment with Speed: Start slowly, then increase speed while retaining proper angles.
- Practice while hitting golf balls, but also work on this drill by completing the motion and not hitting shots.
- Find your “just right” amount of flexion—too little or too much can cause mishits.
4. Make Sure the Weight is Forward at Impact
If your weight stays on the back foot at impact, your trail shoulder drops, adding loft and sending the ball too high.
To fix this and lower your ball flight:
- Start with 55–60% of your weight on your lead side at setup.
- As you swing down, rotate through impact—don’t slide. Sliding your hips can lead to power loss and inconsistent strikes.
- Combine this with a slightly back ball position and a flat lead wrist at impact to deloft the club properly.
Watch the video sequence below and pause at key points to study the swing positions. Focus on how the body stays centered while the weight shifts forward naturally.
Small setup changes like this can make a big difference in your ability to compress the golf ball and control trajectory.
5. Check Your Grip
Changing the grip slightly is rarely enough to lower your ball flight.
However, if your grip is too weak, it could leave the clubface a little more open and higher lofted at impact. Instead, create a slightly stronger grip and see if that lowers the ball flight.
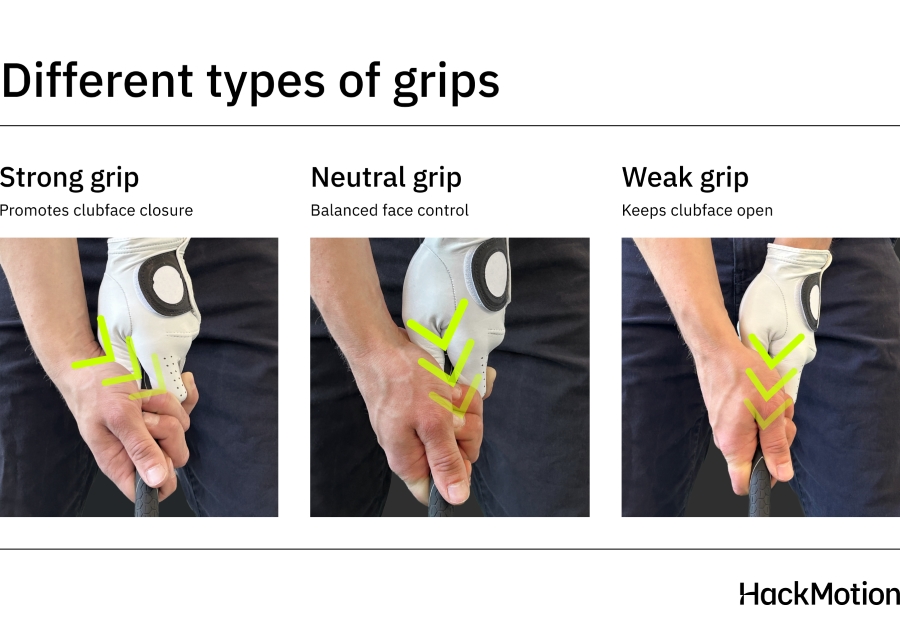
For a right-handed golfer, take your left hand and turn it a half-inch to the right. Then you’ll notice that the right hand fits more on the underside of the club, not on the top of the grip.
Experiment with this, but be careful not to cause the golf ball to veer left of the target.
Other Tweaks to Try Lowering the Ball Flight with Irons
Now that you have the fundamentals of what it takes to lower the ball flight with irons, here are a few other tips to try and get the flight down.
- Use a lower lofted club when you need to keep the ball low; hitting a 6 or 5 iron lower is much easier than doing it with an 8 or 9 iron.
- Use lower-spin golf balls to ensure the ball flight stays down.
- Hold the finish, stop the finish short of where you normally would, and see if that helps to hold the ball flight down a little more.
Drills to Lower Ball Flight with Irons
Most of the drills related to hitting lower iron shots require you to spend some time on the range working with your irons and grooving these different positions.
However, here are a few drills and practice routines you can try to lower your ball flight.
HackMotion Casting Drill
If you are casting the golf club, having that extra shaft lean at impact is not possible.
Try the HackMotion Casting Drill in real time to collect all the data you need.
Fix Your Casting with HackMotion
Improve wrist retention and reduce early release.
HackMotion Casting Drill – Step by Step:
- Set up with your HackMotion sensor and go to the top of your swing.
- As you transition into the downswing, focus on maintaining or even increasing wrist hinge (angle between lead arm and shaft).
- Use HackMotion feedback to avoid early extension or casting.
- Repeat slowly, this drill is best done in slow-motion reps before introducing a ball.
- Once consistent, begin hitting soft shots while maintaining wrist angle through impact.
This helps you keep the shaft lean, reduce added loft, and promote compressed, lower-flight shots.
Alignment Stick Follow-Through Drag Drill
Purpose: Improve shaft lean, body rotation, and wrist control through impact.
Dragging the stick requires proper rotation and structure, no flipping or stalling. It gives immediate feedback if you’re releasing early or losing posture.
Alignment Stick Follow-Through Drag Drill – Step by Step:
- Place an alignment stick under your grip so it extends several feet behind you.
- Set up in your normal stance and grip the stick like a golf club.
- Slowly drag the alignment stick along the ground through the downswing and follow-through.
- Focus on: keeping your weight forward, maintaining a flexed lead wrist, extending the trail wrist (bent back), keeping arms straight, and elbows close together.
- Continue dragging the stick until your arms are parallel to the ground in the follow-through.
- Repeat the motion, then transfer the feel to your actual swing using a club.
Final Thoughts
Now all that’s left to do is head to the range and work out these issues by hitting the golf irons a little lower.
It’s a good idea to bring your HackMotion with you. Eliminating that extra extension in the lead wrist through impact can do wonders for your ball flight control.
Use these lower iron shots to stay under the wind, and go after pins with more confidence.