Pull Slice in Golf (Get Rid of The Pull Slice For Good, Causes & Fixes)
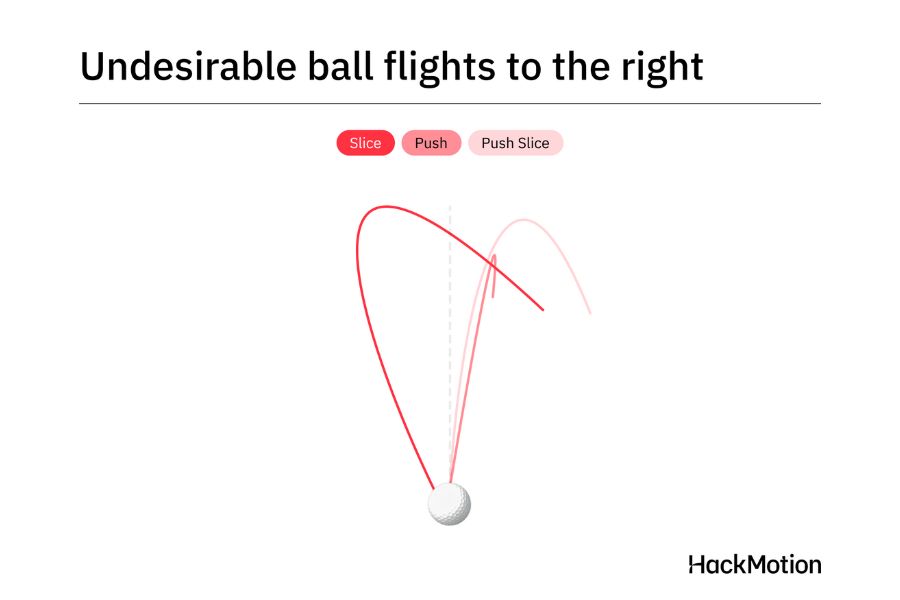
With a pull slice, the golf ball goes straight to the left and then starts to make a turn to the right. Some golfers are so used to this pull slice ball flight they aim left of their target and wait for the ball to slice back in.
The problem is the pull slice is unpredictable, and it’s very likely costing you distance.
If you are ready to fix your pull slice and take your golf game to the next level, you are in the right place.
How to Fix a Pull Slice in Golf (Key Takeaways)
If you are ready to fix your pull slice but don’t have time to read through all of our detailed drills and solutions right now, here are the most important takeaways:
- Start with a square clubface at address; this will help prevent the initial pull to the left.
- Check your ball position and make sure it’s placed correctly in your stance. For drives, keep it forward, but for irons, adjust it gradually back to maintain control over your swing path and prevent slicing.
- Start your downswing with your hips, not your shoulders. This avoids the common “over-the-top” motion that often leads to an out-to-in path and a pull slice.
- Maintain proper wrist flexion through impact. A flexed (bowed) lead wrist squares the clubface and prevents it from staying open, reducing slice spin.
If you feel like your slice is the bigger problem and the pull can be easily fixed or adjusted, take a look at our free slice-fix course. This course breaks down why you slice and how you can fix it into six simple steps.
Access the free video course here!
Contents
Why Am I Hitting A Pull Slice?
Before we get into how to fix a slice, it is important to understand where this pull slice comes from.
Here are the causes that are likely putting you in a position to hit an inconsistent pull slice.
- Left Alignment: Aiming left leads to an inside swing path with an open clubface, setting up a left-starting shot that curves right.
- Ball Too Forward: Placing the ball too far forward forces an overreach, causing an outside-in swing path and preventing square clubface alignment.
- Casting from the Top: When shoulders and arms initiate the downswing, it leads to an outside-in path with an open face, resulting in a rightward slice.
- Out-to-In Swing Path: Swinging from out-to-in generally opens the clubface to the path, starting the ball left and curving it right.
- Excess Wrist Extension: Extended wrists keep the clubface open at impact. Maintaining a more neutral or flexed wrist can help square the face and reduce slicing.
- Clubface Open to the Path: An open clubface relative to the path at impact guarantees a rightward curve after a left launch, creating the characteristic pull slice.
How Do You Fix a Pull Slice in Golf?
Now that you have some of the causes, let’s take a look at how to fix the pull slice in golf.
1. Clubface Square to Target at Address
The first step is to make sure your clubface is square to your target at address.
In addition, make sure you are set up parallel to the target to discourage an inside path through impact and produce a straighter launch.
When you think you are aligned with your target, look down at the clubface and draw an imaginary straight line.
If it points to the left or right of the intended target, adjust the clubface until it is square to the starting line.
2. Progressive Ball Placement
Check your ball position and ensure it’s not too far forward in the stance. Follow a progressive setup, depending on the shaft length you swing.
The furthest forward your ball should sit is on the inside of your lead heel for drives. Since the ball is teed up, you need to strike it marginally after the low point of your swing to launch it.
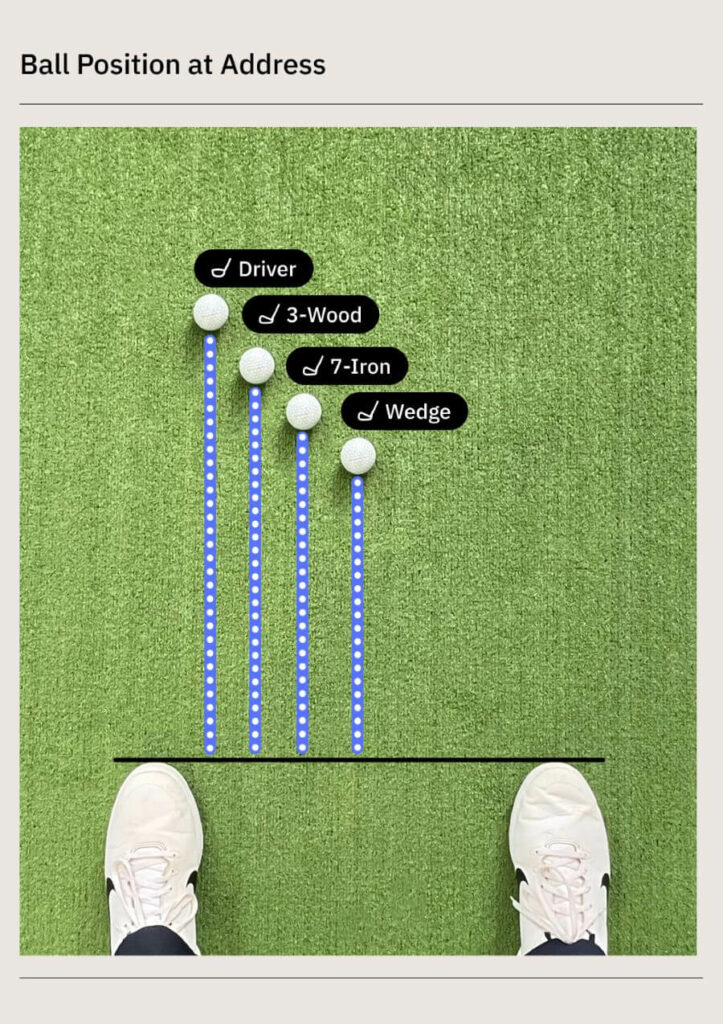
Next, fairway wood and hybrid shots off the deck perform best with a forward-center setup.
Next, move the ball an inch back from its fairway wood position for long iron strikes and place it in the center for my mid and short irons.
Finally, set the ball up just slightly back of center for wedge strikes.
3. Forward Shaft Tilt
Forward shaft lean at address will give you the feel of where my hands should be through impact.
When hands lead, you will be more likely to generate lag, shallow the club, and close the clubface slightly into contact.
The closed face relative to my path executes a marginal right-to-left curve opposite to the shape of a pull slice.
Forward shaft lean doesn’t guarantee a clean strike, but it prepares you for the task ahead.
Some golfers exaggerate the forward shaft lean, take a look at this video to make sure you get it right.
4. Hip Rotation Drops Your Club Into Place
Avoid leading with your shoulders from the top of the backswing, as they will cause you to cast the club and swing from the outside in.
Instead, start the downswing by activating your hip rotation and shifting weight from the back leg forward.
Rotating hips at the top causes the club to drop into place on the inside, allowing me to produce an outside path.
You’ll find your trail arm has the perfect place to drop in on the proper plane when you rotate with your hips. The golf ball will start slightly right of the target and draw back in.
5. Add Wrist Flex
The final piece on how to stop a pull slice lies in your wrist flexion or bowing. Start by holding out your hand as if you’re going to shake a buddy’s hand.
If you push your fingers towards the target, you notice that your palm ends in a closed position to the target.
This position is a consequence of wrist bowing or flexion, which causes you to close your clubface and shallow the shaft, enabling an outside swing path down to contact.
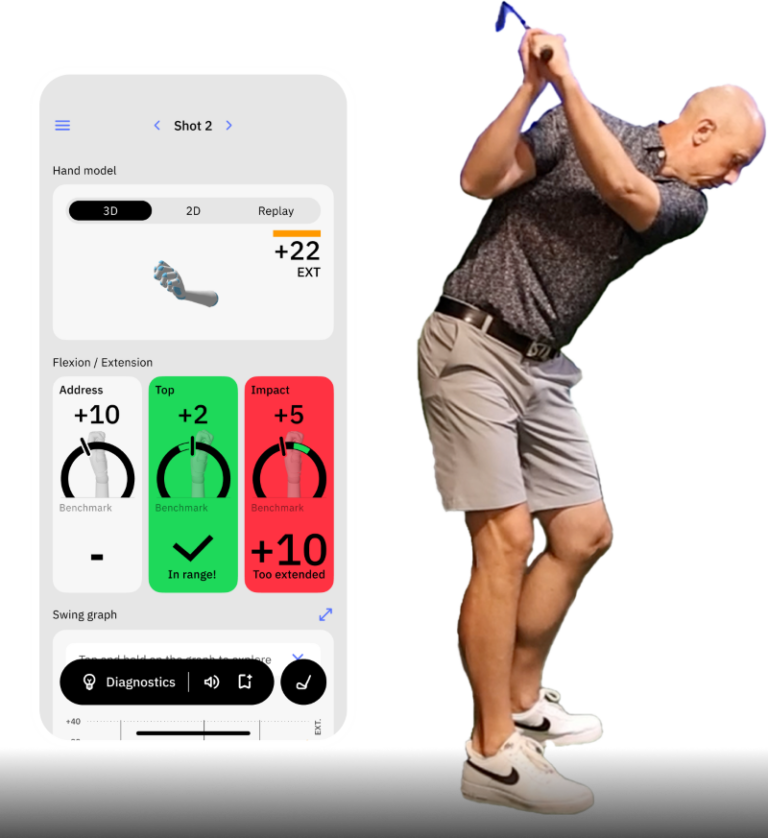
The HackMotion wrist sensor guides amateur golfers to optimize wrist angles from address through impact.
How to Fix Your Pull Slice with HackMotion
HackMotion wrist sensor is the perfect tool to fix a pull slice because it can bring attention to the aspects of your wrist motion in your swing that are incorrect.
HackMotion breaks down wrist motion to set up, top of the backswing, and impact.
Use Audio Feedback with the HackMotion Swing Analyzer
Once you take some swings with your HackMotion and collect data you can then start to look at the patterns and see where your issues are.
After analyzing more than 1,000,000 golf swings, we know that the best golfers start with a small amount of extension in their wrists.
As they swing to the top, they do not add any extension. Then, from the backswing down to the golf ball, all extension is lost, and instead, golfers move towards flexion in the lead wrist.
The impact position should be considerably less extended (more towards flexion) than the address position.
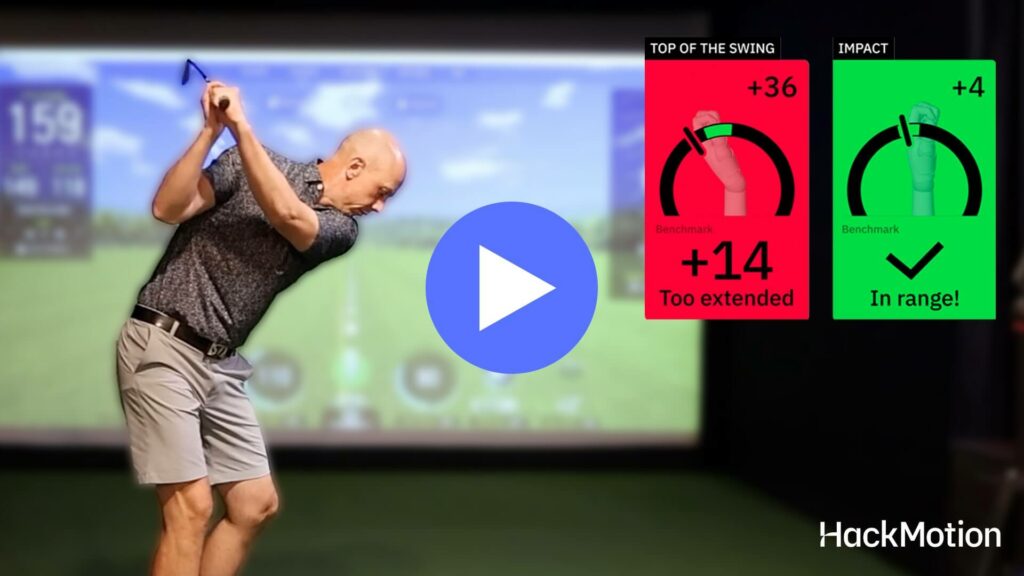
The audio feedback on your HackMotion swing analyzer can be set to notify you when your wrist position is incorrect.
The pull slice usually occurs because of an incorrect moment at the top of your swing.
Half Swing Check / Pre-Shot Thoughts
HackMotion works in real-time. Therefore, you can use it to check your position as you are taking practice swings.
Setup at the range with your phone or iPad in a position that you can see what the HackMotion is saying.

As you swing back and through the ball, look at how your wrist position changes and what it takes to get into that flexion point at impact.
If you can do that, your clubface will be square, and the chance of you swinging more from the inside out is also going to be possible.
Combine these half-swing shots and checks with the proper body rotation and turning, and you will be well on your way to eliminating the pull slice.
Final Thoughts
One of the things golfers notice about the pull slice is that if they can fix the slice, and square the club through impact they can easily get rid of the slice.
Many times the pull part of this is created as a defense to the slice action.
Consider working on fixing the slice first and then from there move to adjust your alignment and ball position.
Use the HackMotion to help ensure your wrists are always in the right place and your clubface angle is controlled.