Proper Wrist Action for Bunker Shots: Tips, Drills & What Most Golfers Get Wrong
If you’ve ever stood in a greenside bunker, taken a swing, and watched the ball either dig straight into the lip or rocket over the green, you’re not alone.
Bunker shots are one of the most misunderstood parts of the short game. The problem often comes down to the wrists.
What your wrists do in the sand is the opposite of what they should do in a full swing. If you’re treating bunker shots like mini iron swings, you’re setting yourself up for frustration.
Instead, you need to learn how to hold loft and expose bounce with the help of your wrists.
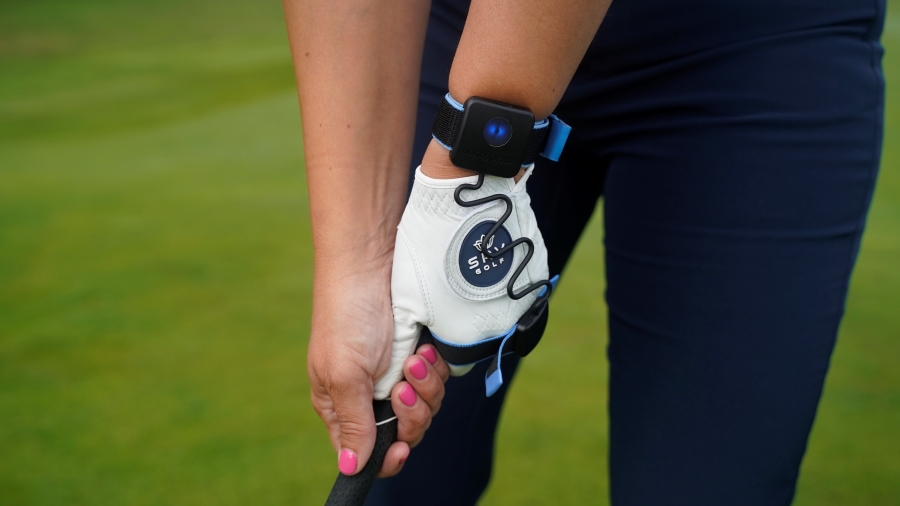
That’s where HackMotion makes a huge difference; it shows you exactly what your wrists are doing and helps you lock in the correct motion.
Wrist Action in Bunker Shots (Key Takeaways)
If you don’t have time to jump into a bunker right now and practice these skills, at least take these tips with you.
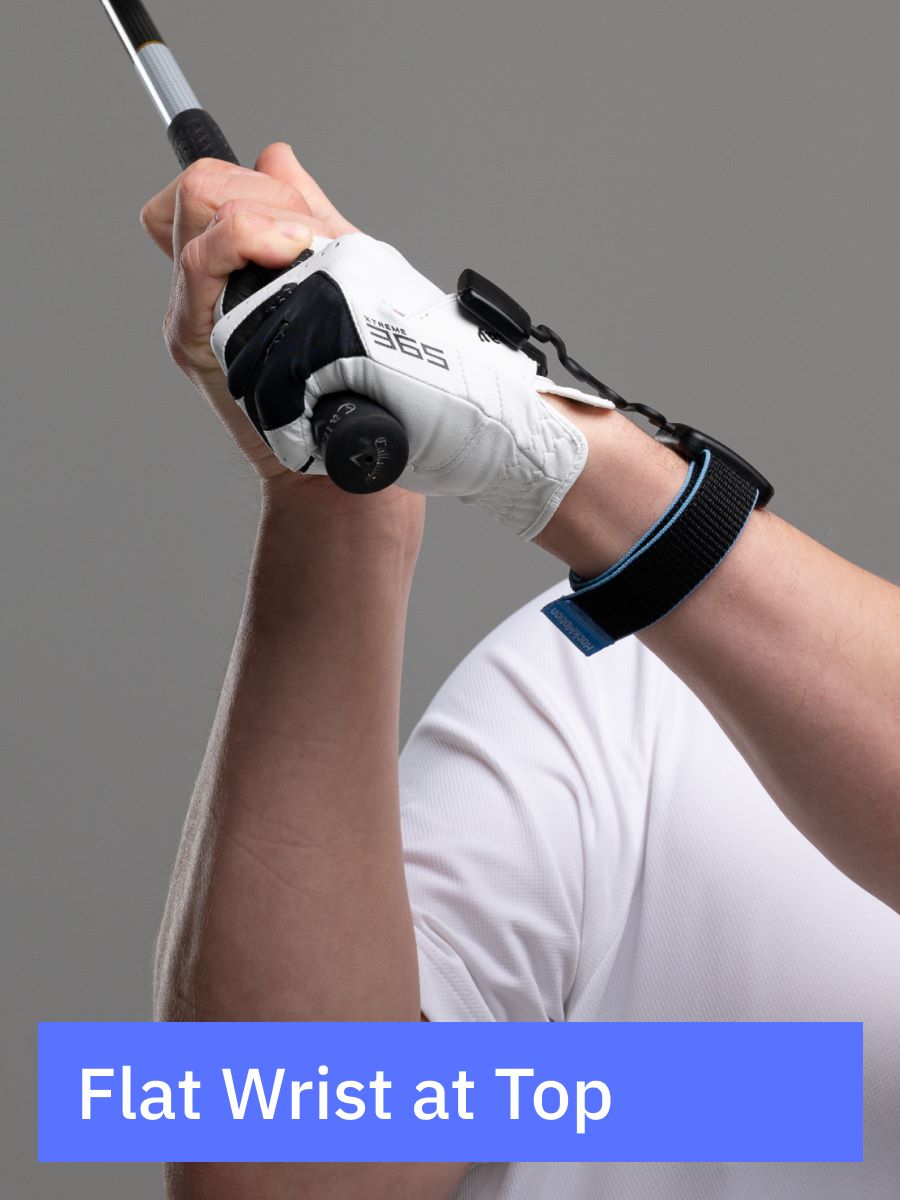
- The lead wrist should stay extended (cupped) from setup through impact to keep loft and use bounce.
- Open the face, then re-grip, with the handle lowered slightly and a wide, stable base.
- Think “face to the sky” – keep the clubface looking open throughout the swing.
- Speed matters – hinge the wrists to generate speed and let the club thump the sand.
- HackMotion biofeedback makes it easy to train extension instead of guessing.
Contents
Proper Wrist Action in Bunker Shots
Most golfers are so focused on getting the golf ball out of the sand that they forget to think about the actual components of a perfect bunker shot.
A great bunker shot takes correct wrist action. You’ll need to get your setup, stance and plane right and then let the position of the lead wrist do the work for you.
Setup that Makes the Swing Easier
The bunker shot starts before you even move the club. If you don’t have the setup correct it’s not worth taking the club back.
Remember as you work through this we are talking about wrist action for greenside bunker shots.
- Take a wide stance and dig your feet in for stability.
- Keep your lead knee flexed and stacked over your lead foot, and don’t let it drift during the swing.
- Play the ball forward, roughly under your lead shoulder.
- Open the face first, then re-grip with the handle slightly lowered (no big shaft lean).
This setup automatically builds in loft and bounce. By lowering the handle and opening the face, you’re already giving yourself the chance to glide the club through the sand instead of digging.
What the Wrists Do
The wrist action in the bunker may be something you have never considered. Most of the time we talk about the lead wrist in bunker shots to help make things a bit easier to understand.
- Lead wrist: Stay extended (cupped) from setup, backswing, and through impact.
- Trail wrist: Flexed to help keep the face open and shallow.
- Hinge: Add a wrist hinge going back to create the speed you’ll need.
Think of the wrists as your loft controllers. Extension equals loft and bounce. Hinge equals speed. Combine both and you get that perfect “thump” into the sand.
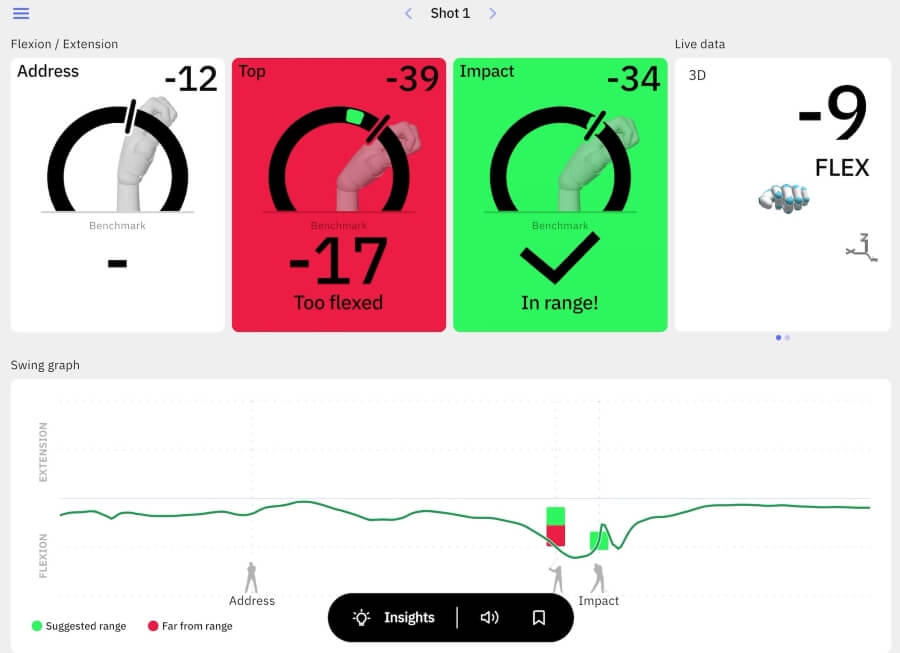
HackMotion helps here by giving you biofeedback; you can set a target range for extension and get a buzz or tone if you fall out of it. That way, you know you’re holding the right amount of extension instead of guessing.
The Mistakes (And How to Fix Them)
There are three common errors we see in golf wrist action for bunker shots. If you’ve followed the steps above and still can’t quite figure out the issues, here are some common mistakes to watch out for.
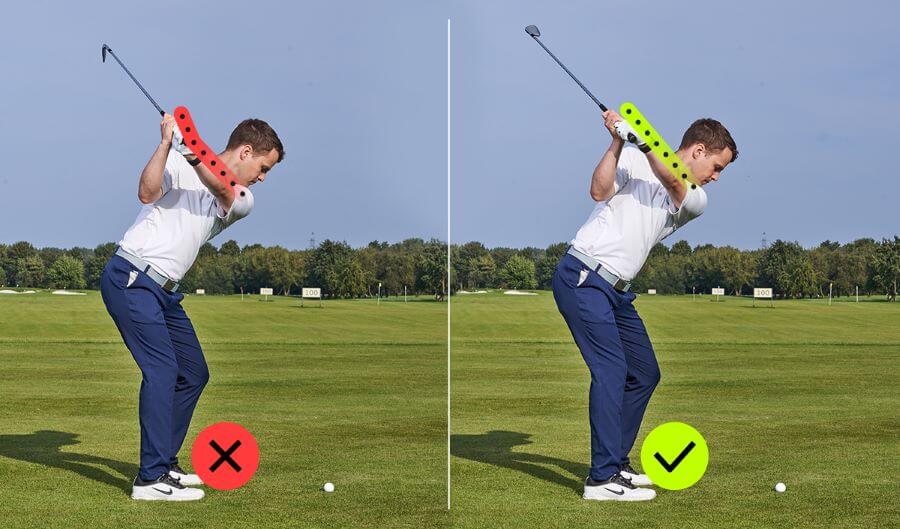
Mistake 1: Adding Lead-Wrist Flexion (Bowing)
If you add lead wrist flexion instead of extension, the ball comes out low, digs into the lip, and it can even rocket over the green. It happens because flexion delofts the club and exposes the leading edge.
Fix it:
- Rehearse the takeaway to waist high with the back of your lead hand pointing to the sky.
- Use the “turn the tap” feel, rotating so the face looks back at you, not down.
- With HackMotion, set biofeedback to buzz if the extension drops below your range.
Mistake 2: Not Enough Wrist Hinge = No Speed
If the issue you are struggling with is that the ball stays in the bunker or you notice that you have inconsistent contact, it could be a wrist hinge issue.
Fix it:
- Imagine “flicking mud over your head” in the backswing to exaggerate hinge.
- Keep your weight forward and release the club so it thumps the sand.
- With HackMotion, pair hinge with your extension band so you’re fast and open.
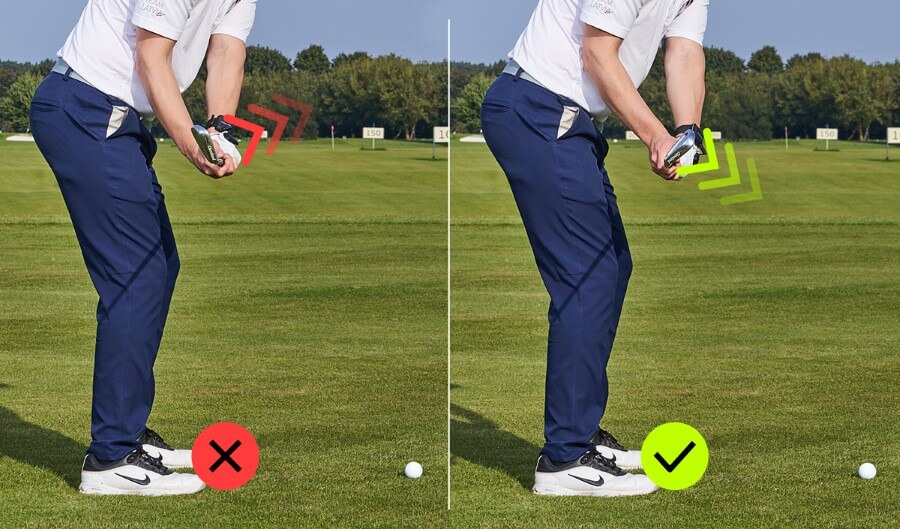
Mistake 3: Getting Too Steep and Across it
Another mistake is getting too steep in the swing and cutting across the ball. This will cause inconsistent strike depth and thin shots. It often happens because of an open stance and more of a chopping swing.
Fix it:
- Use a square-to-slightly-closed stance.
- Keep that lead knee flexed forward throughout the swing.
- Maintain “face to the sky” so you don’t reflex-close the club.
Two Drills to Groove Bunker Wrist Action
To help make your bunker shots more consistent, try these two drills. Doing the drills with your HackMotion on will make it easier to groove the correct motion.
Drill 1: Turn the Tap (Face-to-the-Sky)
The first drill will help train continuous lead-wrist extension so the face stays open and the bounce works.
Turn the Tap Drill – Step by Step:
- Set up with open face, re-grip, handle lowered.
- Without a ball, swing waist high and “turn the tap” so the back of your lead hand (the clubface) looks to the sky.
- Continue through, keeping that face looking back at you after impact.
- Hit splash shots, focusing on holding that extension.
Drill 2: Flick the Mud (Hinge for Speed)
The second drill will help you create speed while still maintaining extension in your lead wrist.
Flick the Mud Drill – Step by Step:
- Same setup with a wide stance, ball forward, face open.
- Imagine mud on the back of the club hinge and flick it over your head.
- Keep pressure forward, then let the clubhead overtake and thump the sand.
- Use HackMotion to make sure the hinge doesn’t turn into flexion.
- Work on 3-ball sets: medium-high-soft trajectories using the same wrist extension band, just with more speed.
Final Thoughts
Bunker shots don’t have to be intimidating. The key is realizing your wrists are doing a completely different job here than they do in a full swing.
Instead of trying to deloft and compress, you’re trying to add loft and expose bounce.
Set up correctly, keep the lead wrist extended, and add hinge for speed. Then use HackMotion to monitor your extension and confirm you’re holding the face open through impact.
The more you practice with this feedback, the sooner your bunker shots will start flying high, landing soft, and stopping close.