Proper Golf Follow-Through: Mastering Wrist Action After Impact for Consistency [Drills Included]
What your wrists do after impact may seem less important than what they do at impact, but that couldn’t be further from the truth.
Wrist action in the follow-through affects your ball flight, consistency, and ability to control the clubface.
Great players all follow a similar pattern: the wrists stay stable through impact, then release naturally after the strike.
When amateurs get this wrong—whether by flipping, over-rotating, or holding angles too long—they struggle with accuracy and contact.
This guide will walk you through the role of the lead and trail wrists in the follow-through, the common mistakes players make, and how to train proper mechanics with a few simple drills.
Wrists in Golf Follow-Through (Key Takeaways)
If you don’t have time to read our entire guide on the role of the wrists in the follow through, here are the most important things to take with you right now.
- Lead wrist: arrives at impact flatter or more flexed than at address, then extends naturally after contact.
- Trail wrist: should have more extension at impact than at setup; releasing it too early causes flips, scoops, and poor contact.
- Minimal forearm rotation through the ball keeps the clubface square to the swing arc.
- The release should feel natural, not forced, with stability through impact and freedom afterward.
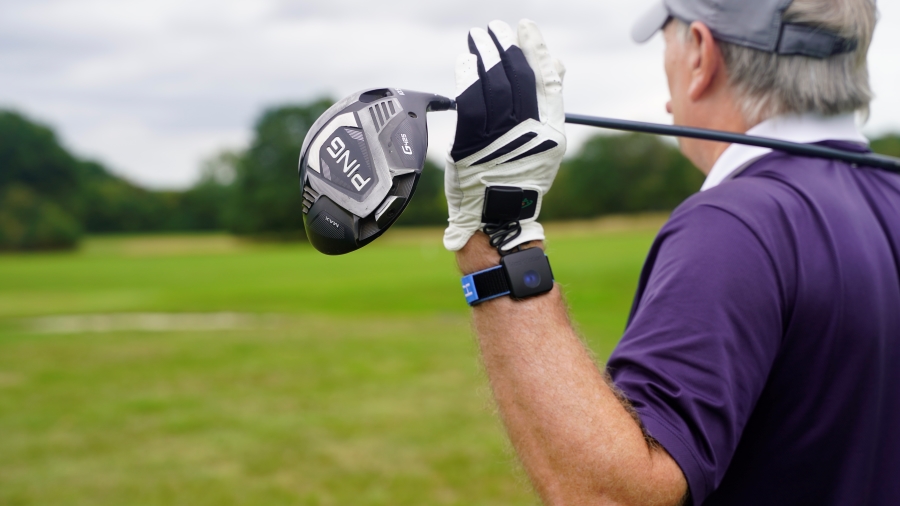
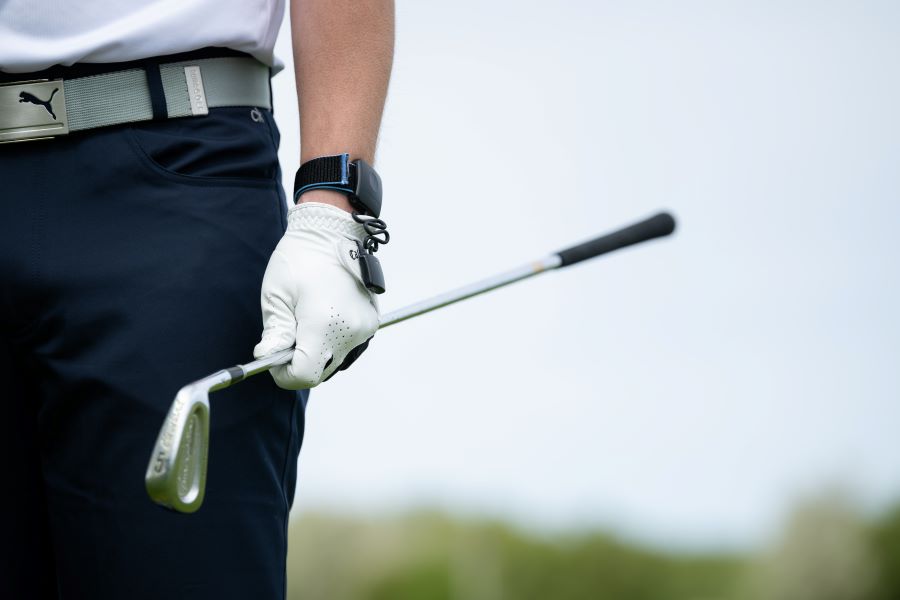
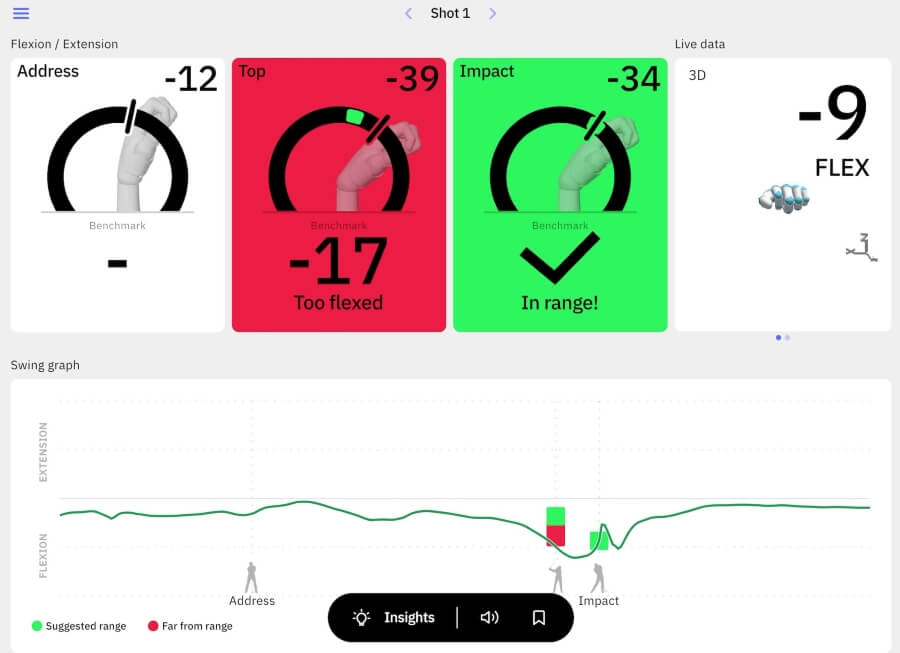
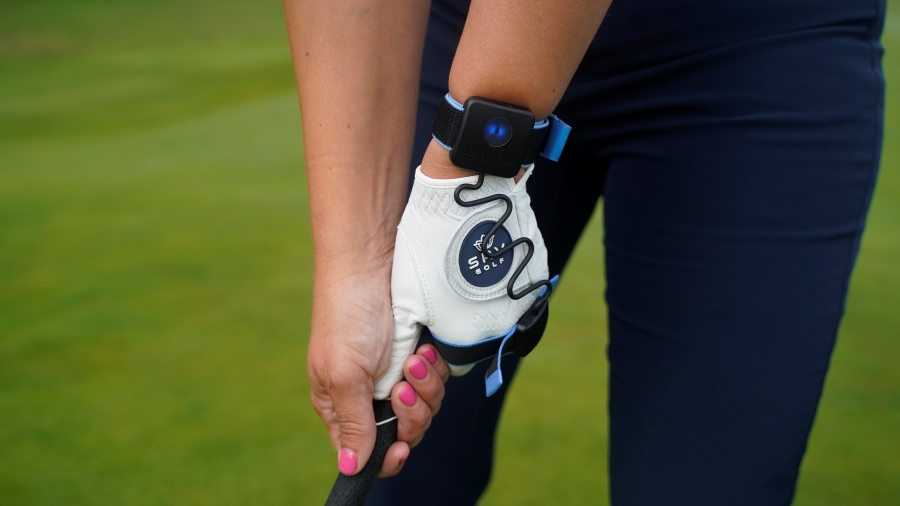
- HackMotion provides checkpoints (P2, top, P6, impact) and graphs to help you measure timing and correct release patterns.
Contents
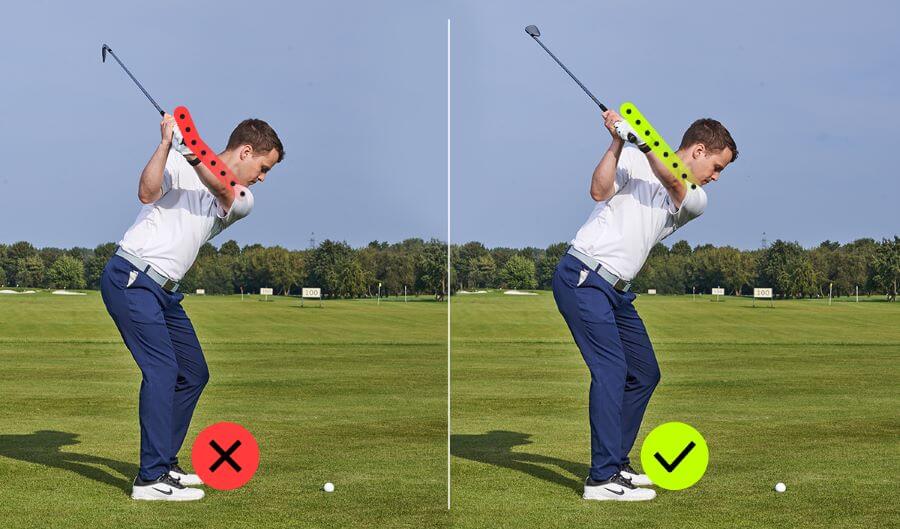
Lead Wrist Action in the Follow-Through
The lead wrist plays the biggest role in keeping the clubface stable through impact.
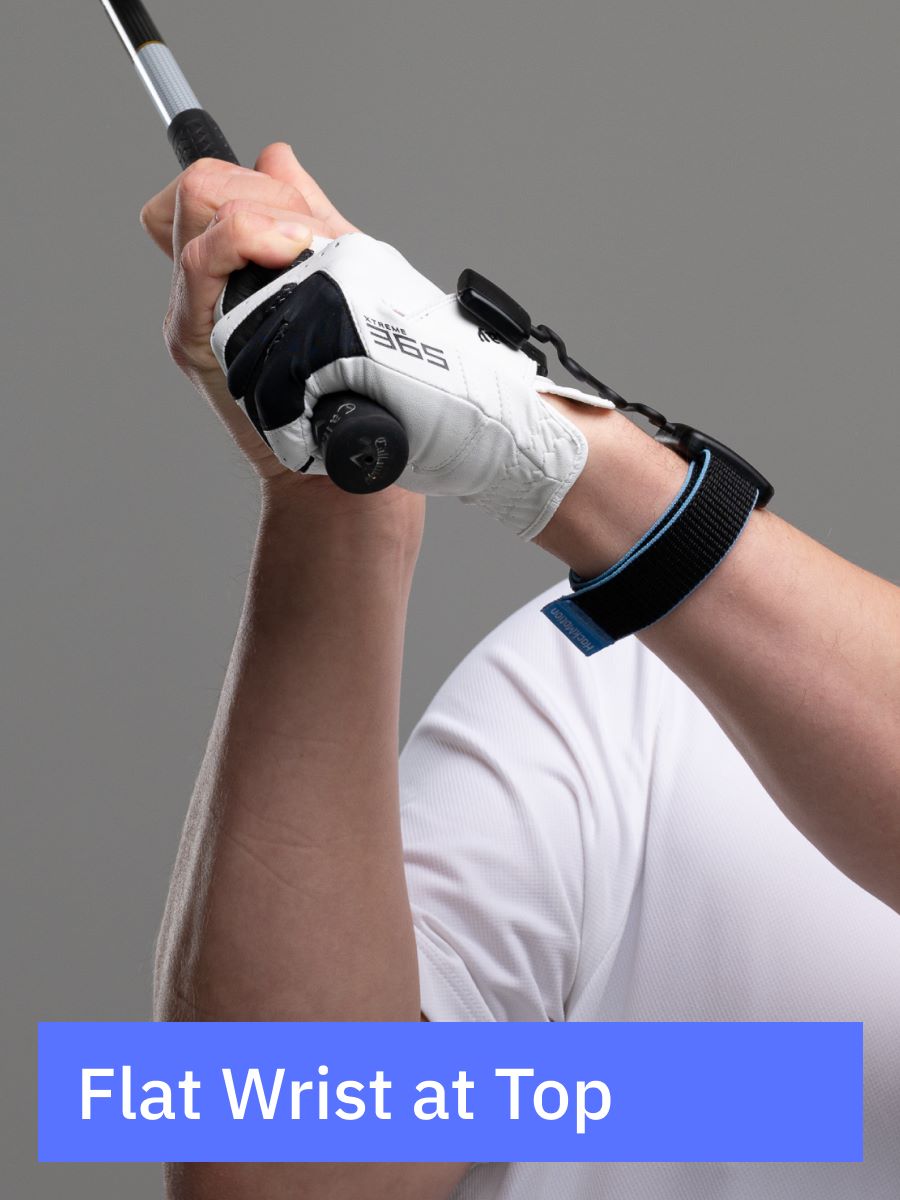
At setup, most golfers have a small amount of extension. The best ball strikers quickly flatten that extension early in the backswing, hold a flat or slightly flexed wrist to the top, and then add more flexion in the transition.
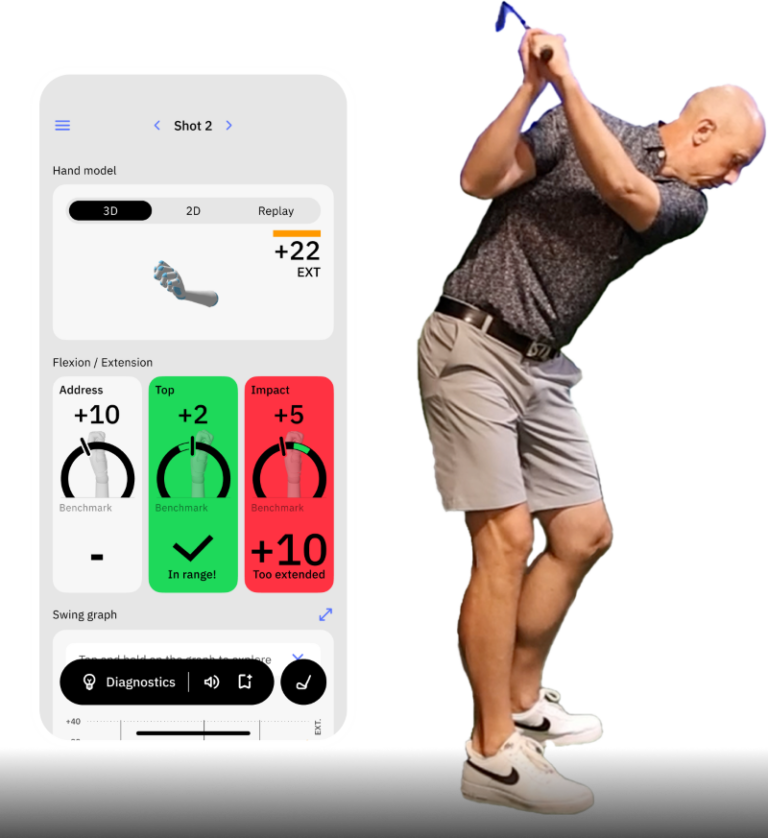
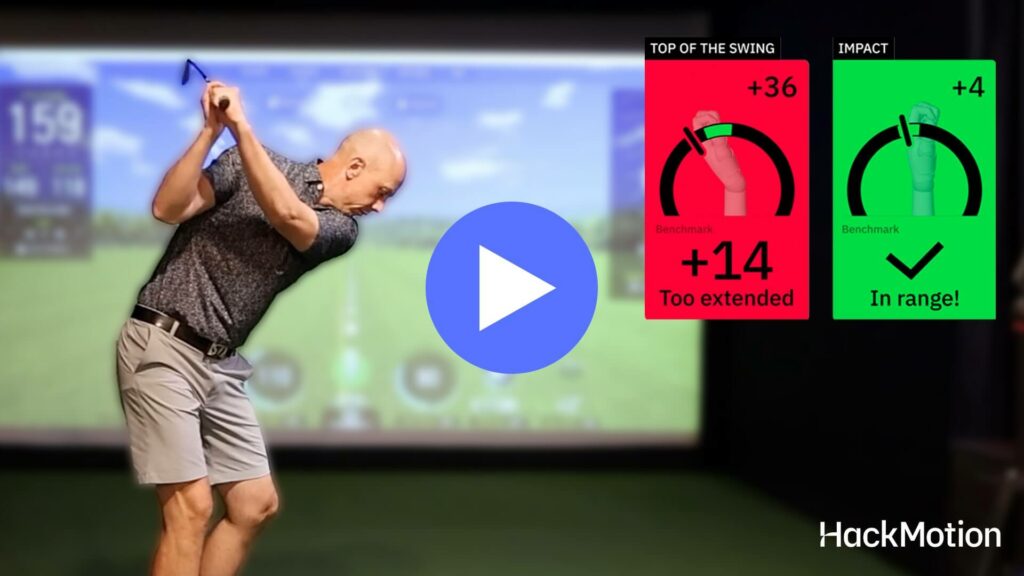
At impact, the lead wrist should be flatter or more flexed than it was at address.
This ensures the clubface is square and de-lofted at the strike. Only after the ball is struck should the lead wrist begin to extend.
If this extension happens too early, it almost always results in thin shots, scooping, or directional issues.
The takeaway: don’t try to force a locked wrist. Instead, focus on reaching impact with flexion and letting the release happen naturally afterward.
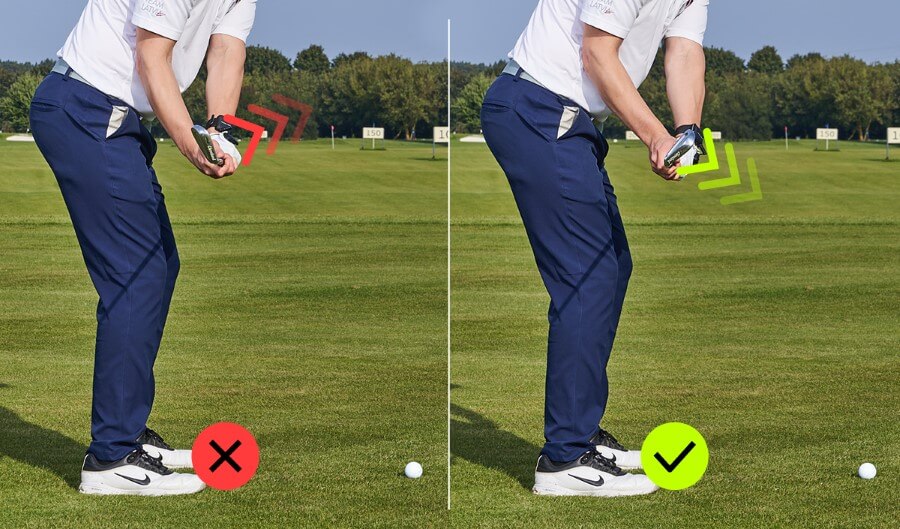
Trail Wrist Action in the Follow-Through
The trail wrist is the “mirror” of the lead wrist.
At setup, it starts slightly extended. To strike the ball properly, you need more extension at impact than you had at address. This keeps the hands in front of the clubhead and prevents the dreaded flip.
The challenge is that the faster you swing, the more the club wants to straighten that angle. To keep trail wrist extension, you often need to feel like you’re holding the bend longer than feels natural.
Elite players aren’t holding extension forever; they’re simply managing the timing so that flexion happens after the strike, not before.
Getting this sequence right creates more shaft lean, better compression, and a square face through impact.
Common Wrist Action Mistakes After Impact
Thinking that your wrists are “done” once the ball leaves the clubface is one of the biggest misconceptions in golf.
In reality, how your wrists behave in the first part of the follow-through has a direct impact on accuracy, trajectory, and consistency.
- Over-rotation of the forearms: If your arms roll too much after impact, the clubface will close or open unpredictably. This often shows up as hooks, slices, or an inconsistent starting line.
- Holding the clubface off: Some golfers try to “hold” the face square for too long to avoid hooks. This usually reduces power and produces weak, glancing contact.
- Early release: Letting the trail wrist flatten or flip before impact leads to scooped shots that launch high and right with little distance.
- Late release: On the other hand, holding wrist angles too long can create low hooks or blocky shots that start left and stay there.
- Arms collapsing through impact: If your body isn’t absorbing the forces of the swing, your wrists and arms will break down too soon, leading to inconsistent strikes.
The solution isn’t to freeze your wrists, but to train their natural sequence. Stable into impact, controlled through the strike, and then free to release afterward.
Drills to Improve Wrist Action in the Follow-Through
The best way to improve your follow-through wrist mechanics is to train the positions with clear checkpoints.
Here are four drills you can start with today:
Mirror Drill
Work on visualizing a square clubface and natural release using the mirror drill. Some driving ranges have a large mirror you could work with, but you can sometimes use your reflection in the window if that helps.
Mirror Drill – Step by Step:
- Address in front of a mirror.
- Rehearse into a follow-through where the glove logo points down the line, not skyward.
- Add half swings, matching the mirror feel with real motion.
Lead Wrist Extension Awareness Drill (HackMotion)
Trains the correct timing of when the lead wrist moves from flexion into extension.
Lead Wrist Extension Awareness Drill – Step by Step:
- Take slow half swings with HackMotion on your lead wrist.
- At impact, check that your wrist is still flatter or more flexed than at setup.
- Continue into the follow-through and confirm that extension increases after impact, not before.
- Start at slow speed, then build up to full swings while keeping the same sequence.
Dynamic Transition Drill (HackMotion)
Trains lead-wrist flexion into impact, and then it makes it easier for the follow-through to be in the perfect position.
Transition Drill in HackMotion
Master your sequencing and pivot to improve your swing efficiency and control.
HackMotion Transition Drill – Step by Step
- Take the club to the top, then make pump rehearsals to shaft-parallel in downswing (P6).
- Add flexion with the lead wrist in transition.
- Hit half shots; check HackMotion shows more flexion at impact than at address.
Hit Hard, Stop Quick (Trail Wrist)
Teaches you to retain trail-wrist extension to impact.
Hit Hard, Stop Quick (Trail Wrist) – Step by Step
- Swing with intent to stop just after contact.
- At impact, confirm more extension than at setup.
- Build speed gradually; extension should release after impact, not before.
Final Thoughts
Your follow-through isn’t just a finish pose—it’s proof of what your wrists did at and after impact. Stable wrists through the strike, followed by a natural release, give you straighter shots and cleaner contact.
By combining checkpoints with drills, especially with HackMotion’s real-time feedback, you’ll know exactly where your wrist action breaks down and how to fix it.
Train both lead and trail wrists, and your follow-through will become a weapon for consistency and control.