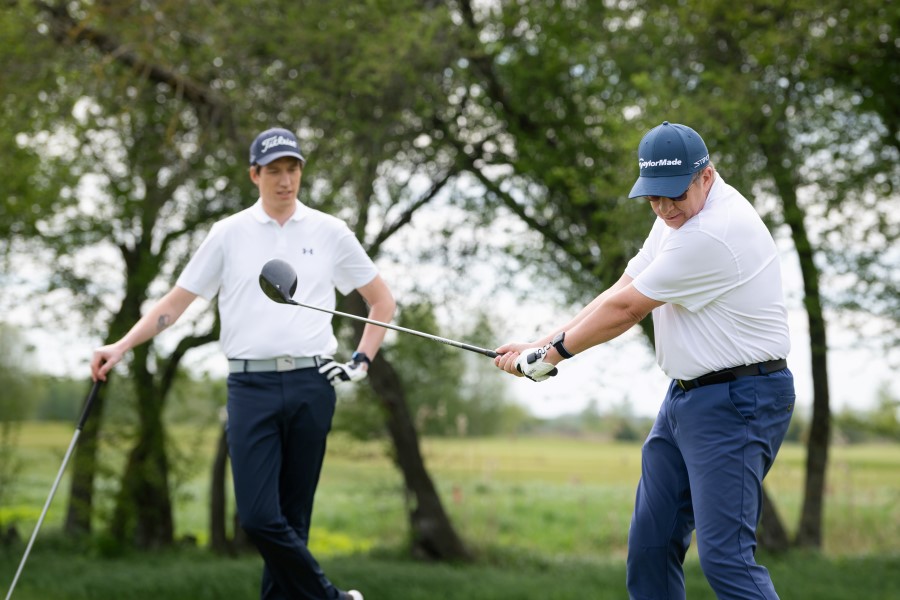
5 Most Common Mistakes Golfers Make at Impact and How to Fix Them
While we can discuss the grip, setup, and top of the backswing, the only thing that really matters in golf is the impact position.
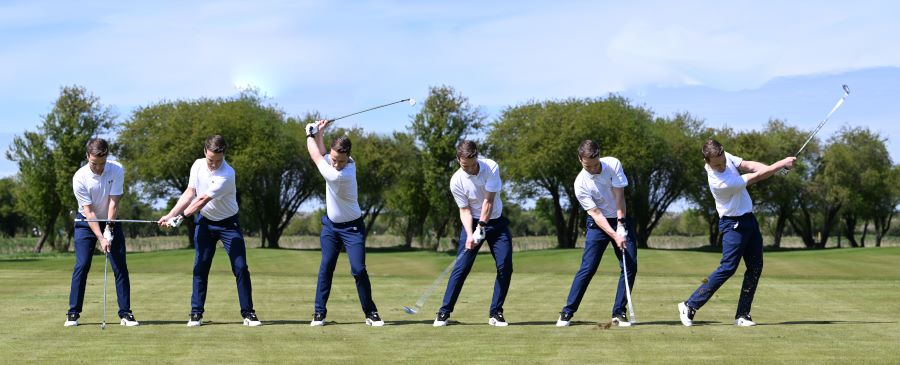
Everything you do in the backswing and downswing either sets you up for a perfect strike or for a poor shot.
There are five mistakes that amateur golfers tend to consistently make at impact. Here are those mistakes and the drills that can help you fix them.
Key Takeaways
If you don’t have time to work your way through these mistakes and their fixes, here are some of the most important things you can take with you.
- A flat-to-slightly-flexed lead wrist (and matching trail-wrist bend) is the common denominator of good impact.
- Flaws that appear earlier, such as poor takeaway, weak grip, and sway, show up at impact, so film your swing or use HackMotion to trace the real cause.
- Practicing impact first, then lengthening the swing (Chip, then half, three-quarter, and finally full swings) speeds up learning and locks in wrist patterns.
- When you can train a better position in the backswing and downswing, you can create more speed at impact.
Contents
Common Impact Mistakes in Golf and How to Fix Them
The most common mistakes golfers make at impact are flipping wrists and early extension.
Each of these can create a good shot here and there, but if you want to deliver a club reliably square through impact, you’ll have to fix these things.
Flipping or Scooping at Impact
If you flip or scoop at impact, the shaft overtakes the lead arm, the ball flight gets too high, and you notice divots that often occur before the golf ball.
Flipping or scooping can happen when the clubface is too open as it approaches the ball. It can also happen when golfers don’t understand what a perfect impact position looks like.
The lead wrist needs to be moving towards flexion through impact. This allows for a square clubface and a more solid strike.
To fix your flipping or scooping issues, the best drill to try is the Hit Hard Stop Quick Drill. You’ll find that it almost fixes the problem itself as long as you dedicate time to it.
Hit Hard – Stop Quick Drill – Step by Step:
- Take Small Swings: Make short, punch-style swings and focus on stopping the club just after impact.
- Feel the Shaft Lean: At the stop point, your hands should be ahead of the clubhead with forward shaft lean.
- Check Wrist Flexion: Use HackMotion to check your wrist data—your lead wrist should be more flexed after impact than it was at address.
- Reinforce Impact Feel: Repeat until you consistently stop the club in the right position with proper shaft lean and flexion.
Early Extension
The hips play an important role in your golf game. If you want to maximize power and improve rotation, the hips should be involved.
However, for some golfers, the hips thrust toward the ball, causing thin shots where you stand up on the way down.
This happens often because of an over the top movement or improper sequencing in the swing. You probably end up with thin shots and inconsistent contact.
Putting an alignment stick behind your tailbone and focusing on keeping pressure on it through impact will help you fix early extension.
It’s also important to remember that having a square clubface will make you less likely to extend early and stand up through impact.
Open Clubface at Impact
If your clubface is open at impact, you’ll hit pushes, slices, or weak fades that start to the right (for a right-handed golfer) and sometimes continue further right.
The open clubface at impact happens when the lead wrist stays extended on the downswing.
The motorcycle wrist action drill is the best way to fix the open clubface at impact, as demonstrated in the video below by Rob Cheney.
You’ll feel like you are revving a motorcycle with your lead wrist as you transition from backswing to downswing.
This is one of the most famous wrist action drills in golf, and you can work on it in real-time using the HackMotion app.
Motorcycle Drill – Master Wrist Flexion in the Downswing
Focus on continuously adding flexion until the club reaches parallel, then smoothly complete your swing.
Motorcycle Drill – Step by Step:
- Set Up: Address the ball as usual, staying relaxed in your arms and wrists.
- Downswing Flexion: As you begin your downswing, gradually add wrist flexion—feel like you’re revving a motorcycle. By the time the club reaches parallel to the ground (P6), your lead wrist should be flexed.
- Continue to Impact: Maintain that flexion through impact, then let the club release naturally after contact.
- Experiment with Speed: Start slowly to ingrain the movement. As you gain confidence, build up to full-speed swings while retaining proper wrist angles.
- Reps with and without a Ball: Practice hitting shots, but also rehearse the movement without striking the ball to build consistency.
- Refine Feel: Find your “just right” amount of flexion—too little or too much can lead to mishits. Use feedback tools like HackMotion to dial it in.
Swaying Instead of Rotating
If you do not pivot and rotate and instead sway through the golf ball, you’ll struggle to make clean and consistent contact.
Swaying instead of rotating is a problem that often causes fat or thin shots.
The issue for most players is that swaying feels powerful, but in reality, it does not help generate power or create crisp contact.
In the video below, Rob Cheney demonstrates a drill that uses an alignment stick to help train proper rotation through impact.
Hip Bump Then Rotate Drill – Step by Step:
- Set the Stick: Place an alignment stick through your belt loops (or hold a club across your hips).
- Backswing with Hip Turn: Make a backswing with roughly 45° of hip rotation—allow your knees to naturally change flex.
- Pause at the Top: Stop at the top with your hips still closed to the target.
- Shift Forward: Bump your hips toward the target—your belt buckle should move over your lead ankle—but don’t rotate just yet.
- Rotate Through: Once you’ve shifted forward, begin rotating your hips through to a full balanced finish.
- Start Slow: Rehearse this motion slowly at first to build coordination and awareness.
HackMotion Tip: Use HackMotion to confirm that your lead wrist stays flexed during the downswing, helping you maintain a strong, square clubface.
Early Casting
Casting the golf club technically happens before you get to impact but it’s a mistake that you can’t recover from when you get to the impact position.
The club throws from the top, the wrists unhinge early and you lose all lag.
Golfers that cast the club use their upper body too much without letting the lower body unwind and fire.
The HackMotion App has a casting drill to help you learn to maintain lag and rotate through the golf ball for more power and a cleaner strike.
Fix Your Casting with HackMotion
Train to fix casting by generating power with your core and lower body.
HackMotion Casting Drill – Step by Step:
- Slow Rehearsal: Make a full backswing. Start down by shifting weight left and clearing hips-arms stay soft.
- Maintain Trail-Wrist Bend: Watch HackMotion trail-wrist extension stay >50° as you start down.
- Let Arms Drop: Clubhead lags behind hands; no “throw.”
- Build Speed: Gradually swing faster, ensuring trail-wrist bend lasts until hands reach hip-high.
HackMotion Tip: If the extension line straightens too soon, you’re still casting.
More Drills to Fix Mistakes at Impact
If you still need a few more ways to train your impact position here are some great options to try.
Low Point Impact Drill
Another great option is the Low Point Impact Drill. This one will help you train the low point position in your swing.
If you can nail that low point position all you need to do is get your clubface square and you’ll be a much better ball striker.
Low Point Impact Drill – Step by Step:
- Mark a Line: Spray paint or draw a straight line on the grass. Place the ball directly on the line.
- Address the Ball: Set up with your clubhead positioned over the line, maintaining your normal stance.
- Weight Forward: Keep about 80% of your weight on your lead foot at impact to encourage a downward strike.
- Strike Past the Line: Focus on brushing the turf on or just past the line—never behind it.
- HackMotion Check (Optional): Use HackMotion to monitor your lead wrist at impact. A flat or flexed wrist is ideal. Excessive cupping suggests you’re hitting behind the line.
Impact Full-Swing Challenge
The Impact Full Swing Challenge is another HackMotion app drill. You can train your impact position in real time while getting feedback from HackMotion.
HackMotion Impact Full Swing Challenge
Perfect your full swing with this interactive drill on the HackMotion app. Focus on timing and generating power throughout your swing.
Impact Full-Swing Challenge – Step by Step:
- Set Up: Address the ball with a full-swing setup and your HackMotion sensor on.
- Swing & Hold: Hit a normal-speed shot, but freeze the club waist-high in the follow-through.
- Verify: Check your HackMotion data for green-zone wrist angles at the top and impact—lead wrist should be flexed, trail wrist extended, and the shaft leaning forward.
Head on the Wall Drill
If your swing has too many moving parts, the Head on the Wall drill is a great option to help settle things down.
One of the great things about this drill is that you can work on it at home without even hitting golf balls.
Head on the Wall Drill – Step by Step:
- Set Up a Wall Station: Rest your forehead lightly against a wall, door frame, or alignment stick positioned vertically.
- Get into Golf Posture: Take your normal stance, keeping your head in contact with the wall.
- Backswing with Tilt: Turn your shoulders while keeping head contact. Maintain spine angle throughout.
- Shift Pelvis Forward: On the downswing, move your belt buckle toward the target while keeping your head stable.
- Stop at Extension: Finish when arms are fully extended and parallel to the ground. Let your head come off the wall after that point.
- Slow Reps: Repeat slowly to train proper pivot, posture, and balance.
Final Thoughts
Mastering the impact position is what getting better at golf is all about. If you can do this you are well on your way to the handicap of your choice!
Using HackMotion to help you work on your impact position will ensure your lead wrist is in the correct spot, your hands are ahead of the clubhead and your tempo and sequencing are correct.
Mastering impact in golf will take time but it’s well worth the effort.