Golf Swing Positions Simplified: The P Classification System Explained
The golf swing is often referred to in pieces such as the takeaway, backswing, downswing, and impact. Some players even throw in the follow-through position. However, there is more to the swing than just these positions.
The P Classification system breaks the swing into 10 parts, making it much easier to zero in on certain areas of your game that may need some work.
Here’s a brief overview of the positions and what you should know about each one.
Golf Swing Positions (Key Takeaways)
Here is a brief look at the importance of the golf swing positions and how you can use them to help your golf game improve.
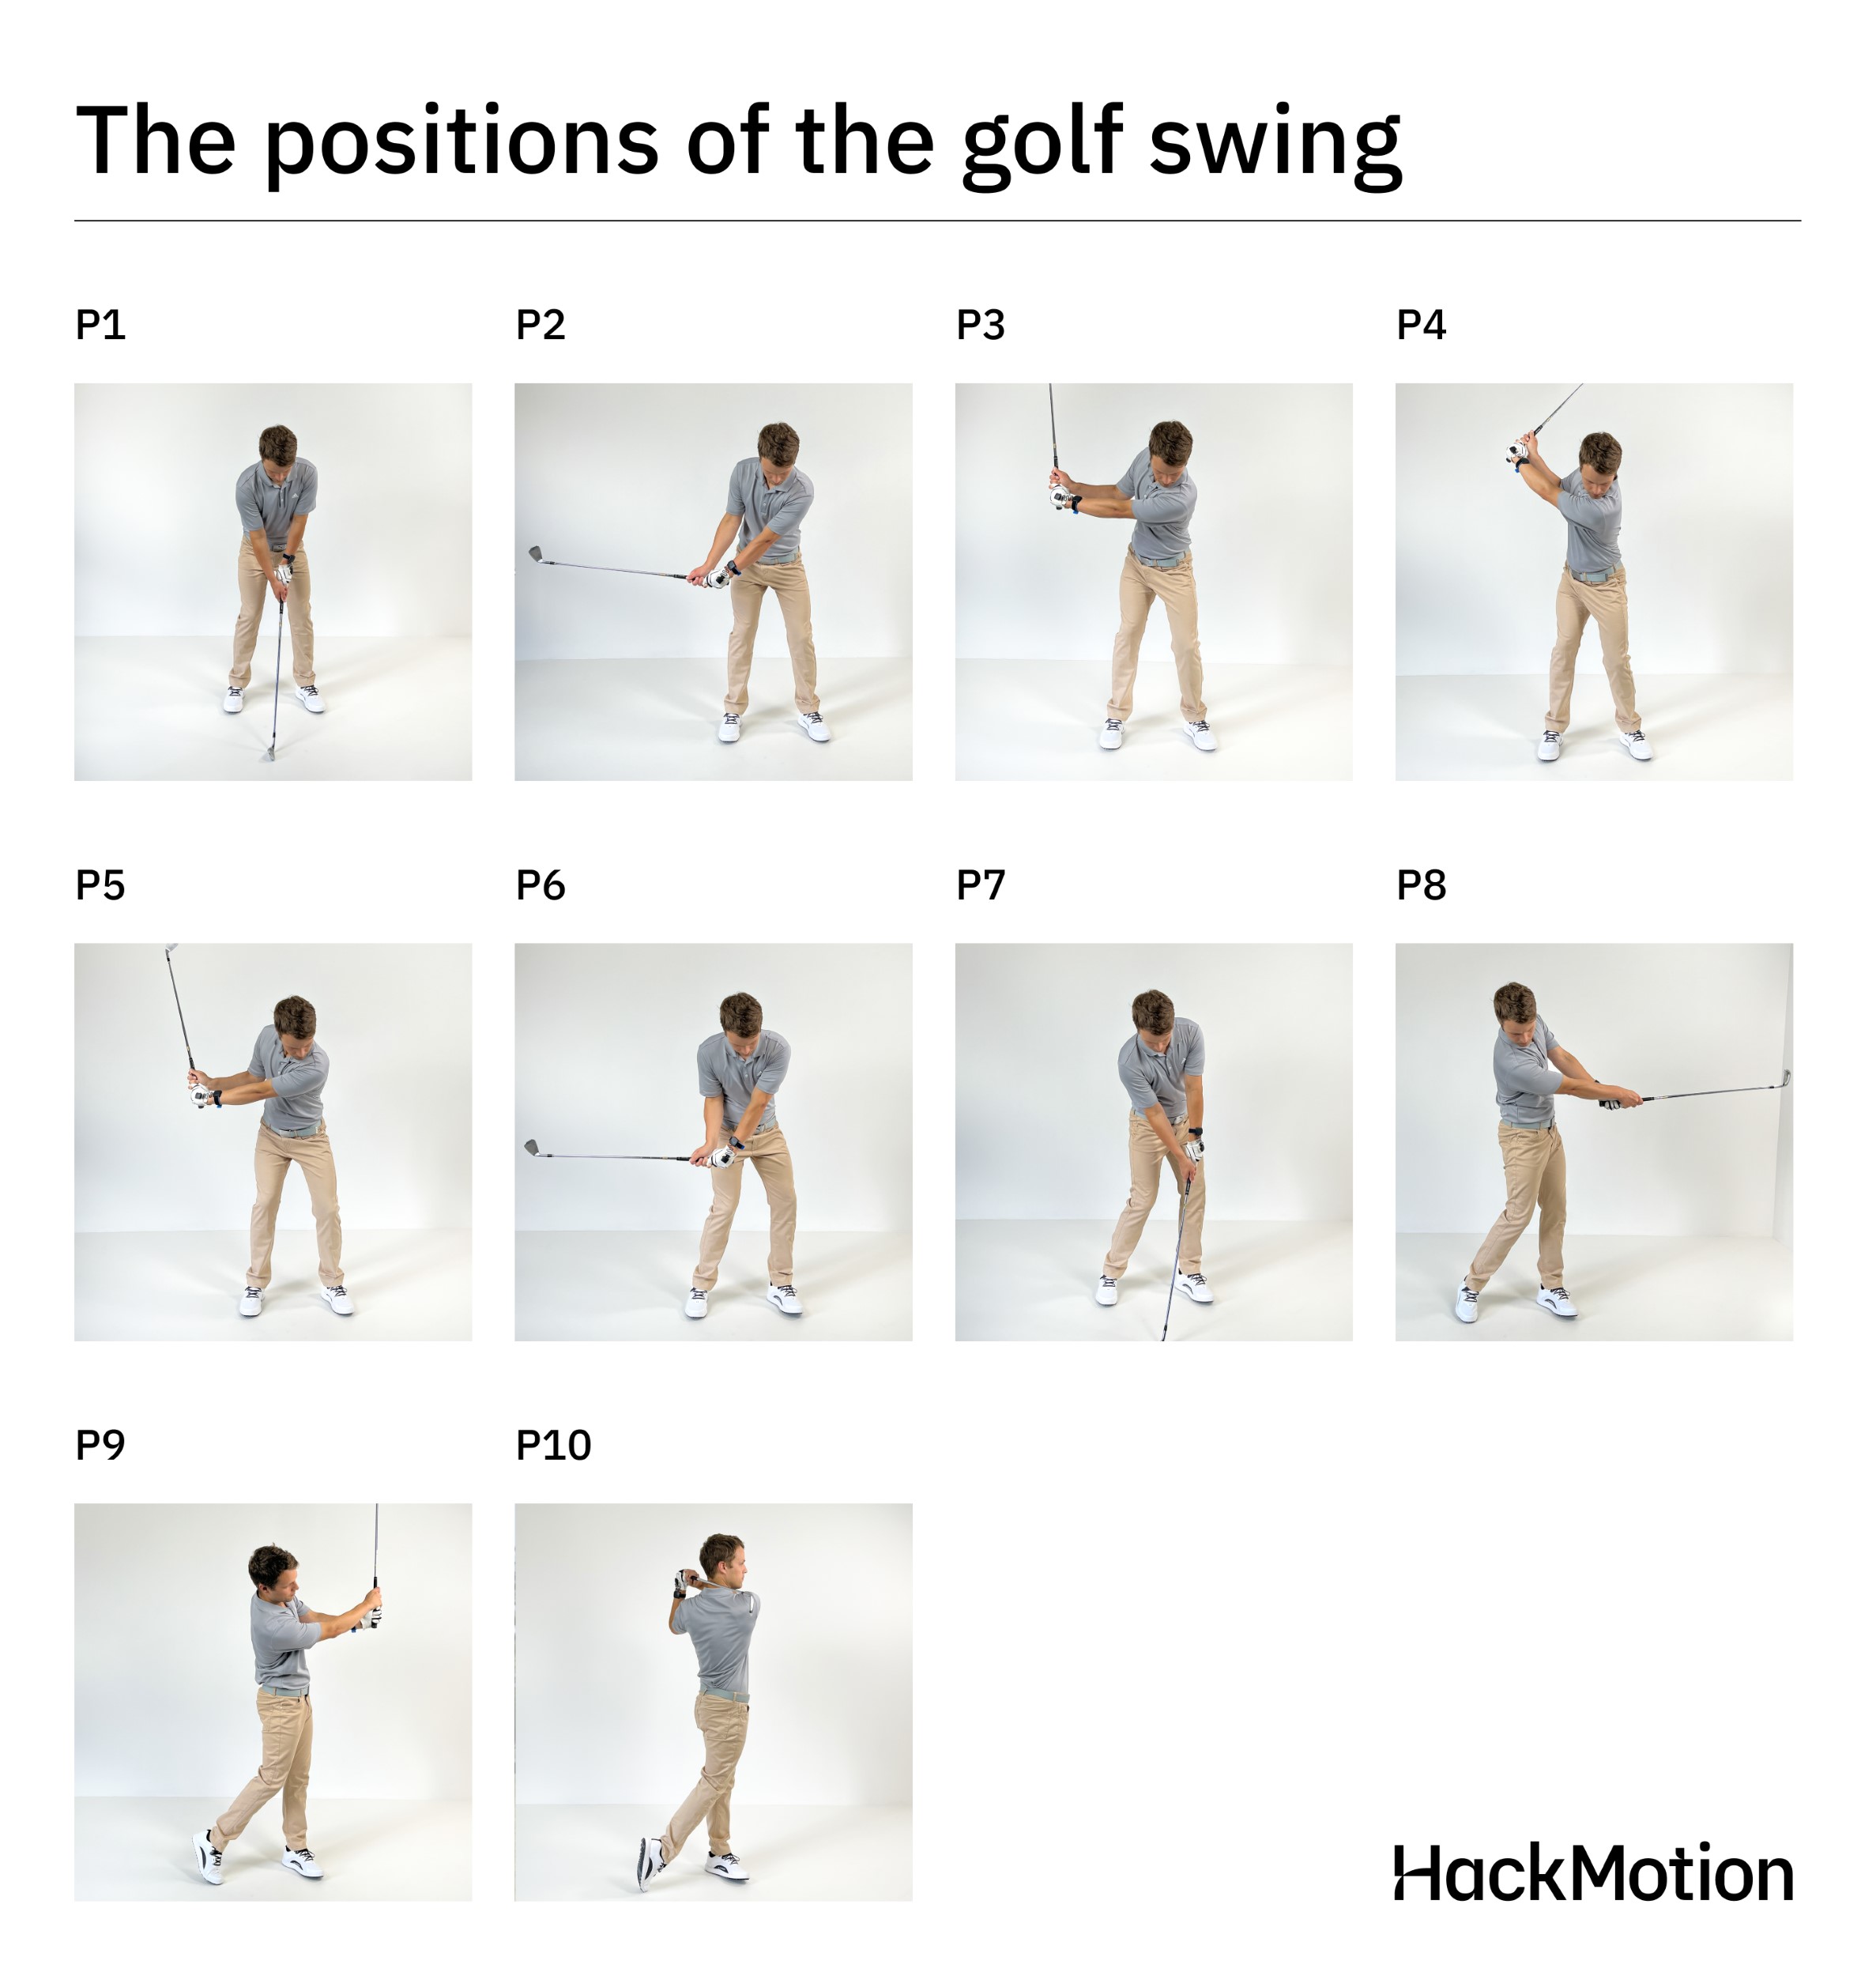
- The golf swing can be broken down into 10 positions using the P Classification System, from setup (P1) to the end of the swing (P10).
- P4 (Top of Backswing) and P7 (Impact) are the most critical checkpoints for face control and power.
- HackMotion shows elite players often maintain a flat or slightly bowed lead wrist at P4 and maintain flexion into impact for more consistent ball striking.
- Common swing faults like early extension, flipping, and casting often show up in P5 and P6.
- Using HackMotion during practice can help you monitor wrist angles and build a more repeatable swing.
Contents
Understanding Golf Swing Positions in the P Classification System
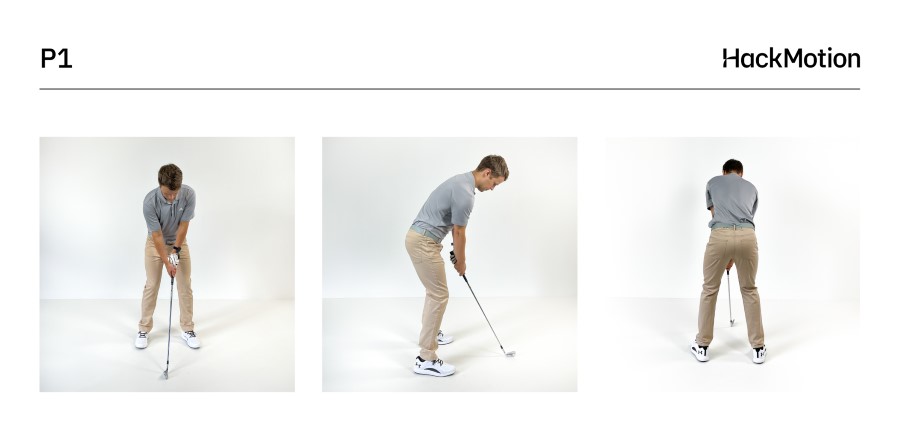
P1: Address
The address position is the starting position before the swing begins. This is the setup.
When you are in the proper setup, you’ll have to pay attention to grip alignment, posture, and even balancing your weight appropriately between your feet.
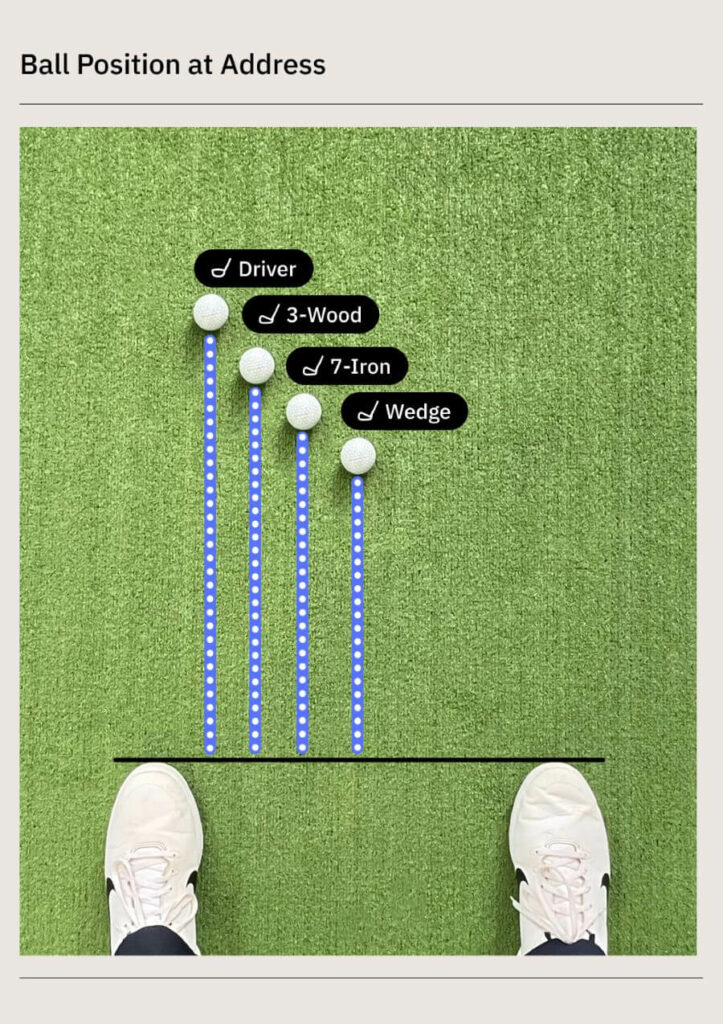
Here are a few key checkpoints to remember as you change clubs:
- Driver: Position the ball off your front heel. Your stance should be wider than shoulder-width, with more weight on your back foot. Tilt your spine slightly away from the target.
- Irons: Place the ball in the middle of your stance. Your feet should be shoulder-width apart, with weight evenly distributed. Ensure a straight spine and slightly more forward shaft lean.
- Wedges: Position the ball slightly back in your stance or just behind the middle. Your feet should be closer together, with more weight on your front foot. Maintain a more upright posture with a steeper shaft angle.
Keep in mind that the address position changes depending on which club you are using.
P2: Takeaway
The takeaway position starts as soon as you begin to take the club back and stops when the club is parallel to the ground.
During this part of the golf swing, it’s imperative to avoid excessive wrist movement.
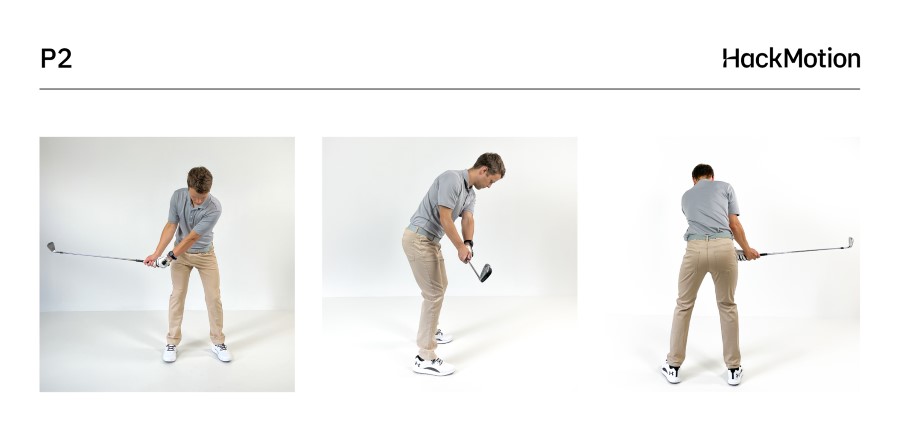
Some golfers focus on the triangle formed by their shoulders and arms and try to maintain it during the first part of the takeaway. During the takeaway, some weight may transfer back to the trail leg, but the lower body turn will also initiate during this time.
P3: Halfway Back
The P3 position is when the lead arm is parallel to the ground. At this point, your key focus is to keep the golf club on plane. In addition, most players will notice that this halfway back position is where the wrist starts to hinge naturally.
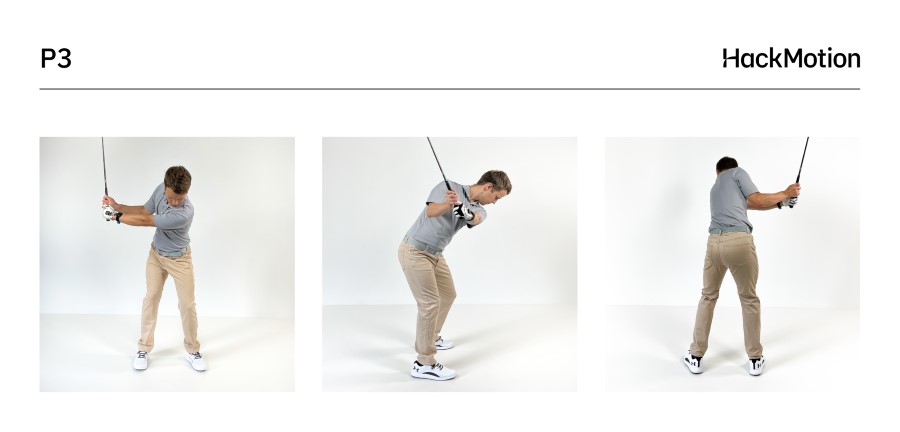
As the golf club is halfway back, pay close attention to the extension in the lead wrist. Many golfers start to add extension in the lead wrist here, and it catches up to them at the top of the backswing.
In addition, make sure that your body and arms are still working together. At the halfway point, you don’t want the lower body to stop rotating and the arms to take off independently.
Using a ball between the forearms is a good drill to stay connected.
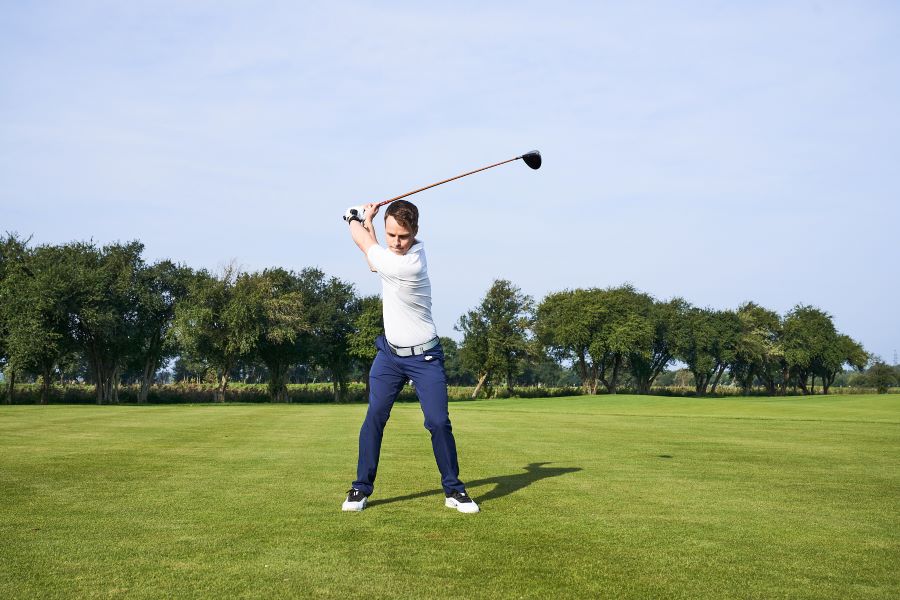
P4: Top of the Backswing
The top of the backswing is the highest point of the backswing. For most golfers, this position has the club in a position that is parallel to the ground.
At the top of the backswing, you’ll have a full shoulder turn, weight shift, and hip rotation. You want to make sure the club has not traveled too far. Overswinging only makes it harder to square the clubface at impact.
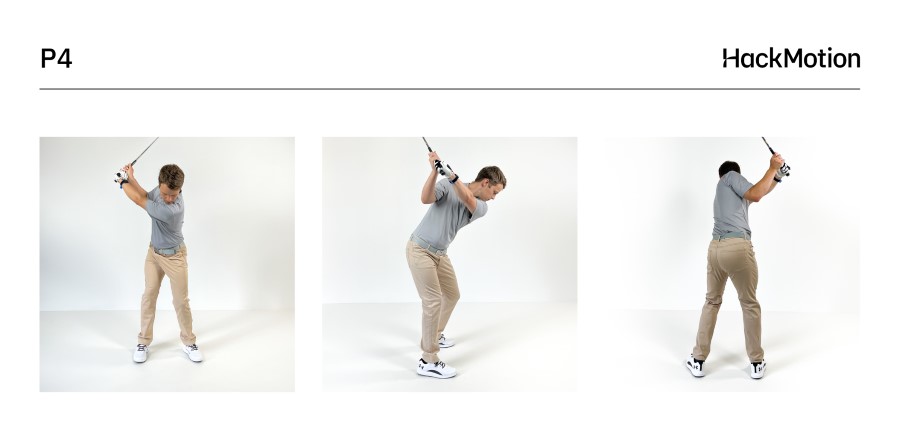
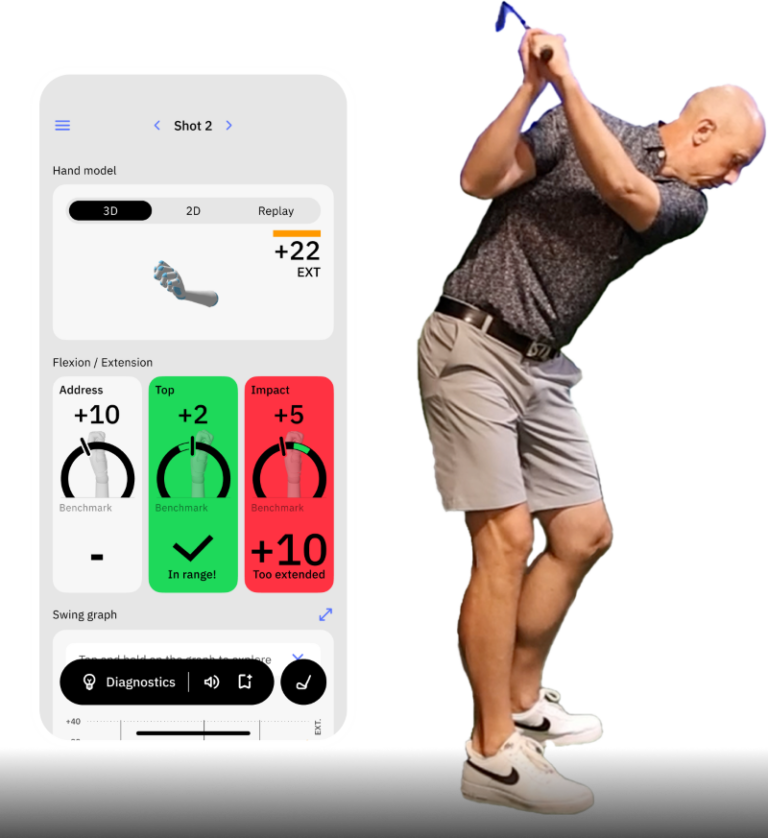
The wrist position at the top is also essential. HackMotion data has shown us that the best players in the game have a flat lead wrist or slightly bowed lead wrist at the top.
From this position, it becomes much easier to square the clubface at impact.
P5: Early Downswing
The early downswing is the transition from backswing to downswing. This P5 position lasts from the top of the backswing to where the club is parallel to the ground.
There are three keys to keep in mind during this early downswing. You’ll want to start with the lower body, keep the club on plane, and ensure the arms don’t push away from the body.
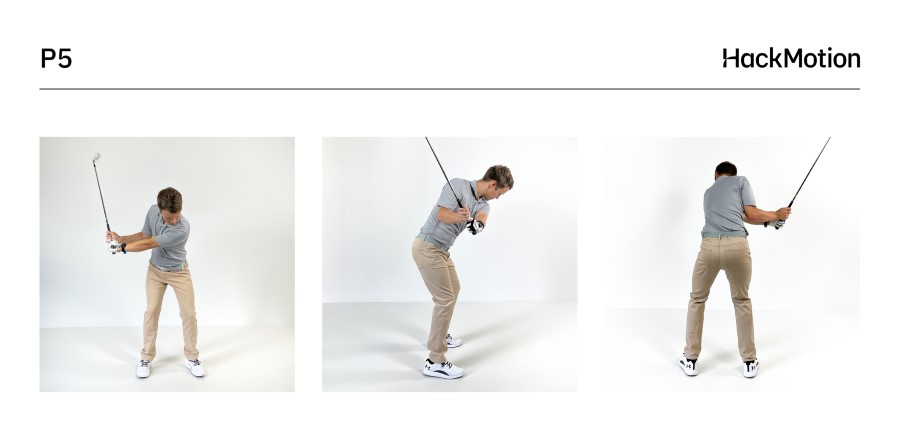
When it comes to wrist position in the early downswing, the best players in the game start to square the clubface and move to a more bowed position at impact.
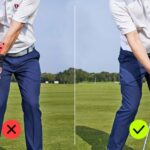
P6: Pre-Impact
The next position, P6, is where the club shaft is parallel to the ground before impact. Although this position may be very similar to P3, the halfway-back position, there are some key differences.
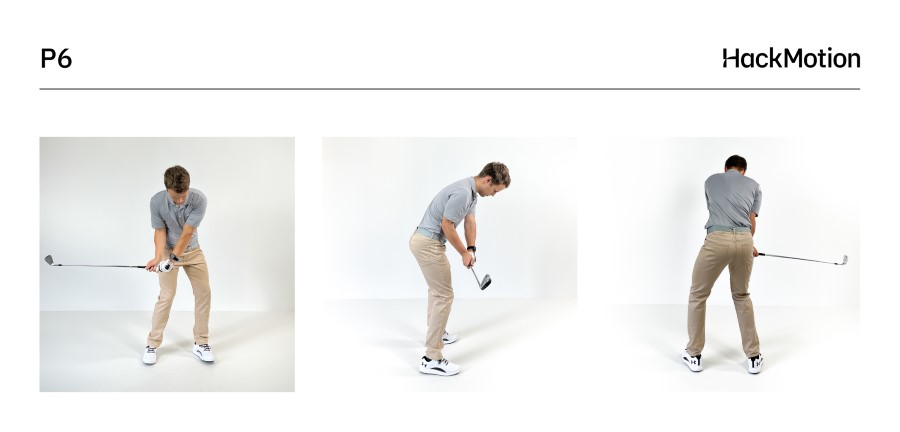
At P6, you’ll have more lag in the club and lots of stored energy.
At the P6 position, ensure the body is rotating towards the target. You’ll also want to check the clubface to see how open or closed it is. Many golfers struggle with an open clubface when they get close to this position, which creates issues with flipping at impact.
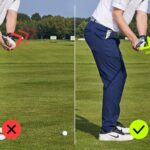
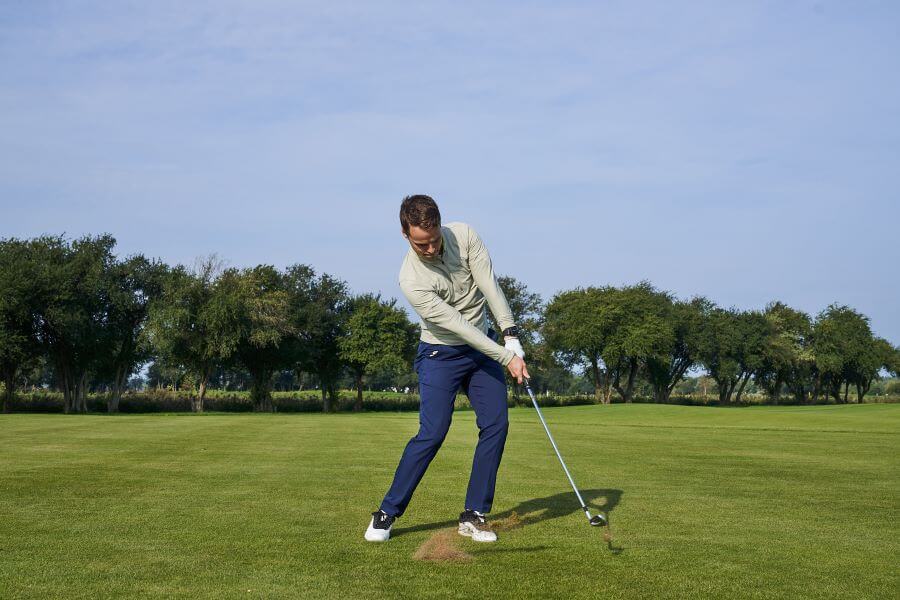
P7: Impact
The most important of the ten positions is impact, or P7, the moment of striking the golf ball.

At impact, you will want:
- A square clubface
- Forward shaft lean
- Weight shifted towards the front foot
To work on impact position, you should follow these checkpoints and practice impact drills.
P8: Release
By the time you reach P8, you are in the post-impact position.
At this point, the arms extend fully, and you can feel the trail arm rotating to a position where it is over the lead arm.
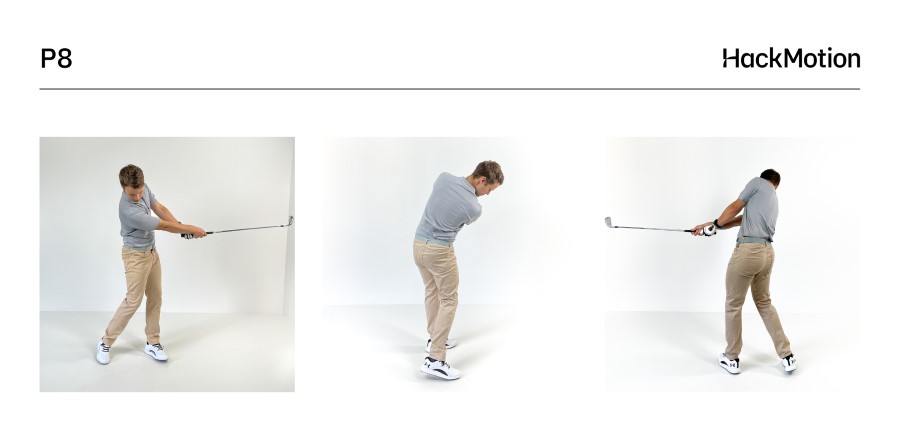
During the release, the wrists start to move towards a more extended position, and weight will be mostly transferred to the lead foot.
P9: Finish
P9 is essentially the opposite of P3. Here, the lead arm will be parallel to the ground but on the lead side of your body, not the trail side.
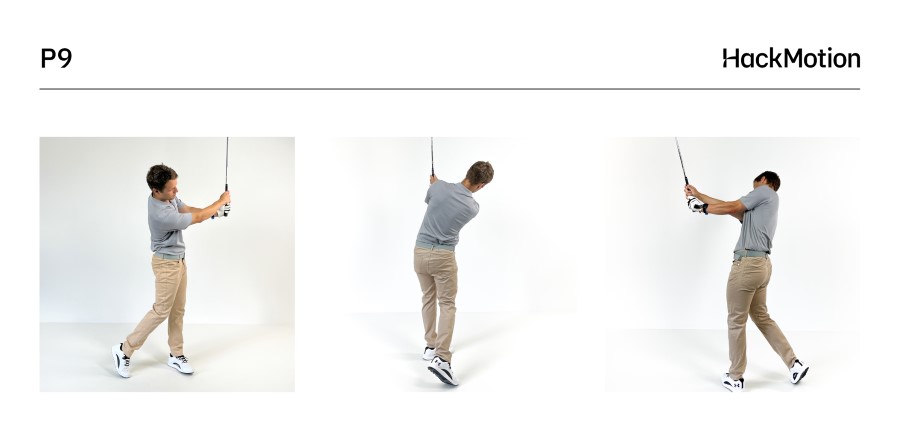
In this position, you’ll want to make sure you are balanced and controlled. Additionally, weight will continue to transfer to the lead foot. After this P9 position, the club continues to travel up and around your body.
You’ll also notice your lead elbow has folded and is close to the body. Keeping the elbow from flying should help with improved power at impact and consistency in the strike.
P10: End of Swing
The end of the golf swing is P10. When you get to P10, you’ll have a stable and balanced stance. Your body will face the target completely, and your hands will be all the way around and up by your lead ear.
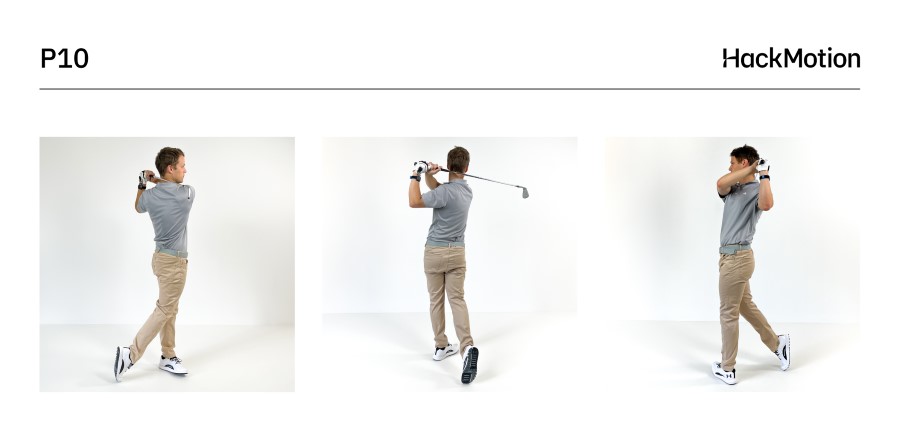
From this position, you should be able to watch your entire golf shot without feeling as though your weight needs to transfer back to the trail leg. In addition, your hands and wrists should be completely released and not still holding the clubface in position.
Golf Swing Position Summary Table
| Position | Name | Description |
|---|---|---|
| P1 | Address | Setup before the swing; focus on grip, ball position, posture |
| P2 | Takeaway | Club is parallel to ground; minimal wrist hinge, triangle still intact |
| P3 | Halfway Back | Lead arm parallel to ground; early wrist hinge begins |
| P4 | Top of Backswing | Club parallel at top; full shoulder turn and ideal wrist position |
| P5 | Early Downswing | Transition phase; lower body starts motion, wrists begin squaring |
| P6 | Pre-Impact | Shaft parallel pre-impact; key lag and body rotation checkpoint |
| P7 | Impact | Moment of truth; square face, weight forward, hands ahead of ball |
| P8 | Release | Full arm extension and trail wrist rotation through the ball |
| P9 | Finish | Lead arm parallel again post-impact; balanced and controlled |
| P10 | End of Swing | Final position; full rotation, weight forward, club over lead shoulder |
Drills to Train the Swing Positions
If you’re serious about building a repeatable golf swing, you need to understand what each position should feel like and then train it.
These drills from the HackMotion app are designed to help you lock in the correct wrist angles at each key phase of the swing.
Below are a few drills you can start working on—click here to explore all the built-in HackMotion drills and see them in action.
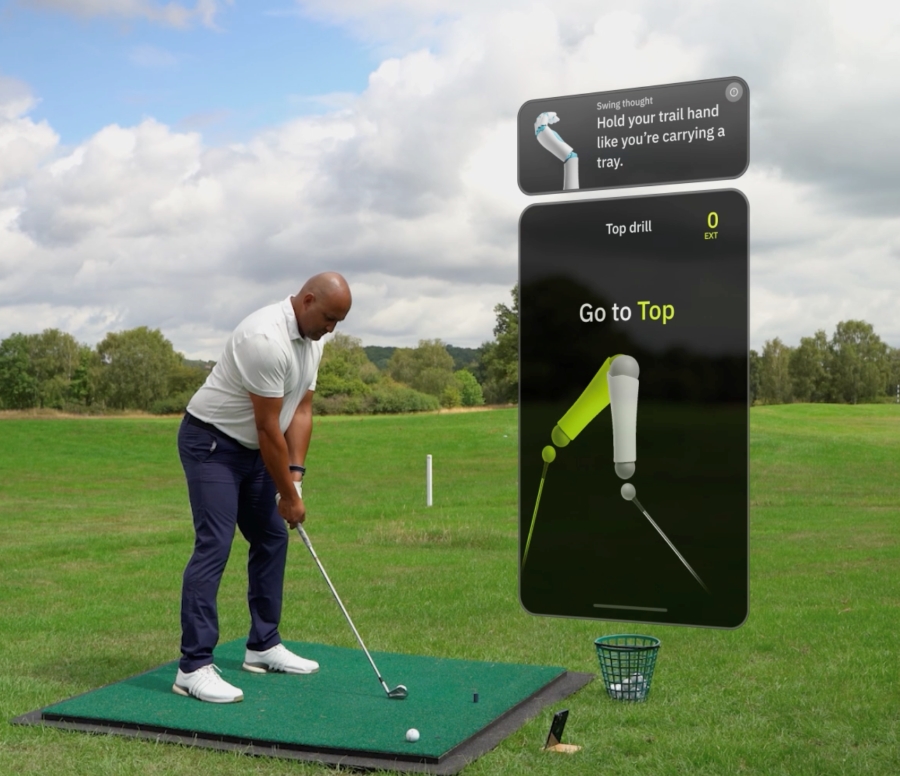
To Improve Your P4 (Top of Backswing): Use the Combined Top Drill
With this drill, you’ll swing to the top of your backswing at full speed and immediately check if you’ve reached the correct wrist position (typically flat or slightly bowed lead wrist).
This helps you blend a powerful top-of-backswing position that you can trust.
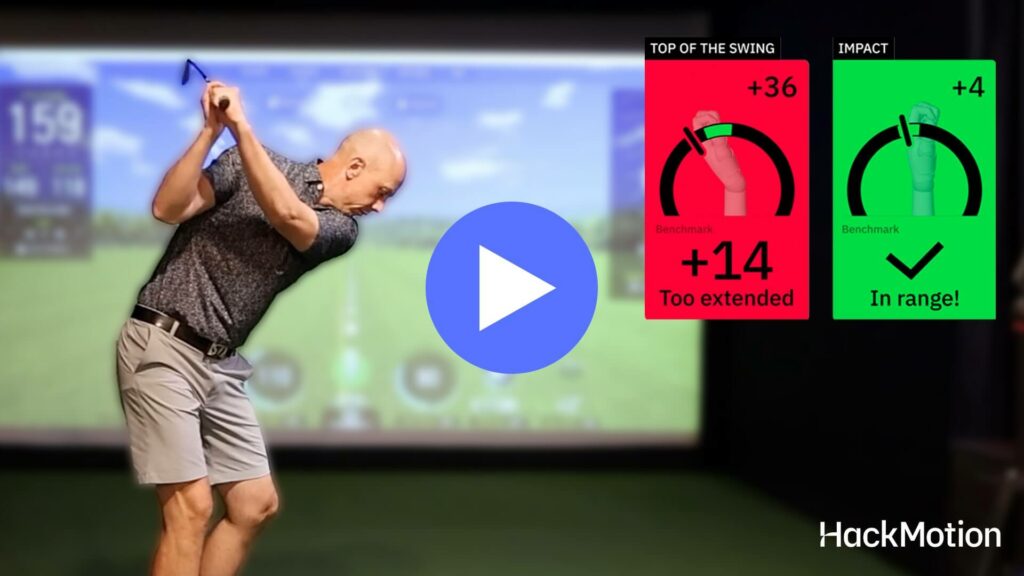
To Improve Your P7 (Impact): Use the Release Drill
This short-swing drill teaches you to maintain forward shaft lean and proper wrist flexion into the ball.
Start from club parallel (P6.5), and focus on crisp, compressed contact by checking your HackMotion wrist angles at impact.
To Improve Your Transition (P5–P6): Use the Transition Drill
This drill helps you sequence the downswing with proper body motion and wrist mechanics.
You’ll take a slightly longer swing than the Release Drill, focusing on moving from P4 to P7 while keeping the wrists in the green zone.
To Improve Wrist Control During the Downswing (P6): Use the Motorcycle Drill
This drill trains you to square the face early by adding flexion in the downswing. Start slow, rehearse the “motorcycle” wrist motion, and maintain wrist flexion through to impact. Ideal for stopping slices and open clubface issues.
To Improve Wrist Angles in the Takeaway (P2): Use the Inside Takeaway Drill
This drill helps you avoid rolling the club too far inside by keeping the clubhead outside your hands and the lead wrist stable at P2. Use HackMotion to verify wrist angles and keep the takeaway on-plane.
To Improve Your Casting Issues (P5–P6): Use the Casting Drill
Learn to delay the release and maintain trail wrist extension in the early downswing. The Casting Drill trains your hands and arms to trail the body’s motion, helping you store and release power efficiently.
Final Thoughts
Now that you have a better understanding of these 10 positions, you can break down where your swing issues lie.
Wear your HackMotion as you practice to ensure that you meet each of these checkpoints. Although not every golf swing is the same, the key positions in each part of the swing are universal if you want to play great golf.