How to Stop Pulling Wedge Shots: Causes, Fixes, and Drills That Work
Your wedges are your scoring clubs. When you pull a wedge from your bag, you should be confident that you’re in a position to gain a stroke or two on your competition. The most common way to ruin this great feeling is with a pull.
Wedges get pulled for many reasons, but there’s no doubt that pulling is a common mistake, right up there with the dreaded chunk shot.
Use these tips to diagnose why you pull the ball and then create a plan to stop it. Once you have that, you can use the tips below on the driving range to eliminate the pulls from your game once and for all.
Pulling Wedge Shots (Key Takeaways)
Review these key points before moving on to the detailed information to give yourself a heads-up on what to expect when trying to stop pulling your wedges.
- Wedge pulls are caused by multiple factors: closed face, leftward swing path, incorrect ball position, overactive wrists, etc.
- You can stop pulling wedges by making adjustments to your stance, backswing, and downswing.
- Utilize checkpoints to ensure every swing is optimized to give you the best chance at success.
- Creating a great relationship between the club path and the club face is key to limiting pulls with your wedges.
- Use the drills below that are specific to addressing pulls.
Contents
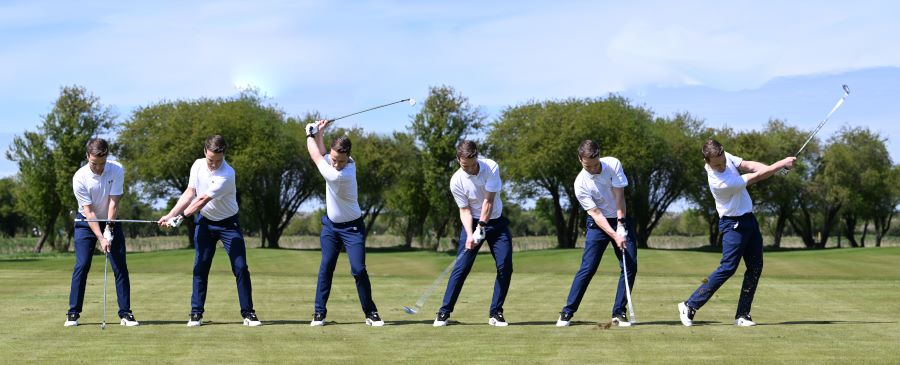
What is a Pulled Wedge and Why Does it Happen?
A pull is a shot that starts left of your target (for a right-handed golfer) and stays left with little to no curve.
Most pulled wedges are the result of a face that’s left of the target at impact, often combined with a path that’s also moving left.
Because wedges are meant to be precise, small errors in face control and alignment show up as big start-line misses.
Causes of Wedge Pulls
- Closed clubface at impact can come from a strong grip, excessive lead-wrist flexion (bowing) late in the downswing, or a trail-wrist “throw” that releases the face too quickly.
- Leftward swing path or swinging over-the-top is when the upper body dominates the downswing, or an alignment that’s unintentionally closed can push the path left.
- Body stall is when the hips and chest stop turning through impact, and the hands pass the body to shut the face.
- Forward ball position or excessive shaft lean can cause the face to point left and move the low point too far forward.
- Having a lie angle that is too upright at impact can cause the face plane to tilt left.
- Grabbing the turf, especially in the rough, can slow the heel of your wedge and close the face.
Pro Tips to Stop Pulling Wedge Shots
- Start the ball on line: Make the face point where you want the ball to start, then match the path. Build your routine around setting the clubface at the intermediate target first, then aligning your body to it.
- Simplify the motion: Use more 3-quarter and stock knockdown wedges. A shorter arm swing with steady rotation reduces timing and face closure. Smooth tempo, firm structure in the arms, and a balanced finish create a neutral swing path, fewer pulls, and better wedge shots.
- Keep the chest moving: Feel your belt buckle and sternum continue through impact. If your body keeps turning, the hands won’t flip and close the face.
- Calibrate ball position and shaft lean: For most stock wedges, play the ball just forward of center with the handle slightly ahead, but not so much that you de-loft and close the face. If you tend to pull, move the ball half a ball back and feel slightly less forward press.
- Neutralize the grip: Turn down a very strong lead-hand grip. A neutral lead hand (logo on the glove angled roughly toward your right ear) and a trailing hand that sits more on the side rather than underneath help you deliver a stable face.
Checkpoints: Setup, Alignment, Wrist, and Club Face
- Narrow to shoulder width or slightly less; pressure 55–60% on lead foot.
- Alignment with feet, knees, hips, and shoulders should be parallel to the target line; don’t let shoulders aim left.
- Set the club face at your intermediate target first; do not “fix” it after you set your feet.
- Your ball position should be just forward of center for standard shots; move it back half a ball if needed for better contact or to add a few extra yards of wedge distance.
- Your grip should have a neutral lead hand, while the trail hand is more on the side than under. Light to medium grip pressure.
- Lead wrist: Relatively flat through impact; avoid adding late bow (flexion) that slams the face shut.
- Trail wrist: Keep it bent back through impact; don’t “dump” the angle early. Use Hackmotion to monitor your trail and lead wrist movement and get instant feedback on your progress.
See how wrist mechanics shape every part of your swing. Read Wrist Action in the Golf Swing for expert insights, and watch Wrists and Hands in Slow Motion to visualize the motion frame by frame.
Fixing The Path and Clubface Relationship
Your goal is for the face to be very close to the path, ideally a fraction more open than the path, so the ball starts on line and stays there.
With wedges, a path that’s a touch left with a face slightly right of that path creates a gentle, dependable fade that holds the target.
Keeping your arms in front of your chest is a great way to keep the club path from getting too far inside/left. If the arms outrun or get trapped behind you, you’ll stall and close the face. A connected feel keeps the arms and torso turning together and stabilizes face-to-path.
Always try to control the closure rate with rotation, not hands or forearms. Let your torso rotation square the club and avoid rolling the forearms too much, even though they have to. The more you rely on hand rolling, the more you’ll pull.
Drills to Prevent Pulling Wedge Shots
Now that the theory of why and how pulled wedge shots occur, it’s time to head to the range and address the issue head-on.
These wedge drills will prevent pulls and are designed specifically to improve club path, point of impact, and club face control. Take your time and focus to take wedge pulls out of your game altogether.
Headcover Swing Path Drill
This is the best drill to improve your swing path with any club, but especially your wedges. The visual and physical presence of the head covers serves as direct muscle trainer, helping you learn quickly.
Using this drill just once a week for a month or two will yield noticeable and positive results.
- Video Timestamp: 2:27 – 5:23
Headcover Swing Path Drill – Step by Step
- Place a small headcover six inches in front of your ball just inside your target line.
- Place a second small headcover six inches behind your ball, just outside your target line.
- Take a few practice swings first to get your body and swing used to swinging between the headcovers without touching them.
- Start hitting balls and move the head covers as needed based on your divots.
- As you improve, you can move the headcovers closer to the ball to add an extra challenge.
Impact Zone Club Face Control Drill
Get your contact and club face dialed in with this Hackmotion-specific drill. The app will help you address the ball at impact, control your wrists, and follow through in a way that is successful and repeatable.
Following the app and using the data provided will help you understand why you pull a wedge and prevent pulls in the future.
- Video Timestamp: 5:53 – 9:52
Impact Zone Club Face Control Drill – Step by Step
- Take your usual address position, but adjust your wrists, shaft lean, and weight transfer to mimic your impact position.
- Take your normal swing from here.
- Use the Hackmotion app to ensure your swing positions are correct. By starting in your impact position, you tell your body where you want to end up, which makes it easier to replicate.
Tempo Line Up Drill
Even with the best mechanics and all the practice in the world, without a smooth tempo, the potential for pulled wedges is present.
Working on tempo helps more than one aspect of your game, so don’t be afraid to use this drill with other irons as well, not just your wedges.
Controlling tempo also makes it easier to control your wedge distance. There are many types of wedge shots between 50 and 75 yards, so by keeping your tempo the same and only making minor swing adjustments, you’ll increase your chances of getting the exact shot you need, when you need it.
- Video Timestamp: 4:52 – 6:10
Tempo Line Up Drill – Step by Step
- Line up five balls in your normal wedge ball position, but have them working away from you.
- Start the drill by hitting the first ball and then, without stopping your momentum, take a small step forward to make another swing and hit the second ball.
- Continue this pattern until you’ve hit the fifth ball without stopping.
- Take note of where your divots are pointing and ensure nothing is too far left to avoid pulls.
Final Thoughts
Your wedges should be your scoring clubs. You should not worry about pulling them; instead, focus on getting the ball close to the flag. With the tips above, the HackMotion system, and the drills provided, you can start seeing improvement and eliminate pulls very quickly.